Minecraft Map Art Guide: Pixel Art With Maps Explained
Every filled map in Minecraft is a 128x128 grid of pixels, and each pixel copies the color of the block beneath it. Learn to control those colors and you can paint anything from a company logo to a full landscape on your wall. The trick nobody tells you: raising a block one level makes its color brighter, which turns 61 flat colors into 183.
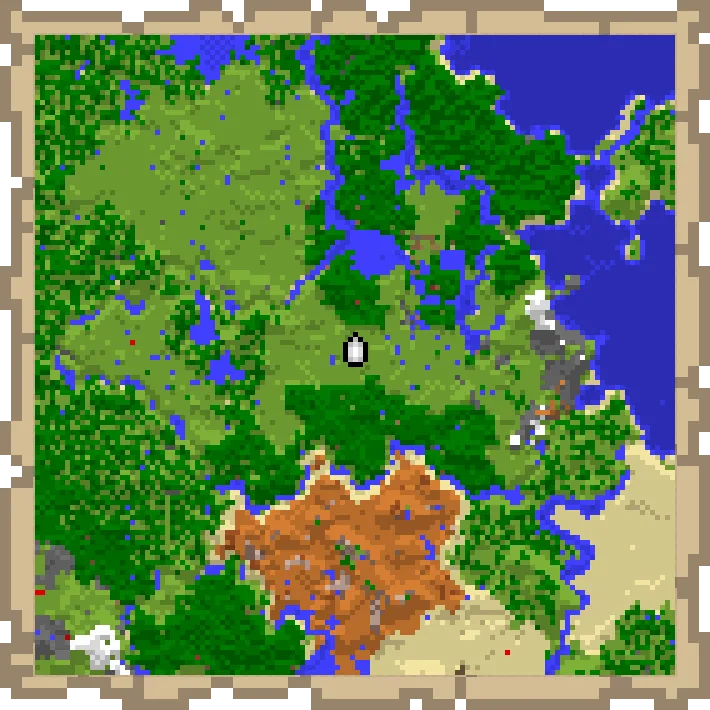
Every filled map you have ever held in Minecraft is lying to you a little. It looks like a photo of the terrain, but it is actually a 128 by 128 grid of colored pixels, and each pixel is just copying the color of a single block below it. Once that clicks, a map stops being a navigation tool and becomes a canvas. Lay the right blocks in the right pattern, hold up a fresh map, and you have painted a logo, a portrait, or a full landscape that you can hang on a wall and never touch again.
Map art is one of the oldest creative subcultures in the game, and the mechanics behind it are genuinely clever. The single most important fact — the one that separates a muddy blob from a crisp image — is that raising a block one level above its northern neighbor makes its map color brighter, and dropping it one level makes it darker. That height trick roughly triples your usable palette. Here is how the whole system works, from the color list to the cartography-table lock that freezes your finished piece forever.
How map colors actually work
A map does not store block types. It stores colors, one per pixel, sampled from the world. In Java Edition the pixel takes the color of the most common opaque block in the little area it covers; at the default zoom that area is exactly one block, so it is a straight one-to-one copy. In Bedrock Edition the pixel just copies the single top-most opaque block. Either way, at the smallest scale, one block equals one pixel, and that is the scale every map artist builds at.
The map only samples the surface — the highest solid block in each column, seen from directly above. That is why map art is a flat, top-down build: you are laying out a floor, not a wall, and the map photographs it from the sky.
The base colors and four shades
Under the hood, current Java Edition defines 62 base map colors. Each base color has four brightness shades, produced by multiplying the RGB value by one of four factors: 180, 220, 255, and 135 (out of 255). So the brightest shade leaves the color untouched at 255, the two mid shades knock it down to 220 and 180, and there is a fourth, darkest 135 shade that normal survival building basically cannot reach.
That math gives you 62 times 4, or roughly 248 theoretical colors — but you never get all of them in survival, which brings us to the important part.
The staircase trick
Here is the mechanic that runs the entire hobby. The shade a block shows on the map is not fixed; it depends on the height of that block relative to the block directly to its north. The rule is simple:
- Block placed higher than its northern neighbor: brighter shade.
- Block at the same height as its northern neighbor: medium shade.
- Block placed lower than its northern neighbor: darker shade.
So if you build your art as a series of gentle north-facing stairs, every block can be pushed into a lighter or darker version of its base color just by nudging its elevation. That is why serious map art is built on a slope: a flat floor only ever gives you the single medium shade of each color, but a staircase gives you three. It turns roughly 61 flat colors into 183 usable shades, and shading is what makes gradients, curves, and depth possible instead of flat blocky poster colors.
Flat maps versus staircased maps
You have two ways to build, and the choice is a real trade-off.
A flat map is exactly what it sounds like: every block sits on one level surface. You get precisely one shade — the medium 220 shade — of each color, which caps you at about 61 usable colors. Flat art is dramatically easier to build (no height management, no support scaffolding, you can lay it out like tiling a floor) and it is the right call for logos, text, simple icons, and pixel-perfect recreations of low-color images. Beginners should start flat, full stop.
A staircased map places blocks at rising and falling elevations to unlock the brighter and darker shades, reaching that 183-color palette. This is how people make map art that looks like a photograph — smooth skies, shaded faces, realistic terrain. The cost is enormous: you are managing height column by column, you cannot use certain blocks that fall or need support, and a single misplaced elevation throws off every block north-to-south of it. It is a weekend project, not an afternoon one.
My honest take: build your first three or four pieces flat to learn palette and pixel-reading, then graduate to staircasing when you want gradients. Trying to staircase a complex image as your first map art is how people burn out and quit.
Picking a palette that reads
Not every block is a good map-art block. The blocks builders reach for over and over are wool, concrete, and terracotta, for three reasons: they come in a wide spread of distinct map colors, they are cheap and stackable, and they hold their position (no gravity, no support needed) so they work in both flat and staircased builds. Concrete in particular gives you the punchiest, most saturated colors in the game, which is why it is the default for bold, poster-style art.
A few palette rules that save you grief:
- Avoid gravity blocks (sand, gravel, concrete powder) in staircased builds — they fall and wreck your heights. Concrete, the hardened version, is fine; the powder is not.
- Some map colors are duplicated across many blocks, so pick the cheapest block that produces the color you need. There is no reason to use a rare block when a wool of the same map color exists.
- Water and certain plants produce colors you cannot get any other way, but they behave awkwardly in a build, so use them deliberately.
- Plan the palette before you place a single block. The building tips guide covers block-palette thinking that carries straight over to map art.
If you are sourcing large quantities of wool, a shepherd villager and a dye setup make it renewable — the villager trading guide has the trades. And banners deserve a mention: you can add a banner marker to a map by using a banner on the terrain, which the banner guide explains, though that is labeling rather than pixel art.
Scaling up from one map to a mosaic
One map is 128 by 128 pixels, and at the default zoom that covers a square area 128 blocks on a side — eight chunks — which means a full single-map artwork uses 16,384 blocks, or 256 stacks, not counting any staircase support underneath. That is already a big build.
When one map is not enough, you tile them into a mosaic. You build multiple 128-block sections edge to edge, draw a separate map for each, and hang them in a grid of item frames so they read as one enormous image. A 3 by 3 mosaic is nine maps and over a hundred and forty thousand blocks — this is the point where people bring in planning tools.
That is worth flagging honestly: nobody hand-plans a nine-map portrait by counting pixels in their head. Map-art creators use external converters that take an image, map it to the available block palette, and spit out a block-by-block schematic, then use schematic mods to project it in-world. The best Minecraft mods roundup covers the schematic tools people lean on; using them is standard practice and not considered cheating in the map-art community, since the artistry is in the palette choices and the build, not the arithmetic.
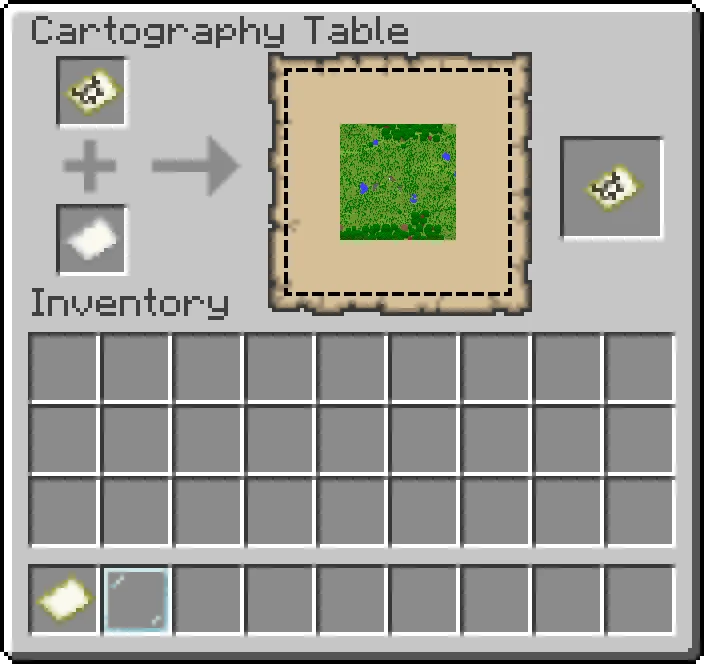
The map's scale is set in a cartography table, which zooms a map out from level 0 (1 block per pixel) up to level 4 (256 blocks per pixel). For art you almost always stay at scale 0 — the one-block-per-pixel default — because any zoom out throws away the per-block detail that makes the image sharp. Zooming is for exploration maps, which the maps and cartography guide covers in full.
Locking your art so it never changes
Here is a mistake that ruins finished pieces: a normal filled map keeps updating. Walk back over your art after the seasons change, or after a mob tramples a block, and the map redraws with the damage. Worse, an unlocked map that you clone will keep updating on every copy.
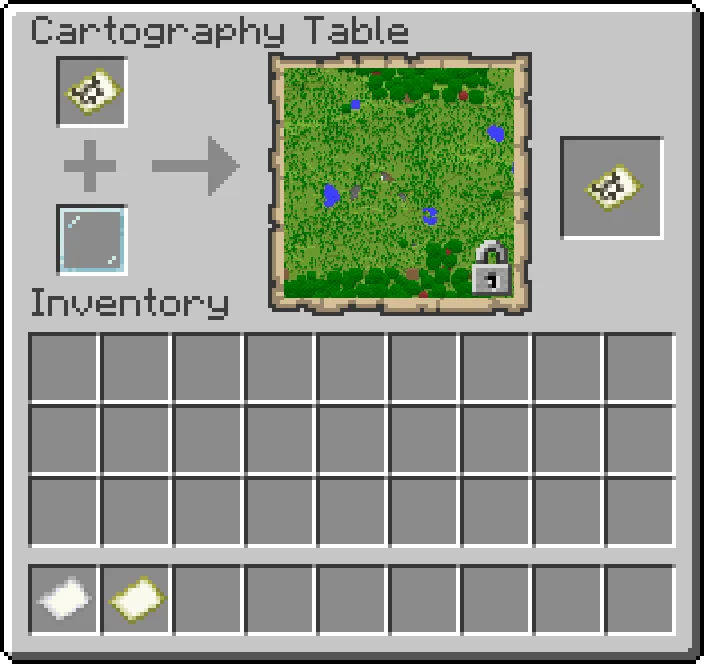
The fix is to lock the map in a cartography table using a glass pane. Put the filled map in one slot and a glass pane in the other, take the result, and that map is now frozen permanently — its image will never change again no matter what happens to the blocks underneath. This is a non-negotiable final step for any map art you want to keep or trade.
The workflow that matters: build the art, walk the whole area holding a fresh empty map at scale 0 so it draws the full image, then immediately lock that map with a glass pane. After that you can clone it freely — clones of a locked map are also locked — and you can even mine the original blocks back for materials, because the locked image is baked in.
Building it without losing your mind
A few field-tested habits keep a map-art project from collapsing halfway:
- Build on the ground, north-to-south. Because shading reads against the northern neighbor, orient your whole build so north is "into" the image and start your staircase from there.
- Do a small test strip first. Lay a 16-wide row of your intended palette, draw a map over it, and confirm the colors read the way you expect before committing 16,000 blocks.
- Work in a Creative copy first if you can. Prototyping the layout in Creative and then rebuilding in survival — or just building the whole thing in Creative for a decorative server — saves enormous time.
- Frame it right. Maps in item frames tile edge to edge with no gap, so a grid of frames displays a mosaic seamlessly. Use plain item frames for the standard look; a glow item frame makes the map faintly luminous so it stays visible in a dim hall.
Map art is a patience game more than a skill game — the mechanics are simple once you understand the height-shading rule, and the rest is careful block placement. Start with a flat logo, lock it, hang it, and you will immediately want to build something ten times bigger. That is exactly how everyone falls down this particular rabbit hole.
Quick Action Checklist
- Remember a map is a 128 by 128 pixel grid, one block per pixel at scale 0.
- Build flat for your first pieces — about 61 colors, far easier, great for logos and text.
- Use the staircase trick to unlock brighter and darker shades (183 colors total): a block higher than its northern neighbor is brighter, lower is darker.
- Default to wool, concrete, and terracotta; concrete gives the most saturated colors.
- Avoid gravity blocks (sand, gravel, concrete powder) in staircased builds.
- Keep the map at scale 0 in the cartography table — never zoom out for art.
- Walk the full area with a fresh empty map to draw the image, then lock it with a glass pane in a cartography table so it can never change.
- Clone the locked map freely — copies stay locked — and reclaim the blocks if you want.
- Tile multiple maps in item frames for a seamless mosaic; use glow item frames for dim rooms.
- For anything complex, use an image-to-schematic converter and a schematic mod to plan the build — standard practice in the map-art community.
Frequently Asked Questions
How does map art work in Minecraft?
What blocks are best for Minecraft map art?
What is the difference between flat and staircase map art?
How do you lock a map in Minecraft so it stops changing?
How many blocks does a single map artwork need?
Keep Reading
Related Guides
Minecraft Banner Guide: Loom Patterns, Shields, and Maps
Banners are the deepest decoration system in Minecraft, and most players never get past a plain colored flag. Here is how the loom, all ten pattern items, shield decoration, and map markers actually work.
Minecraft Spear Guide: Jab, Charge Damage, and Lunge
A diamond spear jabs for 4 damage. Held low on an elytra at rocket speed, the same spear charges for 37. The spear's charge takes its damage from how fast you are moving, and the weapon breaks several rules the rest of Minecraft combat runs on. Here are the real numbers for every tier, both attacks, and Lunge.
Minecraft Game Rules List: Every Rule and Its New Name
Java 1.21.11 renamed every game rule: keepInventory is keep_inventory now, doDaylightCycle is advance_time, and doFireTick is gone entirely. Here is the full list for Java 26.3 and Bedrock 26.50, with old names, new IDs, menu labels, defaults, and the 19 Bedrock rules that switch your achievements off for good.
Minecraft Dye Guide: How to Make All 16 Colors
Fifteen of Minecraft's sixteen dyes come from a single item you can pick up, smelt or squid. Purple is the only one that does not exist outside a crafting grid, and green is the only one with no crafting recipe at all. Here is the whole palette in one table, which biome hands you eight of the sixteen for free, and the sheep trick that turns one dye into unlimited coloured wool.
Minecraft Survival Guide for Beginners: Your First Days
You have about ten minutes of daylight before the sun sets and the world tries to kill you. Here is exactly what to do with them — punch a tree, build a tool chain, and get a roof over your head before the zombies arrive.
Best Minecraft Enchantments, Ranked — The Ones Worth Your XP
Mending is the enchantment that ends the grind — gear that repairs itself forever. Everything else is a fight over your XP and anvil uses. Here is what actually earns a slot, ranked, with the real max levels.