PUBG Solo Strategy Guide: How to Survive and Win Alone
Solo PUBG is a different game from squads, and most people play it like they still have backup. There's no revive, no trade, no one to call the flank — every fight you take is a coin flip you don't have to flip. Here's how to actually survive solo queue and solos-vs-squads.
You knock the first guy, peek to confirm the kill, and a second player you never heard drops you from the ridge while you were busy admiring your own work. No one revives you. No one trades the kill. You watch the kill feed scroll for the next eight minutes. That's solo PUBG, and if you keep playing it like squads with three empty slots, that loop never ends.
Solo is a fundamentally different game. In squads, a knock is information and a setback you can recover from — a teammate trades the kill, picks you up, and you fight on. In solos there is no DBNO safety net unless you're holding a rare self-revive item: when your HP hits zero, you are eliminated, full stop. That single rule changes everything about how you should play. Every fight you take is a coin flip with no insurance, so the entire game becomes about not flipping coins you don't have to. This guide covers the solo-specific stuff: the survival-first mindset, third-party discipline, when fighting is actually correct, positioning, and the brutal math of being one gun against many.
Solo is not squads with fewer people
The reason good squad players often tank in solos is that squad habits are actively wrong here. In a squad, aggression is rewarded because your teammates cover the downside — you push, you get knocked, somebody trades and revives, and the play still nets positive. Strip out the teammates and that same push is just you dying with nobody to clean up.
PUBG's DBNO ("Down But Not Out") revive system is squad-only by design — it exists to let teammates pick each other up. In a normal solo match there is no down state and no revive; you go from alive to dead. The lone exception is the Self AED, a world-loot self-revive that, in solos, puts you into a down state instead of eliminating you outright — but it's currently a Taego-only item, so on every other map a lost fight is a lost game. Plan around the rule, not the exception.
So the mental reframe is simple: in squads you play to win fights. In solos you play to be alive, and fights are a tool you use only when they move you toward that. The player who internalizes that beats better aimers constantly.
The survival-first mindset
Survival-first does not mean passive. It means you treat your own life as the scarcest resource on the map, because it literally is — you only have one and there's no respawn. Every decision runs through one filter: does this keep me alive and improve my position, or does it just feed my ego?
- Your default is "no." Hear a fight two compounds over? The squad instinct is to push and get free kills off the loser. The solo instinct is to ask whether you can get there, win, and leave before a fourth party shows up. Usually the answer is no, so you let them kill each other and you take the position they vacated.
- You don't have to win the lobby's fights. A solo win is one player standing, and that player is rarely the one with the most kills. It's the one who took the right three fights and skipped the other fifteen.
- Damage you don't take is damage you don't have to heal. With no medic, every heal is your own time and your own kit. Avoiding a fight you'd win at 40 HP is often better than winning it, because that 40 HP is your whole buffer for the rest of the game.
This is the part people resist because it feels boring. It isn't — it's the difference between a kill or two and a 1080p screenshot of your own Chicken Dinner.
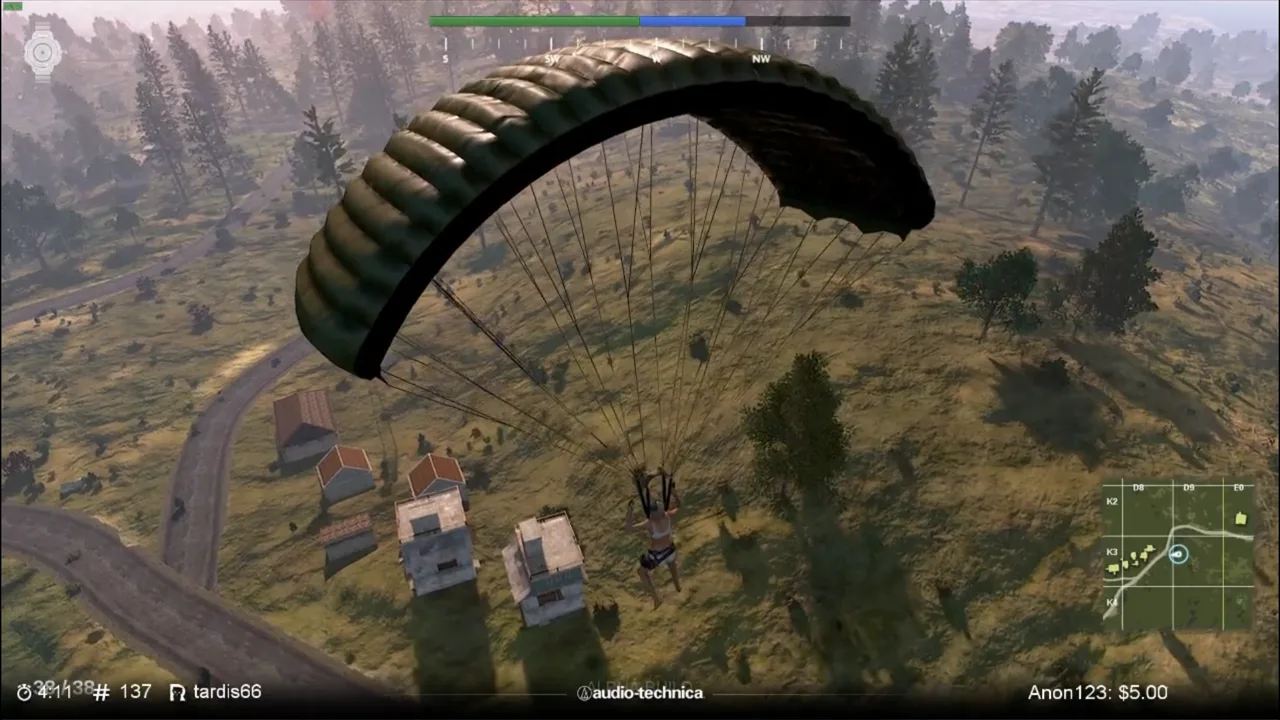
The drop: pick living over loot
Your drop choice in solos should weight survival much more heavily than it does in squads. A squad can contest a hot drop because four guns landing tight can win the floor scramble. A solo who lands hot is just one of eight people punching each other for the same pistol, and seven of those coin flips end your game in the first ninety seconds.
The survival-first drop:
- Edge of a named town, not the center. You still get real loot, but you land with a wall at your back and only one or two directions to watch instead of being surrounded in the town square. Towns like Zharki or the smaller Erangel clusters give you a near-guaranteed full kit without the eight-way scrum.
- Loot fast, then leave. The longer you sit in a populated area kitting up, the more time you give the player who landed two roofs over to find you. Grab a gun, armor, heals, and ammo, then move to the edge and start thinking about the circle.
- Watch the plane line and other chutes. In solos you have no spotter calling drops, so it's on you to clock how many parachutes peeled off near your spot. Two chutes on your town means two coin flips you didn't ask for — adjust your landing while you still can.
If you want the per-spot breakdown of where to actually land, our best PUBG landing spots guide ranks the drops by loot and contest level.
When to take a fight (and when to walk)
The skill ceiling in solos is mostly fight selection. Taking a fight is correct when the math is in your favor; the rest of the time, walking is the strong play. Take the fight when:
- You have the first shot and the angle. You spotted them, they haven't spotted you, and you can open from cover. An unanswered first burst is the closest thing to a free kill solo offers. (Our PUBG peeking guide covers how to take that angle without giving it back.)
- They're already weak or reloading. Someone who just won a fight is low and out of position. That's a clean third-party — but only if you're confident no one else is watching the same body.
- The circle forces it. Late game, when the playzone has squeezed everyone into a field, you can't always avoid contact. Then you fight on your terms: from the best cover, with full HP and boost.
Walk away when you'd be peeking blind into an unknown, when you're low and the kill won't gain you a better position, or when winning the fight just paints you as the loud, low, exposed third-party target for everyone within earshot. Gunfire is a beacon in solos — every shot you fire tells the rest of the lobby exactly where the free kill is.
Third-party discipline: the skill that wins solos
The third party — a fresh player rolling up on two people who just fought — is the single biggest killer in solo PUBG, and it cuts both ways. Master both sides and you've basically solved the mode.
Don't get third-partied. After any fight you win, assume someone heard it and is already moving on you. So:
- Reposition immediately. Don't loot the body in the open. Pull back to cover first, watch the most likely approach, then loot if it's safe. The kill is worth nothing if it's the reason you die ten seconds later.
- Loot fast and break line of sight. Grab the essentials — ammo, heals, a better attachment — and get moving. A full inventory sweep over a fresh body in the open is how solos die.
- Heal in cover, not in the kill zone. The post-fight heal is the most dangerous animation in the game. Do it behind a wall, watching the door.
Be the third party, carefully. When you hear two players fighting, you have a choice. The disciplined solo move is usually to wait, not charge. Let them finish, let the winner expose himself looting, and only then decide if the position is clean enough to punish. The undisciplined move — sprinting into a live 1v1 hoping to clean up — just makes it a 1v2 where both of them now know you're there.
Positioning: cover, angles, and the edge
With no teammate to hold a second angle, positioning is your entire defense. You can't crossfire alone, so you have to make geometry do the work two players would.
- Always have a wall at your back. You can only watch one direction well at a time, so eliminate the directions you can't watch. A corner, a rock, the edge of a building — anything that turns 360 degrees of threat into 90.
- Hold the edge of the circle, not the dead center. Center circle means threats from every side. Edge means the blue covers your back and you only watch inward. Just rotate in early enough that you're not the one sprinting through the open while everyone else is already set.
- Use cover that lets you leave. Don't pick a position you can't retreat from. The best solo spots have an exit — a tree line, a ditch, a back door — so when you get third-partied (you will), you can break contact instead of getting pinned.
- Pre-aim the angle that matters. Since you're watching one direction, watch it properly: scope or hipfire trained on the spot someone would appear, not staring at the floor. Our PUBG movement and positioning guide digs deeper into holding ground without a team.
The 1vX reality
Sooner or later you're outnumbered — a duo or a full squad in a solos-vs-squads lobby, or two solos who happened to converge on you. The math is ugly: every additional enemy isn't just more bullets, it's more angles you can't watch and more guns that can punish the moment you commit to one of them.
You don't beat a 1vX by out-aiming everyone at once. You beat it by refusing to fight them at once:
- Make it a series of 1v1s. Use cover and corners so only one enemy can see you at a time. A doorway, a tight corridor, the back of a compound — any chokepoint that forces them to come at you single file turns an unwinnable 1v3 into three winnable 1v1s.
- Reposition between kills. The instant you down one, move. The others are pushing the spot they last saw you. If you're still there, you lose; if you've slid to a new angle, you get another isolated 1v1.
- Bait the rush. Outnumbered players love to overextend on a knock. Pop a shot, fall back to a corner, and let the eager one round it alone. (Our dedicated PUBG clutch and 1vX guide breaks down the late-game clutch math in more detail.)
- Sometimes the right play is to disengage. A 1v4 in the open with no cover is not a clutch, it's a stat correction. If the geometry isn't there, break contact and live. There's no shame in third-placing a fight you couldn't win.
Solos-vs-squads (FPP): the hardest mode
Some queues and events drop solo players into lobbies with full squads — one of you against teams of up to four. FPP makes it harder still, because first-person strips the third-person camera trick of peeking over cover without exposing your head. This is the purest test of everything above.
The adjustments:
- Avoidance goes way up. Against squads, almost every fight you can skip, you should. A squad trades and revives; you don't. The only fights worth taking are ones where you can isolate and punish a single squad member without the other three in play.
- Punish the split squad. Squads that loot loosely or rotate strung-out hand you isolated 1v1s — that's your whole game plan. Watch for the straggler, take him clean, and vanish before his teammates converge.
- FPP rewards sound and pre-aim. With no free third-person peeks, audio is your radar and pre-aiming your corners is your edge. Footsteps and gunfire tell you where the squads are; play around that information instead of walking into it. Our PUBG audio guide covers reading sound when you're the only set of ears on your team.
- Mode availability varies by patch and region. Whether solos-vs-squads is queueable, and exactly how FPP solo regions are split, shifts with updates and where you play — check the current playlist rather than assuming it matches last season.
Quick Action Checklist
- Treat your life as the scarcest resource — there's no revive in normal solos
- Default to "no" on fights; only take ones where the math favors you
- Drop the edge of a town, loot fast, then leave before others find you
- After every fight, reposition and heal in cover — assume a third party heard it
- When you're the potential third party, wait for the winner to expose himself
- Always keep a wall at your back and an exit you can use
- Hold the edge of the circle, not the dead center
- In a 1vX, use chokepoints to force isolated 1v1s and reposition between kills
- Against squads (especially FPP), skip nearly every fight and only punish the lone straggler
Frequently Asked Questions
Keep Reading
Related Guides
PUBG Duo Strategy Guide: How to Actually Win as Two
Duos is the least forgiving mode in PUBG and nobody talks about it that way. You get exactly one teammate, which means you get exactly one mistake — and the moment you're both down, the game ends instantly with no third player to clean up. Here's how two players actually win.
PUBG Flanking Guide: Win Fights From the Side
A head-on peek war between two decent players is a coin flip. A flank removes the coin. Here's how to get to an enemy's blind side, when it's worth it, and how to close the kill without handing it back.
PUBG Third-Party Guide: Avoid and Exploit the Third
The player who wins a PUBG fight and the player who wins the lobby are usually different people — and the difference is the third party. Here's how to stop getting jumped mid-fight and how to be the one doing the jumping.
PUBG Clutch Guide: How to Win 1vX Fights
Your whole squad is down and three enemies are pushing. Most players panic-spray and feed. The clutch player slows down, isolates one enemy at a time, and walks out with the chicken dinner. Here's how to actually win when you're outnumbered.

Best Weapons in PUBG: Tier List
Every PUBG tier list is out of date the moment a balance patch drops. So here's the list, ranked by role, plus the durable logic to re-tier any gun yourself when the next patch shakes things up.
Best PUBG Loadouts & Attachments
A naked M416 and a fully kitted M416 are basically two different guns. Here's how to build the strongest two-gun loadouts in PUBG and the attachment priority that turns loot into recoil control.