Super Mario 64 Lethal Lava Land Guide: All 7 Stars
Lethal Lava Land is a course where the signature enemy deals literally zero damage and the floor does all the killing. Every star hangs on one decision you make in the first ten seconds — left or right at each of two path splits — and the two volcano stars send you in opposite directions from the same landing spot. Here is every mission, the full 133-coin breakdown, and the behaviours the game never explains.
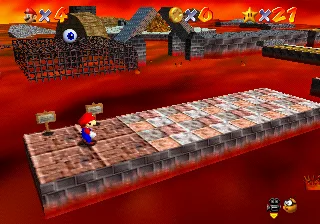
The most dangerous enemy in Lethal Lava Land deals no damage at all. Ukikipedia's object data for the Bully lists damage 0 and damage without a cap 0 — the same zero the health guide records for Chuckyas and Heave Hos. No Bully on those platforms can take a wedge off your meter by touching you. The floor takes three.
That is the whole design of the course in one line. Lethal Lava Land is not a combat stage, it is a positioning stage with combat-shaped props, and almost every death here is a navigation error the game let you call a fight.
Here is every star, which of the two path splits each one needs, where all 133 coins sit, and the handful of behaviours the game documents nowhere.
Where Lethal Lava Land sits, and how you get in
Lethal Lava Land is the seventh course of Super Mario 64. The painting is in the Mushroom Castle basement — the one with the menacing red fireball on it, which the Japanese course name implies is a Podoboo. Getting to the basement at all means clearing Bowser in the Dark World first, per the Super Mario Wiki's unlock note for the course.
Two orientation details that pay off later. This is the course whose music Shifting Sand Land borrows, so if you have already done the desert, the theme will be familiar before the layout is. And the hallway to the left of this painting is where the Shifting Sand Land wall entrance hides — the same basement room does double duty. MIPS the rabbit runs around down here too; the secret stars guide covers him.
Inside, you land on a platform with a couple of signs and a gap in front of you. The first move in the course is a long jump, not a walk. From the platform you reach, the level splits — and then splits again. Learn those two forks and the course stops being confusing.
Every star, and which way you turn at the two splits
Six named missions plus the 100-coin star, seven in total, matching Ukikipedia's star count for the course. The routing column is the Super Mario Wiki's own directions from the start of the level.
| # | Mission | Route from the start | What it actually asks |
|---|---|---|---|
| 1 | Boil the Big Bully | Left at both splits | Shove one Big Bully off the back-centre platform |
| 2 | Bully the Bullies | Left, then right | Three Bullies first, then a Big Bully drops in |
| 3 | 8-Coin Puzzle with 15 Pieces | Left at both splits | Eight Red Coins on the sliding Bowser puzzle |
| 4 | Red-Hot Log Rolling | Left, then right | Cross the grating, ride the rolling log |
| 5 | Hot-Foot-It into the Volcano | Into the volcano, then forward | Climb the wall ledges past the hidden smasher |
| 6 | Elevator Tour in the Volcano | Into the volcano, then turn around | Ride two lifts, climb two poles |
| — | 100 coins | Anywhere | 133 available, so 33 of margin |
The pattern to hold onto: stars 1 and 3 are the left-left half of the course, stars 2 and 4 are the left-right half, and stars 5 and 6 both live inside the volcano. That is three destinations, not six, which is why a 120-star route can clear this course quickly.
Nintendo's Super Mario 64 Player's Guide named the unnamed 100-coin star "Surf the Lava", which is the kind of title that tells you what the run actually feels like. The 100-coin stars guide ranks every course by margin.
Bullies do zero damage and walk where you look
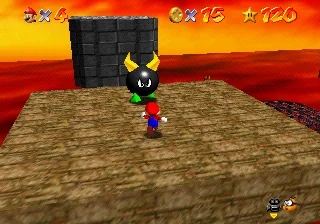
Bullies are the black spheres with green feet and yellow horns, and they are introduced here. Per the Super Mario Wiki, they charge at Mario to knock him into the lava, and Mario takes no damage from being hit by one. Ukikipedia's object entry confirms it with numbers: damage 0, damage hatless 0.
The behaviour that matters is on the same wiki page: Bullies always move in the direction that Mario is facing. They are not chasing your position, they are following your heading. Turn your back to the lava and you are steering a Bully at yourself. Face along the platform's long axis and the same Bully walks harmlessly past.
You can knock one out five ways — punch, kick, ground pound, dive, or slide kick. When it sinks, it tosses a single coin back onto the platform, which is why ten of this course's coins are enemy drops rather than pickups.
The actual damage source is underneath all of it. Lava contact makes Mario jump into the air and costs three wedges of health, or four and a half if he has lost his cap — the same value the health guide's table lists for a lava touch. Two more things here do take health off you: the hidden smasher inside the volcano, which the Super Mario Wiki also puts at three wedges, and the course's two Mr. Is, whose object data lists contact damage of 2.
| What hurts you in Lethal Lava Land | Wedges | Without a cap |
|---|---|---|
| Lava contact | 3 | 4.5 |
| Hidden smasher crush | 3 | 4.5 |
| Mr. I contact | 2 | 3 |
| Bully or Big Bully contact | 0 | 0 |
Two heavy hits is your whole budget on a full meter, and there is exactly one Spinning Heart in the course — inside the volcano, past the hidden smasher, on the platform to the right.
The two Big Bully fights, beyond the shove
The boss guide covers the shape of both fights: you cannot damage a Big Bully, you shove him into the lava, and the main difference from a regular Bully, in the Super Mario Wiki's words, is that he knocks you back further. Two things it does not cover, both from the Super Mario Wiki's Big Bully page and the mission pages:
- He can disengage. In Boil the Big Bully, if you knock him onto the sinking platform next to his own, he tries to return to his normal position and stops fighting you. You have not lost the fight, but you have lost your setup, and you have to walk him back into shoving range.
- The star spawns somewhere you cannot walk to, and the stairs are a trap. When he sinks, the Power Star appears on a tall black platform nearby, and stairs appear to help you up. Those stairs fall when you jump onto them. Walk them.
In Bully the Bullies, the three regular Bullies come first and the Big Bully only drops from the sky once all three are gone. Note the platform difference too: the Super Mario Wiki records that the spinning platform beyond the Bowser puzzle does not hold Bullies — push one onto it and it falls straight through.
The 15-Piece Puzzle is fourteen tiles and one that never moves
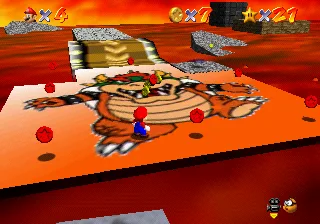
The Bowser image you run on is the 15-Piece Puzzle, and the Super Mario Wiki's page on it is precise about the count: it is fourteen square tiles that slide, plus a stone platform at the top right that serves as the fifteenth piece and never moves. That stone slab is your safe square. Learn where it is before you start collecting.
The failure mode is a physics detail rather than a timing one: when the pieces slide out from under Mario, he does not travel with them. He falls through where the tile used to be, into the lava, taking the three-wedge bounce. You are not riding a moving platform, you are standing on a hole that has not opened yet.
All eight Red Coins sit above the puzzle, and finishing the set spawns the Power Star at the nearby Star Marker. Red coins are worth two each, so this mission alone is 16 of the 133.
To get there: left at both splits, past the drawbridge, past the first Mr. I, onto the tilting platform, and the puzzle is immediately west of the spinning ring platform that circles the volcano.
Red-Hot Log Rolling has three ways across, and two are version-locked
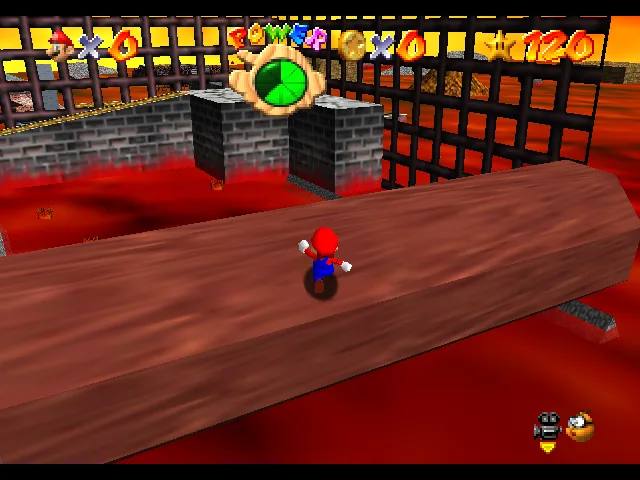
Take the left path at the first split, then the right, cross the tilting and sinking platforms to the circular platform with a pair of Bullies, and step onto the wire net platform to the right of it. Standing on it carries you through the lava plumes to the rolling log.
The log itself works on weight, not on a button: stand on the side of the log you want it to roll toward and it starts moving. Ride it to the end of its rail and a path leads to the star.
The other two routes are the interesting part, because the course changes depending on which star you select:
| Route to the star | Requirement | Available when |
|---|---|---|
| Ride the rolling log | None | Always |
| Fly over the grating with the Wing Cap | Wing Cap, which needs the red switch pressed | Any mission, once the Tower of the Wing Cap switch is on |
| Ride a Shiny Shell across the lava | The ! block that holds the shell | Only with mission 5 or 6 selected |
That last row is Ukikipedia's star-select rule for the course, and it is worth knowing generally: Lethal Lava Land loads two versions of itself. Selecting stars 1 through 4 gives you a version with no shell. Selecting stars 5 or 6, after 1 through 4 are done, spawns the shell inside an item block. Ukikipedia adds the caveat that if uncollected blue stars are showing in the star menu, the last version you can select is the first blue star, not the ones after it.
One honest note on that block: the Super Mario Wiki places it on the small circular platform along the right path, while Ukikipedia's RTA page puts it on the starting platform. The two sources agree it only exists in the later version; they do not agree on where. Sweep both if you are hunting it.
The cap guide covers the Wing Cap route in full — Lethal Lava Land is one of only three courses with a Wing Cap red block, alongside Bob-omb Battlefield and Shifting Sand Land.
Two volcano stars, one entrance, opposite directions
Jump into the volcano at the centre of the course and you drop into its lowest section. Both remaining missions start from that exact spot, and they immediately part ways.
Hot-Foot-It into the Volcano (star 5) goes forward. Take the path in front of you and follow the ledges that ring the volcano wall upward. On the way you pass flamethrowers, Bullies, and the hidden smasher — a slab of steel hidden in the wall that drops on you like a Whomp when you get near. Nintendo's own Player's Guide told players to watch for "suspicious cracks in the stone," which is the only warning the game gives. Past it are floating platforms, one of which carries the course's only Spinning Heart, then a set of poles to jump between, then the star.
Elevator Tour in the Volcano (star 6) turns around. From the same landing spot you face the other way and jump across the platforms behind you to reach a lift. The lift only moves once you are standing on it, and the Super Mario Wiki spells out the catch: when a lift reaches the end of its rail it falls into the magma. You are meant to leave it for the next one, not ride it to the end. At the end of the second lift's rail is a pole, and on the N64 version there is a fire bar spinning at the top of it — the DS version drops that. Past the fire bar, one more pole and a set of small platforms lead to the star.
The single most useful fact about this room is a mercy the game never mentions: if you lose a life inside the volcano and re-enter the course, you are put back inside the volcano rather than at the entrance, provided the death did not trigger a Game Over. Retries here are cheap. Retries on the outer platforms are not.
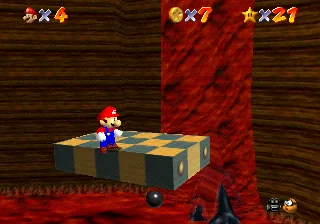
Where the 133 coins are
The Super Mario Wiki's course statistics give the headline number: 133 coins, 107 outside the volcano and 26 inside. Ukikipedia itemises them. Here is that breakdown, grouped, with the arithmetic done.
Outside the volcano — 73 in static pickups
| Where | Coins |
|---|---|
| Line under the bridge | 5 |
| Line on the tilting platform past the first Mr. I | 5 |
| Grey ramp near the tilting platform | 3 |
| Awarded for completing the Bowser puzzle | 5 |
| Sinking platform right before the first Big Bully | 5 |
| Ring on the second Big Bully platform | 8 |
| High brown ramp, north-west corner | 5 |
| Sinking platforms between the Crazy Box and the second Big Bully | 4 |
| Sinking platform north of the volcano | 5 |
| Rings on the platform with two Bullies | 8 |
| Spinning ring platform around the volcano | 3 |
| Small grey ramp south-east of the volcano, with the 1-Up | 4 |
| Ring with the second Mr. I | 8 |
| Crazy Box | 5 |
Inside the volcano — 24 in static pickups
| Where | Coins |
|---|---|
| Tiny floating platforms by the Elevator Tour star | 3 |
| S-shaped island at the bottom, by the lavafall | 3 |
| First ridge going up | 5 |
| Second ridge going up, with the first Bully | 2 |
| Floating platforms with the Spinning Heart | 4 |
| Single coin just past those platforms | 1 |
| Line with the second Bully, on the platform beside the waterfall | 5 |
| Single coin by the checkerboard lift, left of the start | 1 |
Everything else — 36
| Source | Count | Coins |
|---|---|---|
| Bullies, one coin each | 10 | 10 |
| Red Coins, two each | 8 | 16 |
| Mr. I blue coins, five each | 2 | 10 |
73 + 24 + 36 = 133, which checks against the Super Mario Wiki's total. Splitting it the other way: 73 static + 8 outside Bullies + 16 red + 10 blue = 107 outside, and 24 static + 2 volcano Bullies = 26 inside, which is exactly the Super Mario Wiki's split. Ukikipedia counts the course's yellow coins a third way, and its infobox and its itemised table divide them slightly differently — 92 static plus 15 from enemies, versus 97 plus 10, depending on whether you file the Crazy Box's five as a drop. Both land on 107 yellow coins, which is a different 107 from the outside total above: 81 yellow outside plus the volcano's 26.
Three practical reads from that table:
- The volcano is worth 26 coins. You will spend far more time in there per coin than anywhere outside, so if you are pairing the coin sweep with star 5 or 6, take the outside route thoroughly on the way in rather than expecting the climb to top you up.
- The blue coins are 10 of the 133 and they come from Mr. Is. Ukikipedia's RTA notes give the tracking rule: Mr. I only starts following you when Mario is facing within roughly 45 degrees of its line of sight. Run tight circles inside that cone and it shrinks and pops.
- The Crazy Box is five coins and a small stunt. Grabbing one makes Mario bounce three times in the direction he was facing before it explodes into five coins, and you can change the speed of those bounces with the stick but not the angle. Ukikipedia lists it in only four courses: Big Boo's Haunt, Tall, Tall Mountain, Lethal Lava Land and Shifting Sand Land.
Ukikipedia flags one coin here as possibly the hardest non-glitched coin in the game: a Bully high inside the volcano whose dropped coin has to be caught on a leap of faith before it lands in the lava. If your 100-coin run comes up one or two short, that is very likely where it went.
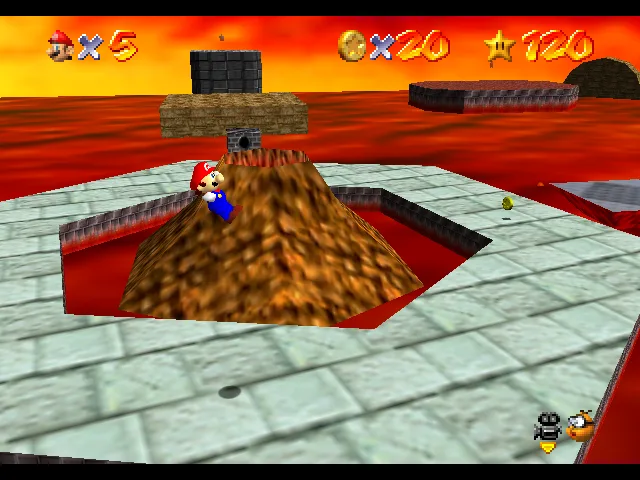
The Wing Cap warp under the Mr. I
Lethal Lava Land has no cannons at all — the Super Mario Wiki's course statistics list none — so the only aerial option is the cap.
Take the left path to the drawbridge and the steel-grated platform with a Mr. I on it. Underneath that platform is a warp, and it takes you to a small island holding the red ! block with the Wing Cap inside. That block only becomes solid once you have pressed the red switch at the top of the Tower of the Wing Cap.
Two things the Wing Cap trivialises here, per Nintendo's Player's Guide: reaching the Big Bully's platform, and reaching the 15-Piece Puzzle. It also gets you over the grating for Red-Hot Log Rolling without touching the log.
The drawbridge runs on the global timer
This is a deep cut, and it is real. Ukikipedia documents the Lethal Lava Land drawbridge against the Super Mario 64 decompilation: each half rotates 0.703125 degrees per frame, waits 50 frames at the end of its travel, and then — the interesting bit — can only begin its next action on a frame where the global timer is divisible by 8.
The consequence is that pausing and unpausing at the right moment desynchronises the check and the bridge can be made to stay lowered, or raised, indefinitely. It is not a shortcut so much as a reminder that a surprising amount of this game is timer-gated rather than event-gated, which is the same class of behaviour the speedrun guide leans on elsewhere.
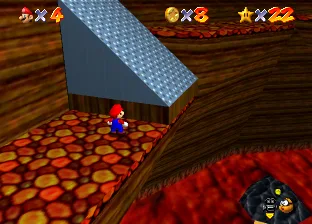
What the A Button Challenge did here
The A Button Challenge — clear a star using as few presses of A as possible — has fully solved this course: all seven stars, zero A presses, per Ukikipedia's table.
The mechanic doing the work is the Lava Boost. Touching lava makes Mario jump, and that jump does not require A. Ukikipedia's action page is blunt about it: the boost sets Mario's vertical speed to 84, and the wall version of it — for which it lists the exact steps — charges 12 hurt-counter damage, or 18 without a cap. Cross-multiply that against the health system's 64 units per counter tick and you get 768 and 1,152 units, which is the three and four-and-a-half wedges the damage table already gave you. You are paying health for height, at the published rate.
That page also notes two things worth carrying: the only lava wall in the entire game is the one inside Lethal Lava Land's volcano, which is why the volcano is where the exotic strategies live, and slide kicking onto a lava floor does not trigger a boost at all — Mario is immune to lava while slide kicking.
The headline result is a piece of speedrunning history. Elevator Tour in the Volcano was originally done in 0 A presses by a route that took over 26 hours — a chain of Bully batteries, parallel-universe rotational displacement and PU movement. It was later replaced by hyperspeed lava boosting from the lavafall, which does the same star in under a minute. Ukikipedia records that as the single largest official timesave in the A Button Challenge.
For the ordinary player the useful version of this is much smaller: on a course made almost entirely of lava, taking a deliberate hit to skip a platforming section is often correct, because you have eight wedges, a Spinning Heart in the volcano, and 133 coins lying around to heal with.
What Super Mario 64 DS changes
| Change | Detail |
|---|---|
| A seventh mission | Flaming Silver Stars — collect the Silver Stars around the main course |
| A renamed mission | Elevator Tour in the Volcano becomes Inside the Volcano |
| Character lock removed | Lethal Lava Land and Rainbow Ride are the only two DS courses where any playable character can collect any Power Star |
| Power Flower and flight together | The only course where Mario can get his Power Flower and his flying ability on the same map, without entering a separate sub-area |
| Wario walks on lava | His metal power lets him withstand it; he moves as if in quicksand |
| Luigi skips the log | Vanish power plus a backward somersault takes him straight through the grating |
| Yoshi fights differently | He pushes Bullies back by stomping them |
| Fire bar removed | The fire bar at the top of the first volcano pole is N64-only |
| Big Bully restyled | Metal collars at the base of each horn, and a red marking beside each eye |
The version differences post covers the N64, DS and 3D All-Stars split across the whole game. One Lethal Lava Land detail that belongs there: the Bowser image on the puzzle was remade at higher resolution in 3D All-Stars, which removed a stray orange square on Bowser's left ankle and changed the rings on his horns and spikes from yellow to red.
Mistakes this course punishes
- Standing with your back to the lava. Bullies walk in the direction Mario faces. Your camera-relative heading is the enemy AI.
- Jumping onto the stairs after Boil the Big Bully. They collapse. Walk up.
- Treating the puzzle tiles as moving platforms. They slide out from under you and you stay put — over lava.
- Riding a volcano lift to the end of its rail. It drops into the magma. Leave before it does.
- Farming coins capless. Lava goes from 3 wedges to 4.5, and this is a course where you will touch lava on purpose.
- Expecting the volcano to finish your coin run. It only holds 26 of the 133.
Quick Action Checklist
- Long jump off the start platform; the course begins with a gap.
- Left at both splits for Boil the Big Bully and the 8-coin puzzle. Left then right for Bully the Bullies and Red-Hot Log Rolling.
- Shove Big Bully away from the sinking platform beside him, or he disengages and walks home.
- Find the stationary stone slab at the top right of the Bowser puzzle before you start on the eight Red Coins.
- Press the Tower of the Wing Cap switch first if you want the flying route; the red block is through the warp under the Mr. I on the grated platform.
- In the volcano: forward for Hot-Foot-It, turn around for Elevator Tour. Dying inside keeps you inside.
- Sweep the outside for the 100-coin star. The volcano is only worth 26.
- Select star 5 or 6 if you want the Shiny Shell version of the course.
Frequently Asked Questions
How many stars are in Lethal Lava Land in Super Mario 64?
How do you beat Big Bully in Lethal Lava Land?
Why do the stairs fall in Lethal Lava Land?
How many coins are in Lethal Lava Land?
Where is the Wing Cap in Lethal Lava Land?
What is inside the volcano in Lethal Lava Land?
Keep Reading
- Lethal Lava Land — Super Mario Wiki
- Lethal Lava Land — Ukikipedia
- RTA Guide: Lethal Lava Land — Ukikipedia
- RTA Guide: LLL 100 Coins — Ukikipedia
- Boil the Big Bully — Super Mario Wiki
- Bully the Bullies — Super Mario Wiki
- 8-Coin Puzzle with 15 Pieces — Super Mario Wiki
- Red-Hot Log Rolling — Super Mario Wiki
- Hot-Foot-It into the Volcano — Super Mario Wiki
- Elevator Tour in the Volcano — Super Mario Wiki
- 15-Piece Puzzle — Super Mario Wiki
- Big Bully — Super Mario Wiki
- Bully — Super Mario Wiki
- Bully object data — Ukikipedia
- Hidden smasher — Super Mario Wiki
- Lava — Super Mario Wiki
- Lava Boost — Ukikipedia
- Crazy Box — Ukikipedia
- Lethal Lava Land Drawbridge — Ukikipedia
Related Guides

Super Mario 64 Lives and Game Over: What You Actually Lose
A Game Over in Super Mario 64 is a file reload: you keep everything you saved and lose everything you did not. Here is when the game actually writes your file, exactly what a Game Over rolls back, the five courses where a fall is free, and every way to earn a life, from the coin tally to the Monty Mole streak that never runs dry.
Super Mario 64 Music: Every Track and Where It Plays
Super Mario 64 scores 15 courses with seven songs, and only one of them belongs to a single course. Here is which track plays in every course and secret level, the five levels whose music rearranges itself as Mario moves, what triggers the boss music and the jingles, all 36 soundtrack tracks under their 1996 and current names, and where to listen today.
Super Mario 64 Bowser Levels Guide: All 24 Red Coins
Bowser in the Dark World, the Fire Sea and the Sky each hide one Power Star behind eight red coins on the obstacle course in front of the fight. Here is the route through all three, where every red coin sits, and what else the level data holds.
Super Mario 64 120-Star Reward: Yoshi and the Castle Roof
Super Mario 64 does not announce your 120th Power Star. The reward is outside: a cannon grate that stops loading, Yoshi on the castle roof, and a gift that quietly resets the next time you load your file. Here is what 120 stars changes, checked against the wikis and the decompiled code.
Super Mario 64 Beginner Guide: Your First 30 Power Stars
Super Mario 64 does not gate you on difficulty, it gates you on Power Stars. Here is exactly which doors need what, which stars are fastest to grab, and the route that gets a first-timer from one star to thirty without wandering the castle in circles.
Super Mario 64 Snowman's Land Guide: All 7 Stars
Snowman's Land looks like the throwaway snow level, and the wiki record on it backs that read up in one specific way: it is the only one of the game's 15 main courses with no Blue Coins at all. What it does have is two freezing ponds that hurt you in two different ways, an enemy species that appears nowhere else in the game, and a cap-stealing snowman nobody warns you about. Here is every star, the full 127-coin breakdown, and the course's last remaining gap in this vertical.