A Link to the Past Magic Guide: What Every Item Costs and How to Refill It
A Link to the Past never puts a number on magic. The meter holds 128 points, the Fire Rod takes 16 of them, the Lamp charges you 4 every time you press it, and there is a freeze-then-hammer trick that forces a magic drop 100% of the time.
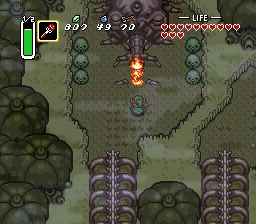
Go get half magic from the Mad Batter. That advice is in our own items and upgrades guide, and it is correct. What it does not tell you — what the game itself refuses to tell you — is what you are halving. You get a green bar, it goes down when you press Y, and you find out you are empty at the worst possible moment in Turtle Rock.
So here are the numbers. The meter holds 128 points. The Fire Rod takes 16 of them. And the Lamp, which has no business being on this list at all, costs 4 points every time you press it.
The meter holds 128 points and the game never shows you one
The magic bar is a single byte, and the game treats 128 as a full tank. That is the value a potion fills you to, and it is the value the game compares against when it decides whether a Magic Decanter is worth picking up.
Nothing in the interface communicates this. The bar has no notches and no readout, so there is no way to price a decision in the moment — you cannot tell whether you have enough left for two Fire Rod shots or five.
Once you know the bar is 128, the costs below snap into fractions you can actually hold in your head. A medallion is a quarter of the tank. A Fire Rod shot is an eighth. A Somaria block is a sixteenth.
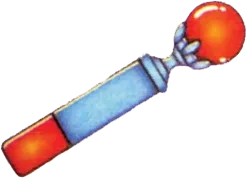
What every magic item actually costs
The game stores its magic costs as a flat table — one row per item, three columns for normal, half and quarter consumption. This is that table, in decimal, with the fraction of a full bar each use represents.
| Item | Normal | With half magic | Uses from a full bar |
|---|---|---|---|
| Fire Rod | 16 | 8 | 8 → 16 |
| Ice Rod | 16 | 8 | 8 → 16 |
| Bombos / Ether / Quake | 32 | 16 | 4 → 8 |
| Cane of Byrna (to switch on) | 16 | 8 | see below |
| Magic Powder | 8 | 4 | 16 → 32 |
| Cane of Somaria (per block) | 8 | 4 | 16 → 32 |
| Lamp (per press) | 4 | 2 | 32 → 64 |
Three things fall out of that table immediately.
The Fire Rod and the Ice Rod are the same price. They share a single row. If you have been rationing the Ice Rod because it feels more exotic, stop — it costs exactly what the Fire Rod costs.
The medallions are the most expensive button in the game. Thirty-two points is a quarter of your bar for one screen-clear. The items and upgrades guide makes the case for Bombos against Kholdstare in the Ice Palace, and the maths backs it up: one Bombos at 32 beats grinding the ice shield down with 16-point Fire Rod shots.
The Cane of Somaria only charges you for creation. Spawning a block costs 8. Detonating a block that already exists is free — the game checks whether one of your object slots is already holding a Somaria block and skips the charge if it finds one. Turtle Rock is built almost entirely out of Somaria blocks on rails, which is exactly why the dungeon order guide puts the half magic errand before it.
One more quirk worth knowing: if you fire the Fire Rod when the game has no free object slot to put the shot in, it hands your 16 points back. The refund is coded specifically for the rod class, and the disassembly notes that Somarian blasts deliberately do not get the same treatment.
The Lamp has been charging you this whole time
The Lamp routine runs a magic check on every single Y press, at a cost of 4, and if you cannot pay it the lamp simply does not light. There is no condition attached — it does not matter whether there is a torch in front of you or whether the room is already lit.
Four points is a thirty-second of the bar, small enough that a couple of presses barely register. It matters in one situation: you are deep in a dark dungeon, mashing the Lamp to see, and also trying to keep enough in the tank for the Fire Rod. Thirty-two lamp presses is your whole bar.
If you are playing with half magic, the Lamp drops to 2 and effectively stops being a line item.
The Cape and the Byrna are billed by the second
These two are not priced per use. They are priced per frame, and they are the reason "my magic just evaporated" is such a common complaint.
- The Magic Cape drains 1 point every 4 frames.
- The Cane of Byrna costs 16 up front, then 4 points every 24 frames.
At roughly 60 frames a second, that works out to:
| Cost to hold | From a full bar | With half magic | |
|---|---|---|---|
| Magic Cape | 15 points/sec | about 8.5 seconds | about 17 seconds |
| Cane of Byrna | 10 points/sec after a 16-point deposit | about 11 seconds | about 24 seconds |

So the Byrna outlasts the Cape despite charging you an entry fee, and the gap widens once you have half magic. Zelda Wiki says the Byrna "uses less magic power" than the Cape without putting a figure on it — this is the figure. The trade is that the Cape makes you invisible and lets you walk through certain hazards the Byrna will not, so they are not interchangeable. But if what you want is a damage shield you can hold, the Byrna is the cheaper one to run.
There is a footnote hiding in the Cape's timer table that we will come back to in a minute.
Where magic actually comes from
Four sources, and only two of them cost money.
| Source | Restores |
|---|---|
| Small Magic Decanter | 16 points |
| Large Magic Decanter | Fills the bar |
| Medicine of Magic (green potion) | Fills the bar |
| Medicine of Life and Magic (blue potion) | Fills hearts and the bar |
The small decanter is worth internalising: 16 points is exactly one Fire Rod shot at full price, or two once you have half magic. That is the actual exchange rate of the game's most common magic pickup.
The potions fill you to 128 and nothing more, which means drinking one at 100/128 wastes most of a 60-rupee purchase. The bottles guide argues the blue potion is the better carry once you are deep in the Dark World, and the price list is in the rupee guide.
Enemy drops are a fixed cycle, not a dice roll
Here is the part that changes how you farm.
Every enemy in the game belongs to a group, and each group has an ordered list of eight prizes with its own counter. When an enemy in that group drops something, you get the next entry on that list, and the counter advances by one and wraps around after eight. Each group tracks its own counter, so working through one group's list does not disturb another's.
Randomness only decides whether a drop happens at all. It does not decide what drops. That is a deterministic walk through a fixed list of eight.
The list you care about is the magic group:
| Slot | Prize |
|---|---|
| 1 | Large Magic Decanter |
| 2 | Small Magic Decanter |
| 3 | Small Magic Decanter |
| 4 | Blue rupee |
| 5 | Large Magic Decanter |
| 6 | Small Magic Decanter |
| 7 | Heart |
| 8 | Small Magic Decanter |
Six of the eight slots are magic. Two of them fill the entire bar. The enemies who carry this group natively are Pengators, Buzzblobs, Gibdos and red spear guards, and the drop rate is 50%.
Pengators live in the Ice Palace, which is convenient given that the Ice Palace is where you are burning Fire Rod charges on Freezors. If you want the rest of the sword-proof roster and what kills it, that is the enemy guide.
Two more rules from the same system, both easy to trip over:
- Killing an enemy with a dash drops nothing from that kill — the Pegasus Boots zero the drop rate on the spot. The prize is not lost, though: the group's counter only advances when something actually drops, so whatever was next in line waits for a later kill. Runners dash-kill through Agahnim's Tower to bank a fairy for Turtle Rock.
- Killing a stunned enemy, or a frozen one with anything other than the hammer, forces a green rupee.
Freeze it, then hammer it
Now put those two facts together, because this is the trick.
Freeze an enemy and kill it with the Magic Hammer, and it drops from the magic group at a 100% rate — regardless of which group that enemy normally belongs to. Any enemy with a prize pack becomes a magic dispenser.
The economics are good. Freezing costs 16. The hammer costs nothing. Six times out of eight the guaranteed drop is a magic refill, and twice in that cycle it is a Large Decanter that fills the whole bar. You are spending an eighth of your tank to reliably pull back a sixteenth, an eighth, or all of it.
Caveats, because there are always caveats:
- You need the Ice Rod (Misery Mire) and the Magic Hammer (Palace of Darkness), so this is a back-half-of-the-game tool.
- A Large Decanter cannot overfill you. Cashing one at 112/128 gets you 16 points of value, not 128. Run yourself down before you farm.
- Enemies flagged to drop a key never drop from a prize pack, and some groups have no prize list at all.
It is also the one job the Ice Rod does that the Fire Rod cannot. Same 16-point price, and it is half of a guaranteed magic drop.
The Bubbles that charge you 8 points a touch
The little invincible bouncing flames — Bubbles, or Anti-Fairies — take 8 points off your bar every time they connect, with a short cooldown between hits so a single one cannot chain-drain you in a corner. If you are below 8 they zero the bar rather than wrapping it around.
Eight points is half a Fire Rod shot per touch. Take four hits crossing a room and you have paid for two rod shots you never fired. The enemy guide covers turning them into fairies with Magic Powder, which at 8 points is a straight one-for-one trade of the magic they were about to steal.
Half magic, and the quarter magic that does not exist
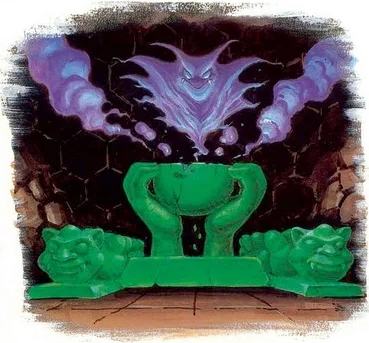
The Mad Batter does not make your bar bigger. The bar is 128 points before and after. What he changes is a single byte that selects which column of the cost table the game reads from — and the effect is the same thing, since halving every price doubles what a full tank buys.
You can see the flag working. Once it is set, the heads-up display swaps in a different meter graphic with 1/2 printed above the bar. That is the label in the screenshot at the top of this post.
The cost table has a third column. Every row carries a quarter-magic value, the display code has a comment acknowledging that a 1/4 meter graphic could be drawn, and the Cane of Byrna even has a proper quarter-cost entry of 1 point per tick.
None of it is reachable. Two places in the retail ROM write that byte, and both write the value for half: the Mad Batter, and a developer cheat that triggers when you name your save file BAGE. Nothing writes the value for quarter. It is finished data wired to a switch that was never installed.
The Cape has its own version of this. Its drain timers are 4 frames at normal cost and 8 at half — and 8 again at quarter. Even if you could reach quarter magic, the Magic Cape would not get any cheaper. The disassembly comment says so outright.
For where the Mad Batter errand sits in a route, and the Magic Mushroom chain that summons him, see the items and upgrades guide. Everything else we have written about the game is on the A Link to the Past coverage hub.
Quick Action Checklist
- Treat the bar as 128 points: a medallion is a quarter of it, a Fire Rod shot an eighth, a Somaria block a sixteenth.
- Do the Mad Batter errand before Turtle Rock — it halves every cost in the table permanently.
- Stop rationing the Ice Rod. It costs the same 16 points as the Fire Rod.
- Detonate Somaria blocks instead of respawning them; only creation is charged.
- Remember the Lamp costs 4 a press when you are mashing it in a dark room you also need the Fire Rod for.
- Prefer the Cane of Byrna over the Magic Cape when you just want a damage shield — about 11 seconds versus about 8.5 from a full bar.
- Farm magic with freeze then Magic Hammer for a guaranteed magic-group drop, and run yourself low first so a Large Decanter is not wasted.
- Never kill a farm target with a dash — a dash kill drops nothing on the spot, and the group's next prize just waits for a later kill.
- Don't drink a green potion at three-quarters full; you are throwing away most of 60 rupees.
Frequently Asked Questions
How much magic does the Fire Rod use in A Link to the Past?
What does half magic actually do in A Link to the Past?
Is the Cane of Byrna cheaper than the Magic Cape?
How do you farm magic refills in A Link to the Past?
Does the Lamp use magic in A Link to the Past?
Keep Reading
- ALttP disassembly — LinkItem_MagicCosts table, LinkItem_Lamp, and the Magic Cape depletion timers
- ALttP disassembly — Cane of Byrna upkeep costs and 24-frame depletion interval
- ALttP disassembly — small and large Magic Decanter refill amounts
- ALttP disassembly — Bubble / Anti-Fairy 8-point magic drain
- ALttP disassembly — Mad Batter setting the half magic consumption flag
- ALttP Speedrunning Wiki — enemy prize packs, drop cycles, and the frozen-plus-hammer rule
- ALttP Speedrunning Wiki — Pegasus Boots: a dash kill drops no item, and the drop is stored for later
- Zelda Wiki — Magic Meter in A Link to the Past and the items that deplete it
- Zelda Wiki — Pengator and its Ice Palace habitat
Related Guides
A Link to the Past Items and Upgrades: Every Tier Explained
The Golden Sword hits eight times as hard as the sword your uncle gives you, and half magic doubles every rod, cane, and cape in your inventory. A Link to the Past hides its best upgrades behind optional detours. Here is all of them.
A Link to the Past Cuccos: 35 Hits Until the Flock Attacks
The number is 35, it is counted on one bird, and the flock never forms indoors. Here is the Cucco routine read out of the SNES code: what counts as a hit, how the attackers fly, what they cost you, how to switch them off, and the one Cucco in Kakariko that talks back.

A Link to the Past Crystal Switches: One Byte, Whole Dungeon
A Link to the Past does not track its orange and blue Switch Fence panels room by room. One RAM byte, shared by the entire dungeon, decides whether every crystal switch and every panel in it is up or down — including the ones in rooms you have not opened yet. Here is the exact byte, what it will and will not respond to, and why it resets the second you walk back through the door.
A Link to the Past I-Frames: 58 Frames After a Hit
One byte at $031F runs the mercy window. It gets loaded with 58 after an enemy touches you, and while it is counting down, contact damage, projectile trails, electric shocks, your own bombs and the spike tiles all skip their damage check. Here is what that buys you, and where it quietly runs out.
A Link to the Past Beginner Guide: Your First Ten Hours
A Link to the Past hands you a sword and a rainstorm and then says almost nothing else. Here is the route, the combat, and the item order that turn a confusing first hour into a game you can actually finish.
A Link to the Past Movement Speed: When Dashing Is Slower
A Link to the Past does not simulate movement. It looks it up. One byte picks your speed, the byte divided by sixteen is your pixels per frame, and every surface and every held item swaps the byte for a worse one. Here is the table, and the arithmetic that says the Pegasus Shoes are a loss under four and a half tiles.