A Link to the Past GBA Riddle Quest: All 10 Answers
Ten one-line clues, ten things to scoop up with the Bug-Catching Net, and a sword technique at the end of it. The Riddle Quest only exists on the Game Boy Advance cartridge, and it will not start until you have won ten Medals of Courage in Four Swords.
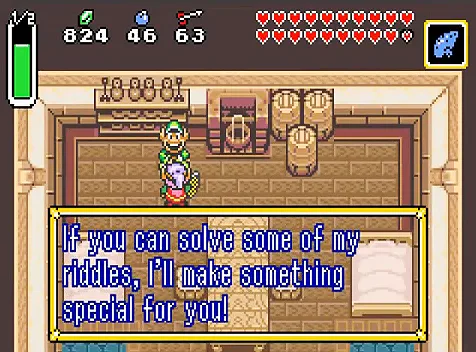
There is a third lumberjack in this game, and he is not on the Super Nintendo cartridge. A. Bumpkin and B. Bumpkin are the pair sawing at the tree outside; Q. Bumpkin sits inside their house, he was added for the Game Boy Advance release, and he has ten riddles for you.
The riddles themselves are one-line clues with one-object answers. Every answer is something you scoop up with the Bug-Catching Net and carry back in a Basket. The hard part is not the puzzling — it is the entry fee, and the five answers that need a piece of setup you may not have done yet.
Here is the whole quest: the gate, all ten answers, the one that can be destroyed permanently, and what the Hurricane Spin at the end actually does.
What the quest wants before it starts
Zelda Wiki and Fandom's Zelda Wiki both list the same two requirements, and the Wikibooks walkthrough agrees with them: the Bug-Catching Net and ten Medals of Courage. Neither lists any story progress at all.
| Requirement | What it actually means |
|---|---|
| Game Boy Advance version | Q. Bumpkin does not exist on the SNES cartridge. This quest cannot be started there |
| 10 Medals of Courage | Won in Four Swords, the multiplayer half of the cart — one medal per stage, to whichever Link finishes it holding the most rupees |
| Bug-Catching Net | The sick kid in Kakariko hands it over, and only if you already own a Bottle |
| Talk to Q. Bumpkin | Inside the lumberjacks' house, north of Kakariko Village by the Death Mountain entrance |
The medals are the real wall. A Medal of Courage is awarded at the end of a Four Swords stage to the player who collected the most rupees, and Four Swords is a two-to-four-player game — Nintendo's own Switch Online write-up describes it as two to four Links, with friendly competition for rupees baked in. On 2002 hardware that meant a console and a cartridge per player, which is covered in the SNES versus GBA breakdown. The modern route is the Game Boy Advance – Nintendo Switch Online app, which sits behind the Expansion Pack tier; Nintendo's page for it says online multiplayer in compatible games "may feature 2-4 players, depending on the game" and does not break that down title by title.
Talk to him with ten medals banked and he hands you the Basket, which takes over the "?" slot on your subscreen, and asks the first riddle.
All ten riddles, answered
You get one riddle at a time, in the order both wikis and the Wikibooks walkthrough list them. The Basket holds one object and catching something else overwrites it, so a wrong guess costs you a trip and nothing else — except entry eight, which has its own section below.
| # | The clue | What to catch | Where |
|---|---|---|---|
| 1 | "Cock-a-doodle-doo!" | Cucco | Kakariko Village |
| 2 | "The scissors by the water…" | Sand Crab | Near the Waterfall of Wishing per both wikis — the river stretch by the Witch's Hut. Wikibooks puts it at the bridge southwest of the hut |
| 3 | "It's shiny and red." | Red Rupee | Great Swamp, after draining it: grab a fish and throw it into deep water, and it pays you a Red Rupee |
| 4 | "It's moist and fresh…" | Fish | Great Swamp, after draining it — same fish, this time keep it |
| 5 | "BOOOM! Skitter-scatter…" | A Puffer from a popped Octoballoon | Eastern shore of Lake Hylia. Let the Octoballoon explode, then net one of the Puffers it scatters |
| 6 | "Sprinkle and watch it wobble…" | Slime | Any enemy Magic Powder transforms — Wikibooks names a Soldier or an Octorok |
| 7 | "It munches on nuts…" | Squirrel | Lost Woods, around the Master Sword pedestal |
| 8 | "Pull it out, but…too bad!" | Fake Master Sword | Lost Woods. Net it directly. Do not pick it up |
| 9 | "It's red and sweet…" | Apple | Dash a tree with the Pegasus Boots — both wikis point at the tree south of the Death Mountain entrance, Wikibooks at the one southeast of the lumberjacks' house |
| 10 | "A spectacled wanderer…" | Cukeman | Sprinkle Magic Powder on a Buzz Blob. There are Buzz Blobs by the Witch's Hut |
Two naming notes, because the sources word them differently. Zelda Wiki calls the answer to riddle five a Puffer; Fandom's version calls it the Octoballoon and says to catch its remains. They describe the same act — pop the balloon, net one of the small Octoroks that spill out. Zelda Wiki also states that a single Octoballoon appears in the game's overworld, on the eastern shore of Lake Hylia, so this is not a riddle you can solve wherever you happen to be standing.
Five of the ten need setup, not searching
Riddles 3, 4, 6, 9 and 10 all depend on something you own or something you have switched on, and three pieces of setup cover all five. If you walk into this quest fresh, sort these first:
- Magic Powder covers riddles 6 and 10. Take the Magic Mushroom from the Lost Woods to Syrup at the Magic Shop, leave the area, come back, and her assistant hands the Powder over — on the GBA cart the assistant has a name, Maple. Zelda Wiki lists nineteen enemy entries that Magic Powder turns into a Slime, ordinary Soldiers and Octoroks among them, while Buzz Blobs become Cukemen instead. That is riddle 6 and riddle 10 from one item. The rest of what that item does is in the magic guide.
- Pegasus Boots cover riddle 9. Zelda Wiki describes Apples in this game as obtained by dashing into trees with the boots, so no boots, no apple.
- The Great Swamp watergate covers riddles 3 and 4. It is the same switch you already flip to flood the Swamp Palace.
Wikibooks' route for riddle 6 sprinkles Powder on a Soldier or an Octorok and then casts Quake. Zelda Wiki has Magic Powder doing the job on its own for those enemies, with the Quake Medallion as a second route that works on tougher ones. If the Powder alone does not produce a Slime on what you sprinkled, that is your fallback.
The Great Swamp trip covers two riddles at once
The southern ruins in the Great Swamp hold two switches. One is a trap that drops bombs on you. The other opens the watergate, which floods the ruins and drains the pond outside — the same errand that makes the Swamp Palace enterable in the Dark World, so it is a switch a normal playthrough flips anyway.
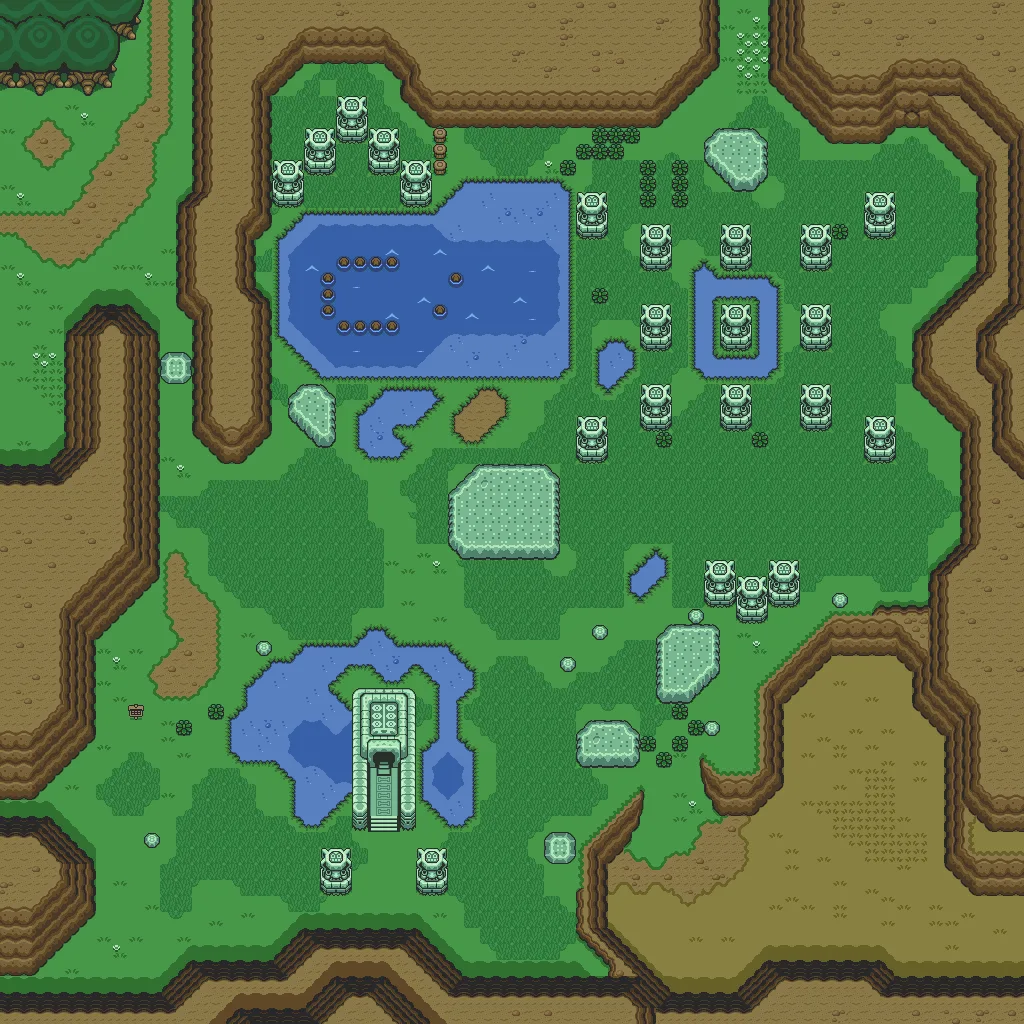
With the water gone you can pick a fish up. Two riddles come out of that one fish:
- Riddle 3 (Red Rupee): throw the fish back into deep water. It thanks you and pays out — Zelda Wiki and Fandom both name the reward as a Red Rupee. Net the rupee.
- Riddle 4 (Fish): get another fish and net it instead of throwing it.
Do not get creative with the fish while a riddle is open. Zelda Wiki notes you can also carry it to the Street Merchant in Kakariko, who trades 21 rupees, ten arrows, eight bombs and a Magic Jar for it — a fine deal on any other day, and a wasted trip on this one. The rupee guide covers where that sits against the rest of Hyrule's payouts.
The Fake Master Sword is the one you can lose
Riddle 8 wants a Fake Master Sword — one of the decoy pedestals scattered in the Lost Woods to send you at the wrong blade. They behave like pots: liftable, throwable, and gone once thrown.
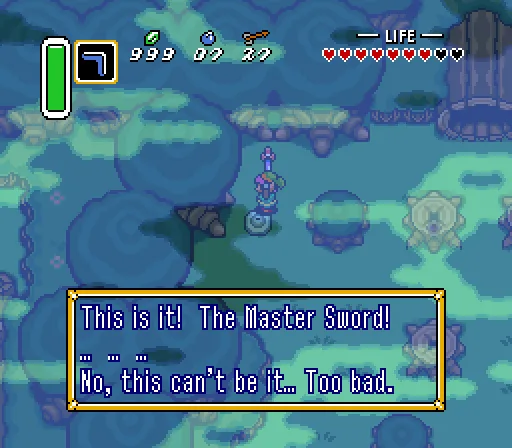
Both sources warn about the same failure. Zelda Wiki states the fakes disappear if picked up and thrown, so destroying all of them makes the Riddle Quest impossible to finish — the page carries a verification tag on that line. Wikibooks says the same thing independently: bag it directly, do not pick it up, and the task cannot be finished if every fake has been discarded for good.
Take the safe version either way. Swing the Net at the Fake Master Sword. Never lift one.
The Basket is a one-way container
The Basket is not a bottle, and it is worth knowing the difference before you start hunting.
- It replaces the "?" slot on the subscreen.
- It holds one thing. Catching something else swaps the contents.
- You cannot let the contents out yourself the way you can empty a bottle.
- It stays in your inventory permanently, but Wikibooks notes it stops being usable once all ten riddles are solved.
Practically that means there is no penalty for guessing wrong — a wrong catch is overwritten by the next one — and no way to "empty" the basket to carry something else in it.
Three Carver's Statues, and a Magic Powder easter egg
You do not wait until riddle ten for a reward. Q. Bumpkin carves you a statue after the first, fourth and seventh riddles and sends it to your house:
| Solved riddle | Statue | Where it ends up |
|---|---|---|
| 1 (Cucco) | A Cucco | Link's House |
| 4 (Fish) | Link himself | Link's House |
| 7 (Squirrel) | Princess Zelda | Link's House |
Then the good part. Sprinkle Magic Powder on a statue in your house and it sparkles; sprinkle again and it takes on colour; sprinkle a third time and it flips to an alternate form. Zelda Wiki and Wikibooks describe the same three swaps: the Cucco becomes one of the sickly Dark World birds, Link becomes Bunny Link, and Zelda becomes an older version of herself. Wikibooks adds that the Link carving wears whatever tunic you are currently wearing. You can also just throw the statues around the room. Everything resets when you leave the house.
The Hurricane Spin, and what it costs
Bring back the Cukeman and Q. Bumpkin gives up the family technique.
The input, as Wikibooks describes it: charge the sword until you hear the charge sound, wait for a second sound, then press B rapidly while steering with the D-pad. The spin keeps going while you mash, and it drains your Magic Meter the whole time, which is how Wikibooks describes the move.
If you have not woken the Mad Batter and doubled your Magic Meter yet, this is the move that will make you want to — the items and upgrades guide has the route to him. Wikipedia's entry on the cartridge also notes that sword moves learned in one half transfer to the other, so the technique is not stranded in the single-player game.
Quick Action Checklist
- The Riddle Quest is Game Boy Advance only. Q. Bumpkin is not on the SNES cart.
- Entry fee: ten Medals of Courage from Four Swords, plus the Bug-Catching Net.
- Start it inside the lumberjacks' house north of Kakariko, by the Death Mountain entrance.
- Answers in order: Cucco, Sand Crab, Red Rupee, Fish, Puffer, Slime, Squirrel, Fake Master Sword, Apple, Cukeman.
- Bring Magic Powder and the Pegasus Boots before you start — Powder answers riddles 6 and 10, the Boots answer riddle 9.
- Drain the Great Swamp once and take both fish riddles in the same trip.
- Net the Fake Master Sword. Do not lift it — thrown ones are gone, and Zelda Wiki and Wikibooks both warn the quest can be stranded that way.
- Statues arrive after riddles 1, 4 and 7, and Magic Powder flips each one to an alternate form in your house.
- The payoff is the Hurricane Spin, which eats magic while it runs.
Frequently Asked Questions
How do you start the Riddle Quest in A Link to the Past?
What are the answers to all ten of Q. Bumpkin's riddles?
Do you need Four Swords to get the Hurricane Spin?
Can the Riddle Quest be made impossible to finish?
What do the Carver's Statues do in A Link to the Past?
Is the Riddle Quest in the SNES version of A Link to the Past?
Keep Reading
- Zelda Wiki — Lumberjack's Riddles, the ten clues with answers and locations, the 10-medal prerequisite, and the statues after riddles 1, 4 and 7
- Fandom Zelda Wiki — Lumberjack's Riddles, which names riddle five's answer as the Octoballoon rather than the Puffer
- Wikibooks — Riddle Quest: Basket behaviour, the Fake Master Sword warning, the Hurricane Spin input, and the carving easter egg
- Zelda Wiki — Medal of Courage, awarded per Four Swords stage to the Link holding the most rupees; ten unlock the Lumberjack's Riddles
- Zelda Wiki — Wooden Statue, covering the three Carver's Statues, where they are placed, and the Magic Powder colour swaps
- Zelda Wiki — Lumberjack, which places Q. Bumpkin inside the house for the whole game and is GBA-only
- Zelda Wiki — Slime, listing the enemies Magic Powder transforms and the Quake Medallion alternative
- Zelda Wiki — Octoballoon, which places the game's overworld Octoballoon on the eastern shore of Lake Hylia
- Zelda Wiki — Fish, the drained Great Swamp pond, the throw-it-back reward, and the Street Merchant trade
- Zelda Wiki — Fake Master Sword, including the warning that thrown fakes disappear
- Zelda Wiki — Magic Powder, obtained from Syrup for the Magic Mushroom and handed over by Maple in the GBA version
- Nintendo UK — the Game Boy Advance Nintendo Switch Online write-up describing Four Swords as two to four Links competing for rupees
- Nintendo — Game Boy Advance – Nintendo Switch Online, the Expansion Pack app page, whose online multiplayer note reads "2-4 players, depending on the game"
- Wikipedia — A Link to the Past and Four Swords, on the two-to-four-player structure and sword moves transferring between the two games
Related Guides
A Link to the Past Small Keys: All 61, Dungeon by Dungeon
Palace of Darkness keeps all six of its keys in treasure chests. Desert Palace keeps none of its four in a chest at all. Here is the key count for every dungeon in the game, and where the ones you cannot find are actually hiding.
A Link to the Past Enemy Guide: Every Sword-Proof Monster and What Kills It
A Link to the Past spends the whole game upgrading your sword and then fills the Dark World with things the sword cannot touch. Here is every armored, reforming, and element-locked enemy in Hyrule, and the one item that actually finishes it.
A Link to the Past Rupee Guide: Every Price in Hyrule and How to Pay It
The wallet caps at 999 and the single most expensive purchase in the game eats more than half of it. Here is every price in A Link to the Past, which minigames actually pay out, the shield you should never buy, and the secret room holding 225 rupees.
A Link to the Past Light World Guide: The Half of Hyrule Everyone Underrates
Everyone remembers the Dark World. But the Light World is where the Flute fast-travel lives, where half your bottles and upgrades hide, and where a whole quest turns Kakariko into a warp hub most players never bother to unlock. Here is the map you thought you already knew.
A Link to the Past Beginner Guide: Your First Ten Hours
A Link to the Past hands you a sword and a rainstorm and then says almost nothing else. Here is the route, the combat, and the item order that turn a confusing first hour into a game you can actually finish.
A Link to the Past Dark World Guide: Crystals, Mirror Tricks, and the Stuff Nobody Tells You
Agahnim drops you on top of a golden pyramid with no map, no explanation, and seven crystals to find. Here is how the Dark World is actually laid out, what gates what, and which detours are worth taking before Ganon Tower.