Fortnite Mobility Items Guide: What to Carry and When to Use It
A mobility item slot is often worth more than a third weapon, and most players either ignore it or waste the item the second they pick it up. Here's how launch pads, shockwaves, grapplers, rifts and the rest actually work, which to carry, and when to pull the trigger.
Watch any late-game death where someone gets caught in the open and you'll usually find the same thing in their inventory: a mobility item they never used. They hoarded the launch pad "for emergencies," got third-partied crossing a field, and went down with the emergency tool still sitting in slot five. Mobility items don't lose you games by being used badly — they lose you games by being treated as clutter you forget you're carrying.
Here's the framing that fixes it: a mobility item is a loadout slot you actively spend, the same way you spend a heal or a wall. It's the tool that turns a brutal storm rotation into a five-second hop, pulls you out of a losing fight, or drops you on top of someone who thought they were safe. This guide walks the whole category — launch pads, shockwaves, grapplers, rifts, vehicles — what each one is for, what to carry, and the part most players whiff: when to actually pull the trigger. We're sticking to the item types and how they behave, because the exact mobility pool rotates every season; check the season's items in-game, but the jobs they do are the same ones that have existed for years.
Mobility is a loadout slot, not an afterthought
Your inventory has five slots and every one of them is a decision. Most players spend four on guns and heals and let the fifth fill with whatever they tripped over. That's backwards. In the back half of a match, the thing most likely to kill you isn't a missing third gun — it's getting stranded in the open with no way to cross danger fast. A mobility slot answers that directly, which is why a movement item is frequently worth more than that third weapon.
What mobility actually buys you breaks down into three jobs, and every item in the category is some mix of them:
- Rotation — covering long, dangerous ground fast so you reach the next zone alive instead of jogging across a field that everyone on the high ground can see.
- Escape — breaking a sightline or leaving a fight you're losing before it becomes a death. Disengaging is a skill, and mobility is the tool that makes disengaging possible.
- Aggression — closing distance onto someone, taking high ground, or repositioning into a fight on your terms instead of theirs.
The mistake isn't carrying mobility; it's not knowing which job your item does best and saving it forever for a moment that never comes "perfect." Pick the item that matches how you play, then spend it on purpose.
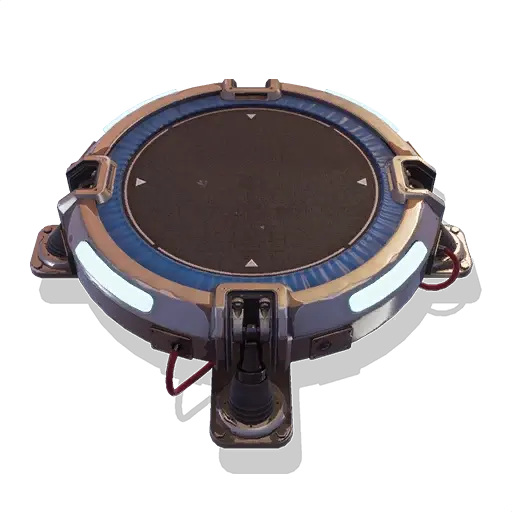
Launch pads: the long-rotation king
The launch pad is the original rotation tool and still the gold standard for distance. You deploy it on a flat surface (or on top of a build), jump on, and get bounced high into the air, redeploying your glider for a long, fast glide across the map. Nothing else in the category covers raw ground like a launch pad.
What it's best at: the long storm rotation. When the zone pulls hard across the map and you're on the wrong side, a launch pad turns an un-survivable run into a glide that crosses the whole danger zone in seconds. It's the answer to "there's no way I make that on foot."
The catches, and they matter:
- You're exposed and loud in the air. A glider redeploy is a giant flare announcing your position to the entire lobby. Use launch pads to cross empty sky, not to fly directly over a stacked endgame where four people will track you down.
- You need a surface to place it. In Build you can pad off your own floor anywhere; in Zero Build you need suitable ground, so scout your placement before you commit.
- It's a commitment. Once you're airborne you're going where momentum takes you. Don't pad without knowing roughly where you'll land.
Carry a launch pad when you expect long rotations — big maps, fast-pulling zones, or any time you're routinely caught far from the next circle.
Shockwaves: the fight-and-escape tool
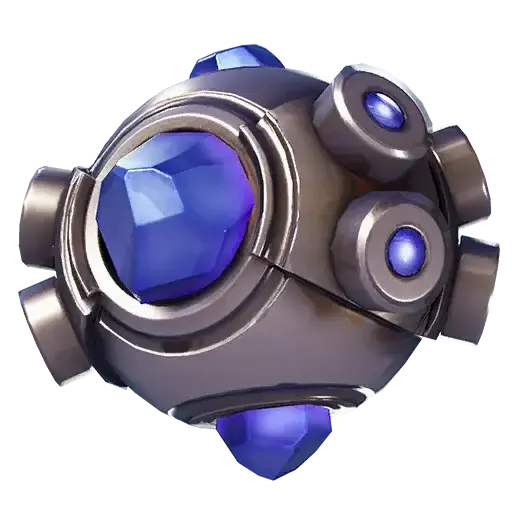
Shockwave-style grenades are the most flexible mobility item in the game and the one good players reach for most. You throw it, it detonates, and it launches anything caught in the blast — including you — a big distance, crucially without fall damage. That last part is what makes it special: you can shock yourself off a cliff, across a gap, or out of a box and land safely.
Why it's the do-everything pick:
- Escape. Losing a fight? Shock yourself backward over cover and you're gone before they can follow. It's the cleanest disengage tool in the game.
- Reposition mid-fight. Shock onto high ground, behind an opponent, or out of a bad angle to flip a fight you were losing.
- Short rotations. Two or three shocks chain you across terrain fast — not launch-pad distance, but precise and repeatable.
- Offense. You can shock enemies off high ground or out of a building to disrupt their position.
The trade-off versus a launch pad is distance for control: shockwaves move you less far but exactly where you aim them, and you can carry several. The skill curve is real — learning to aim the throw at your feet and time the jump takes practice — but a stack of shockwaves is the single most useful mobility you can hold for fighting. If your style is aggressive, this is your item.
Grapplers and pull items: the aggression tool
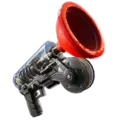
Grapple-style items fire a hook or tether that yanks you rapidly toward whatever you aim at — a surface, a build, a cliff. Where launch pads are about distance and shockwaves about flexible bursts, grapplers are about speed and aggression on demand. They're the closest thing Fortnite has to a movement weapon.
What they're best at:
- Closing distance. Grapple onto an opponent's position to be in their face before they've finished reacting. It rewards aggressive players who want to dictate the fight.
- Taking high ground. Hook up to a roof, a ledge, or a tall build to win the elevation battle instantly.
- Chaining traversal. Skilled players grapple-to-grapple across the map at a pace nothing else matches, swinging from anchor to anchor.
The catch is that grapplers usually have limited charges and need a target to pull toward — they're useless in a flat, featureless field with nothing to hook. They also pull you toward danger as easily as away from it, so an aggressive tool in panicky hands becomes a fast trip into a crossfire. Carry a grappler when you want to play forward and force fights; it's a worse pure-escape tool than a shockwave but a far better engage.
Rifts and teleports: the panic button
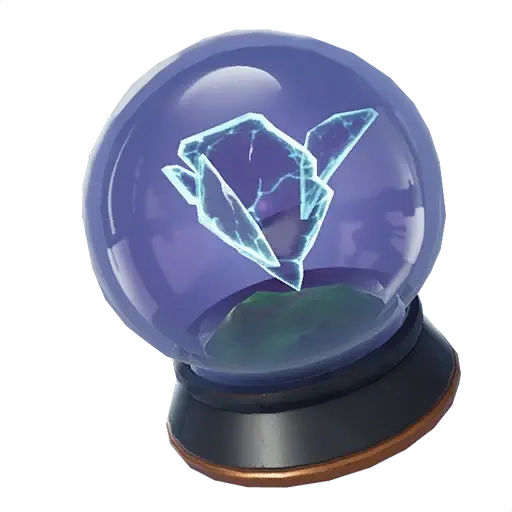
Rift-style items (the deployable Rift-To-Go being the classic) tear open a portal that sucks you up and drops you into a glider redeploy, resetting your position much like a launch pad — but on demand, anywhere, instantly. No surface to place, no setup. You hit it and you're out.
That makes it the premier panic button. When a fight goes sideways and you need to be somewhere else right now, a rift is the fastest hard reset in the game. It's the item you hold for the "oh no" moment — surrounded, low, third-partied — when you'd trade your whole inventory just to be airborne and elsewhere.
The downsides mirror the launch pad: you redeploy your glider, so you're loud and exposed in the sky, and you give up control of exactly where you land. Where it beats the pad is immediacy and the lack of placement — you can rift out of a box, off open ground, mid-panic, with no flat surface required. Carry a rift (or similar instant-teleport item) as your dedicated escape insurance, and unlike the launch pad you actually should save this one for emergencies — that's the job.
Vehicles and the rest of the pool
Beyond the throwables and deployables, the mobility pool usually includes some form of vehicle — cars, or whatever the season's ride happens to be. Vehicles do a different job: they carry a whole squad across the map, provide cover while you drive, and let you reposition the group without anyone crossing the open on foot. The trade-off is noise — a vehicle is the loudest thing in the lobby and a giant target — so they shine for early-to-mid rotations and get risky in a quiet, stacked endgame.
The rest of the category rotates constantly: bounce-style items, seasonal traversal gadgets, map features like geysers or zip-lines, and one-off limited-time movement tools. Don't memorize a specific season's gimmick — slot any new mobility item into the same three-job framework. Ask: is this thing a rotation tool (distance, like a pad), an escape tool (instant reset, like a rift), or a fight tool (flexible burst or engage, like a shockwave or grappler)? Once you know the job, you know when to use it, regardless of what Epic calls it this patch.
What to carry and when to use it
The honest answer to "what should I carry" is one or two mobility items, matched to the stage of the game and how you play. Here's the framework:
| Item type | Best job | Carry it when | The mistake to avoid |
|---|---|---|---|
| Launch pad | Long rotation | Zones pull far, you're often caught out | Flying over a stacked endgame and getting tracked |
| Shockwave | Escape + flexible burst | Almost always — the do-everything pick | Hoarding them instead of spending in fights |
| Grappler | Aggression / engage | You play forward and force fights | Pulling yourself into a crossfire |
| Rift-To-Go | Instant escape | As panic-button insurance | Wasting it on a rotation a pad could do |
| Vehicle | Squad rotation | Early-mid game, moving the group | Driving loud into a quiet endgame |
On when to actually use it, the rules are simple and most players break all of them:
- Spend rotation tools before the open crossing, not after you're already taking fire. The pad is for the field you can see coming, not the one you're already dying in.
- Hold one escape item into the endgame. A shockwave or rift saved for the late-game panic moment is worth more than one burned early on a rotation a different item could've handled.
- Use aggression tools to start fights you've decided to take, not to flee — they're bad at fleeing.
- Never finish a match with unused mobility. If you died holding a launch pad, you misplayed the item, full stop. It's a resource to spend, not a trophy.
Mobility in Build vs Zero Build
The items are the same across modes, but how much you lean on them is not. In Build mode, your walls and ramps are a form of mobility — you can ramp-rush across ground, wall off a sightline mid-rotation, and build to high ground without spending an item. Mobility items there are a supplement: great for the long rotations builds can't cover and for resets, but you have a backup if you're out of them.
In Zero Build, the walls aren't coming. The map's existing cover plus your mobility items are all you get to cross danger, escape fights, and contest high ground. That makes a mobility slot far more valuable in Zero Build — it's not a luxury, it's load-bearing. Our Zero Build guide goes deep on cover and movement without walls, and the rotation guide covers how mobility plugs into reading the zone in both modes. Either way, the discipline is the same: carry the item, know its job, and spend it on purpose before the open crossing kills you.
Quick Action Checklist
The mobility habits that keep you alive:
- Treat a mobility item as a real loadout slot — often worth more than a third gun in the late game
- Know each item's job: pad = long rotation, shockwave = escape/flex, grappler = aggression, rift = panic reset, vehicle = squad rotation
- Carry a shockwave-type item if you can — it's the most flexible mobility in the game
- Hold one escape item into the endgame for the panic moment
- Spend rotation tools before the open crossing, not after you're already taking fire
- Use grapplers to engage, not to flee — they're bad at running away
- Slot any new seasonal item into the three-job framework (rotation / escape / fight)
- Lean harder on mobility in Zero Build — it's load-bearing, not a luxury
- Never die with unused mobility — that's a misplay, not a saved emergency
Frequently Asked Questions
Keep Reading
Related Guides

Fortnite Bots Explained: How to Spot One in Three Seconds
You just cracked someone for 150 and they walked into your build like it owed them money. Was that a bad player or a bot? Fortnite bots follow a fixed username list and a hard-coded list of things they will never do — once you know the tells, you can call it before the fight starts.
Fortnite Crosshair Placement Guide: Aim Less, Hit More
The best aimers in Fortnite barely move their crosshair — it's already where the enemy's head is going to be. Here's how crosshair placement works, why it beats raw flick speed, and how to drill it into muscle memory.
Fortnite Ping and Packet Loss: Why You Die Behind Cover
Your wall went up, your edit reset, your shot connected — and the server disagreed with all three. Here's how to read your ping and packet loss in-game, test it against Epic's own servers, and fix the parts you actually control.
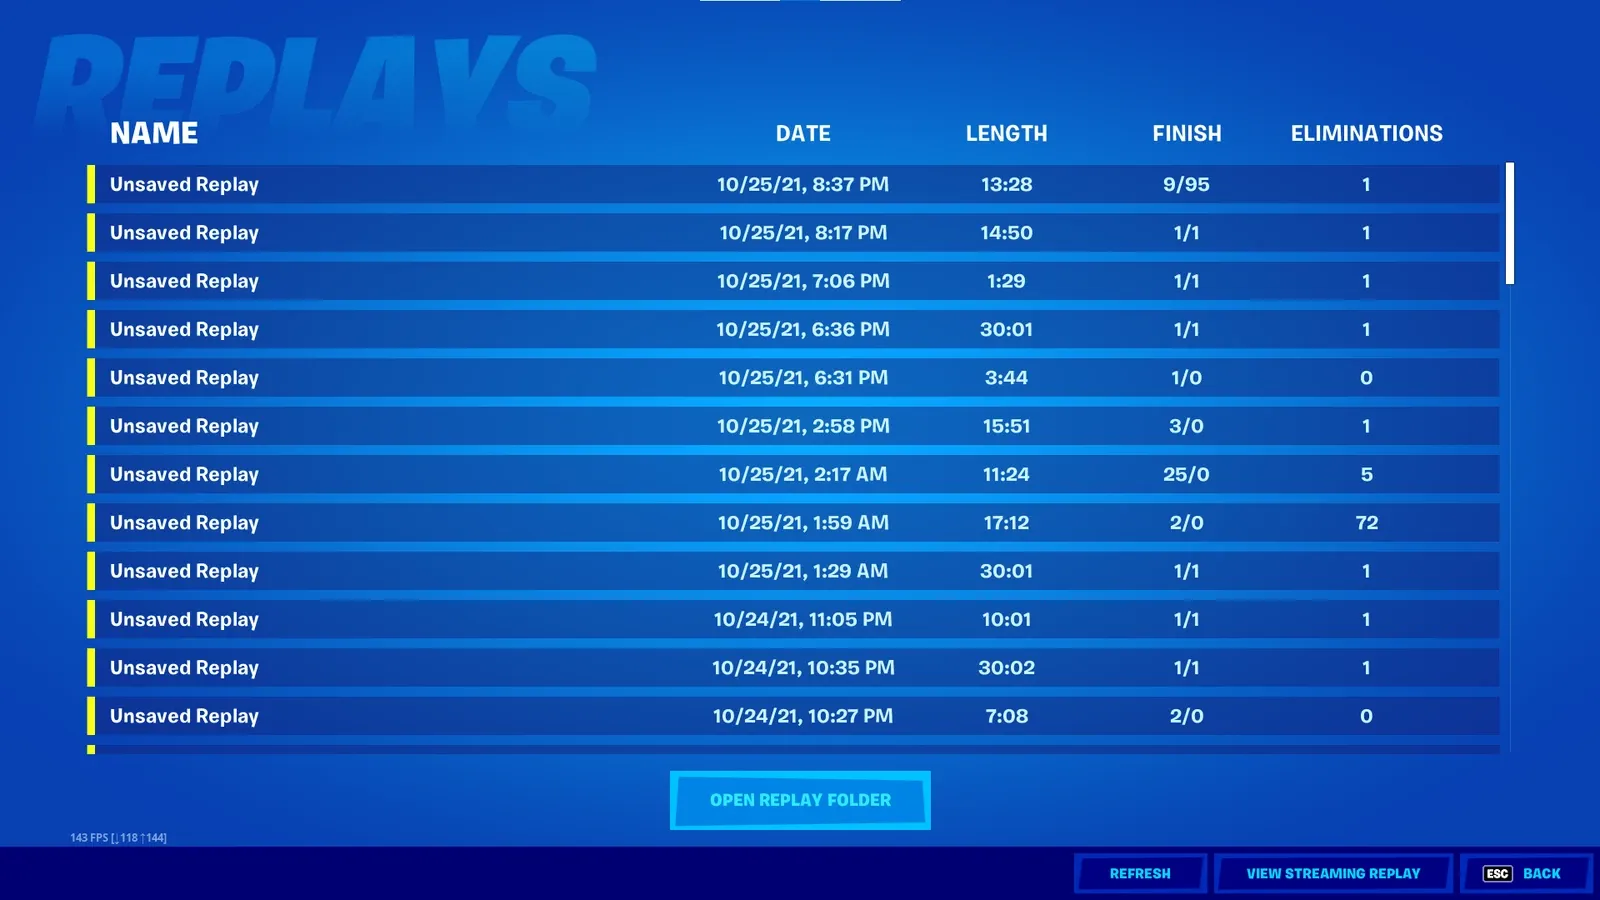
Fortnite Replay Mode: How to VOD Review Your Own Deaths
Fortnite records your matches automatically and almost nobody watches them. Replay Mode is the cheapest improvement tool in the game — here's how it works, what its 250-meter bubble hides from you, and the four questions to answer on every death.
Fortnite Weapon Tier List: How to Rank Any Loot Pool
Any Fortnite tier list is stale the second a patch drops. So instead of memorizing this season's gun names, learn how to rank weapons by class and role — the framework that's S-tier in every season.
Best Fortnite Settings for PC & Console
Half your settings menu is noise; a handful of options decide whether you can see, aim, and build. Here's what to change on PC and console, why, and the one number nobody else can pick for you.