Super Mario 64 Cool Cool Mountain Guide: All 7 Stars
Cool, Cool Mountain has two wrong answers built into it: two baby penguins, of which only the one at the summit is the one the Mother Penguin accepts, and a slide shortcut the game actively watches for during the Big Penguin Race. Here is every star, both traps, the full coin breakdown, and what the DS remake changes.
Super Mario 64 runs an anti-cheat check on a penguin race. Not a metaphor — the Super Mario Wiki documents two separate mechanisms the Big Penguin Race uses to decide you skipped part of the slide, and one of them is a timer that counts how long Mario has been in the air.
That is the tone of the whole course. Cool, Cool Mountain looks like the friendly fourth stop after Bob-omb Battlefield, Whomp's Fortress and Jolly Roger Bay. Bob-omb Battlefield already withholds a star if you jump in a cannon during Koopa the Quick's footrace; Cool, Cool Mountain goes further and runs two separate checks on how you came down the slide. It also puts two baby penguins on the mountain and only accepts one of them.
Here is every star, both of those traps, the full 154-coin breakdown, and what the DS version changes.
The room with three paintings, and the one that works
Cool, Cool Mountain is the fourth course, behind a ★ door needing 3 Power Stars on the first floor of the Mushroom Castle, near the room that holds the Bob-omb Battlefield entrance. The beginner guide walks the castle door order end to end.
One detail worth having before you walk in: the room has three paintings, and per the Super Mario Wiki only the centre one is the course. The other two are decoration. Ukikipedia's wording is looser — it points you at the room near the Bob-omb Battlefield door rather than at which of the three paintings works — so take the Super Mario Wiki's centre-painting detail as the specific one.
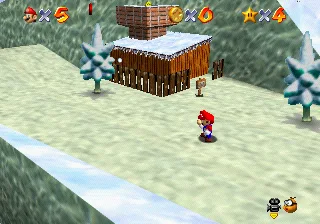
Inside, you start at the top of the mountain beside a cottage. The cottage has no door: the chimney is the entrance, and it drops you onto the slide. Behind the cottage is a platform with a Spindrift and the snowball you need for the fifth mission. To the right is a broken bridge that warps you to the bottom. To the left is the exterior slide down the mountain's face.
There are two baby penguins, and only one is Tuxie
The mission has a wrong answer that looks like the right one, so it goes above the star list.
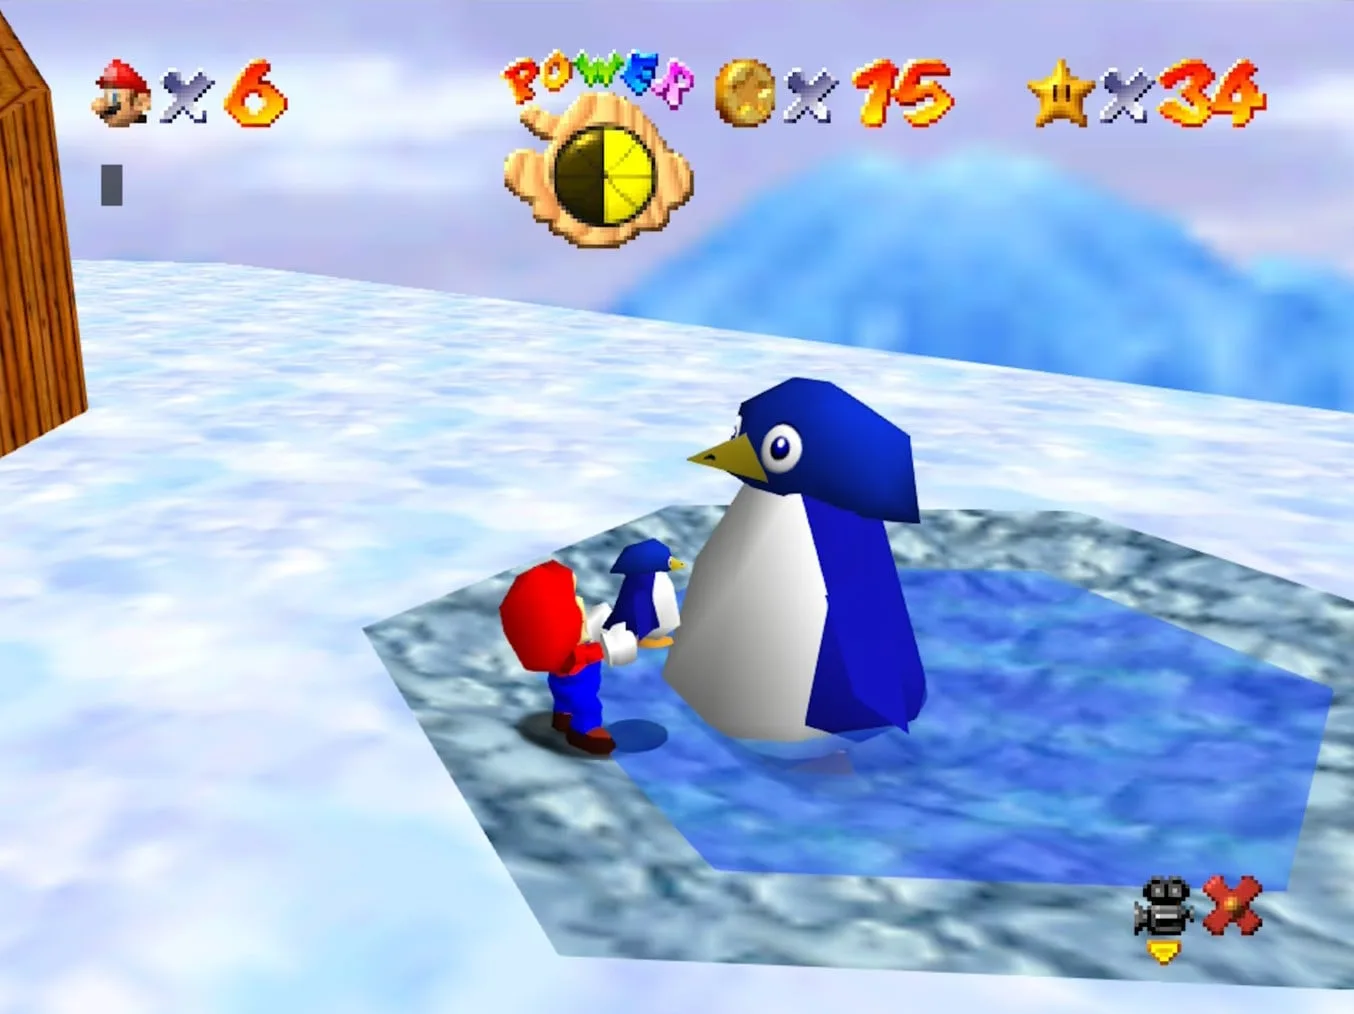
The Mother Penguin sits in water at the bottom of the mountain. She tells you her baby has her beak, and that she last stopped for herring and ice cubes. There are two baby penguins in the level, and the Super Mario Wiki is explicit about which is which:
| Penguin | Where it is | What the Mother Penguin does |
|---|---|---|
| Tuxie — the correct one | At the top of the mountain, above the slide entrance, near where you start | Gives you the Power Star |
| The other baby | On the roof of the cabin at the interior slide's one-way exit, right beside the Mother Penguin | Refuses it — says the baby is not hers and that its parents must be worried |
The wrong one is the one nearest her. The Super Mario Wiki puts it on the roof of the cabin the interior slide empties out of, a few steps from her pond; Tuxie is the long carry from the summit.
Two follow-ons from the same page. If you pick Tuxie back up after the star has appeared, the Mother Penguin turns angry and chases you until you put the penguin down — though she does not follow past the edge of her pond. And in the DS version, this mission cannot be done as Yoshi without first grabbing a cap, because Yoshi cannot pick objects up conventionally; eat a baby penguin and he spits it straight back out.
The slide, its two shortcuts, and the cheat detector
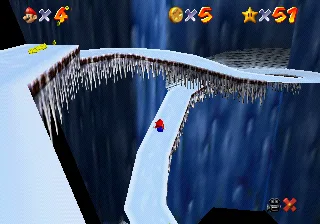
The interior slide — the Super Mario Wiki calls it the Cabin's Snow Slide — is where two of the seven stars are won, and where half the course's coins sit. The game has three slides — the Princess's Secret Slide, this one, and Tall, Tall Mountain's Mysterious Mountain Slide — and of those three the wiki names this as the one with an intentional shortcut: a trail of five yellow coins leading into a fake wall, opening into a tunnel with no obstacles that drops you near the end.
There is a second, faster skip documented for Slip Slidin' Away: jump or fall off the right ledge immediately after you start sliding, and you drop the whole way down, landing in a dive right in front of the final tunnel.
Both are fine when you are just doing the slide. During the Big Penguin Race, both count as cheating — the wiki lists "skipping part of the course by jumping down" and "taking the hidden path inside the wall" together as things that get you disqualified. What is interesting is how the game knows.
| Detection method | How it works | What it means for you |
|---|---|---|
| Invisible trigger | A trigger sits inside the hidden path | It stays active after the race ends, so jump-kicking back up the slide and through the tunnel afterwards still gets you accused |
| Airtime timer | Counts up while Mario is airborne, resets when he lands. Two seconds airborne during the race is treated as a skip | It stays active until the Big Penguin finishes, so a wall kick and ground pound past the finish line can still disqualify you after you have won |
The consequence is a legal shortcut. Because the timer only fires at two seconds, the wiki notes you can slide off to the right on the turn immediately before the hidden path — that drop takes under two seconds of airtime, so the Big Penguin does not object.
One more thing about this slide that separates it from the Princess's Secret Slide: falling off costs a life. The Princess's slide does not. And the last stretch is a thin bridge of sheer ice with nothing at the sides.
The physics underneath all of this — why jamming the stick does nothing on a body slide, and why steering is the only input that matters — is in the movement guide.
The seven stars, mission by mission
Six numbered missions plus the 100-coin star. No boss: the boss guide lists Cool, Cool Mountain among the courses with no fight in them.
Slip Slidin' Away
Enter the chimney, ride the slide to the bottom, leave through the door at the end. The star flies out the door and lands in front of you.
The useful N64 quirk: the Super Mario Wiki records that on N64 this star appears regardless of which mission you selected. On DS you must have this mission selected, because otherwise the Big Penguin is in the cottage and the race takes over.
Li'l Penguin Lost
Take Tuxie — the penguin at the top, above the slide entrance — down to the Mother Penguin at the base. Not the one loitering next to her.
The carry route matters more than the pickup. You cannot use the broken-bridge warp while holding a penguin, so this is a walk or a controlled slide down the mountain face.
Big Penguin Race
Talk to the Big Penguin in the cottage, accept, and beat him down the slide without triggering either detector above. On N64 this mission is only attemptable once Slip Slidin' Away is done.
Win it legitimately and he congratulates you on breaking his record and hands over the star. There is a postscript: once you have all 120 Power Stars, the Big Penguin becomes massive — the wiki's word is "out of shape" — and harder to beat. There is no second star for the rematch, only more praise.
Frosty Slide for 8 Red Coins
Eight red coins spread across the mountain, none of them inside the interior slide despite the mission's name. The Super Mario Wiki's N64 placements:
| # | Location |
|---|---|
| 1 | On the tree near the interior slide's entrance, in front of where you start |
| 2 | At the bottom of the exterior slide, just before the Headless Snowman's head |
| 3 | At the end of a broken bridge not far from the head |
| 4 | Next to the warp to the top, near the Mother Penguin |
| 5 | At the edge of the level, not far from coin 4 |
| 6 | On a tree near the slide's exit |
| 7 | At the top of the two ropes the gondola runs on |
| 8 | On a platform next to a yellow ! block and an Ice Block |
The star appears at the Star Marker on the opposite side of the broken bridge that holds coin 3.
Coin 7 is the awkward one. Ukikipedia's 0-A-press writeup says seven of the eight need no tricky technique and the ski-lift coin does, because the walls around that platform are too high to dive-recover onto — the original solution being to start the lift, warp back to the top of the stage, take the coin, and land back on the lift as it descends.
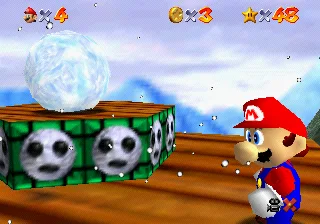
Snowman's Lost His Head
This one only works if you select mission 5 from the menu. The snowball body does not exist in any other version of the course.
Head left from where Tuxie stands and you find a snowball on a platform that tells you it wants a new head. You then escort it down the slope to the Headless Snowman at the bottom of the exterior slide. Escort is the right word: you have to stay in front of the snowball and remain in its field of view the whole way, passing through the row of coins at the narrow section. Break line of sight and it wanders off the course — the wiki notes it can end up in the cannon.
The head sits on its own pedestal partway down; get the body to it and the snowman pays out the star.
Wall Kicks Will Work
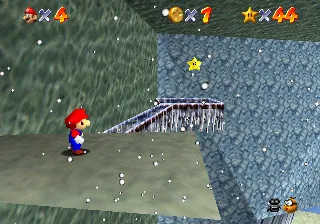
The star is across a large gap, up a crevice you wall-kick. The Super Mario Wiki gives three ways across the gap:
- The cannon at the base of the mountain near the slide's exit cabin. Like every cannon in the game it needs a Bob-omb Buddy first, and this one is on the small floating island along the gondola's path, just left of the cannon. Fire yourself at the tree on the far side so you do not slide off the platform on landing.
- A Spindrift, and float down.
- Falling to the bottom at the start of the level and landing on the far side of the pit.
From there: a narrow cliff with a couple of Spindrifts, a long jump across a pit, then run up the first slope and wall-kick to a second sloped platform. Run the other way up that one, triple jump, and wall-kick at the apex. Then cross the narrow ice bridge to the star.
There is a Spinning Heart at the base of the crevice if the approach cost you health — the same one catalogued in the health guide.
100 Coins
The Player's Guide named this one Dough in the Snow. The course holds 154 coins, which the 100-coin stars guide ranks as one of the roomiest margins in the game at 54 spare.
The margin is real but the geography is not free, and the coin table below is why. Add Ukikipedia's rows up and the course splits almost exactly in half: 77 coins inside the slide, 77 on the mountain. Neither half reaches 100 on its own. You are doing both areas whichever way you route it.
Ukikipedia's 0-A route does the obvious thing with that: take the slide's 72 yellow coins, then ride the exterior slope down the mountain, and the counter tips over 100 outside.
Three course versions, and which stars need which
Ukikipedia lists three versions of Cool, Cool Mountain, chosen by the star you pick from the menu.
| Version | Selected from | What is different |
|---|---|---|
| Version 1 | Star 1 | The Big Penguin is not there to challenge you |
| Version 2 | Stars 2, 3, 4 and 6 | The Big Penguin is present and offers the race |
| Version 3 | Star 5 | As Version 2, plus the snowball body for the Headless Snowman |
One star-select rule governs which of the three you get: if there are uncollected blue stars in the star-select menu, the last version you can select is the first blue star, not anything after it. Ukikipedia's RTA guide spells out the practical effect — Version 3 is reachable only once stars 1 through 4 are done. Its Coinless Challenge notes take that further: because star 4 is the red coin star, Snowman's Lost His Head cannot be collected at all in a full-game Coinless run.
Ukikipedia's own 120-star route, for reference, is not the mission order:
| Order | Star |
|---|---|
| 1 | Wall Kicks Will Work |
| 2 | Frosty Slide for 8 Red Coins |
| 3 | Li'l Penguin Lost |
| 4 | Slip Slidin' Away |
| 5 | Big Penguin Race + 100 Coins |
| 6 | Snowman's Lost His Head |
Big Penguin Race and 100 Coins pair for the same reason the slide is half the coins. Snowman's Lost His Head goes last because its version needs the others banked first.
Where the 154 coins live
Ukikipedia's breakdown for course four:
| Location | Coins |
|---|---|
| Coins on the slide | 72 |
| Vertical line of coins into the chimney | 5 |
| Line of coins near the top of the mountain | 5 |
| Line of coins between fences, on the snowman's head route | 5 |
| Two lines of coins later on the snowman's head route | 10 |
| Arrow of coins near Wall Kicks Will Work | 8 |
| 5 Spindrifts | 15 |
| Mr. Blizzard | 3 |
| 8 Red Coins | 16 |
| Blue Coin Block | 10 |
| Blue Coin at the start of the slide | 5 |
| Total | 154 |
Three things fall out of adding that up.
The 77/77 split. Slide: 72 yellow plus the blue coin at its start, worth 5. Mountain: everything else, also 77. Ukikipedia describes the placement as unusual for exactly this reason.
18 of the coins are enemy drops. Five Spindrifts at three coins each, plus three from a Mr. Blizzard. They are not lying on the ground waiting; you have to kill things.
One of the blue coins runs away. The Super Mario Wiki's Blue Coin article records that the blue coins in the Cool, Cool Mountain and Tall, Tall Mountain slides move away from Mario as he approaches, unlike the stationary yellow coins around them. Cool, Cool Mountain has one of them; the Tall, Tall Mountain guide covers the three on the other slide.
The warp that will not carry a penguin
The broken bridge at the top of the mountain warps you to the L-shaped bridge to the right of the house at the bottom.
It also will not activate while you are carrying a baby penguin, which is the whole difficulty of Li'l Penguin Lost. Everything about that mission is the descent, not the search.
Cannons, hearts and six 1-Ups, one of them broken
- Three cannons. The Super Mario Wiki lists Cool, Cool Mountain alongside Bob-omb Battlefield and Over the Rainbows as courses carrying more than one — and notes that every star here is obtainable without firing any of them. Ukikipedia's Capless/Cannonless Challenge agrees: all seven stars clear.
- One Spinning Heart, underneath the star 6 platform, before the wall-kicking starts.
- No cap blocks at all. No Wing, Metal or Vanish Cap in this course — see the cap guide for where they actually are.
- Six 1-Up Mushrooms. One homing 1-Up in a tree by the Headless Snowman's head, with the trigger on the side of the tree facing the snowman. Two static ones in the slide shortcut. Three in boxes: near a red coin by the Ice Block above and behind the snowman's head, on a platform after the shortcut, and near the head itself.
One of those two static 1-Ups is a genuine bug rather than a hiding place. The Super Mario Wiki records that it clips out of bounds before you can reach it, making it uncollectable without glitches on N64. It was fixed in Super Mario 64 DS.
What the A Button Challenge did up here
Ukikipedia's A-press table for Cool, Cool Mountain reads zero A presses for all seven stars — the same as its Bob-omb Battlefield and Whomp's Fortress tables, and unlike Jolly Roger Bay, which still needs half an A press for Treasure of the Ocean Cave. Its trivia note adds the historical bit — this was the first main course to be solved entirely in 0 A presses, in 2011.
Two of those solutions are worth knowing even if you never attempt the challenge, because they are measurements of the level:
- The Slip Slidin' Away star sits 257 units above the ground, which is inside the range of a precise dive recover.
- The Li'l Penguin Lost star sits above the 288-unit dive-recover ceiling, so the 0-A route has to use vertical wind or warp to the top and drop onto it from above.
The rest of the challenge board:
| Challenge | Result in Cool, Cool Mountain |
|---|---|
| A Button Challenge | All seven stars at 0 A presses |
| B Button Challenge | Whole course at 0 B presses; Li'l Penguin Lost needs the baby led into the vertical wind |
| Z Button Challenge | Whole course at 0 Z presses |
| Pacifist Challenge | All seven stars |
| Capless/Cannonless | All seven stars |
| No Buttons Allowed | Slip Slidin' Away, Frosty Slide, Wall Kicks Will Work, 100 Coins |
| No Joystick Allowed | Li'l Penguin Lost, Frosty Slide, Snowman's Lost His Head, 100 Coins |
| UBER Challenge | Slip Slidin' Away and Wall Kicks Will Work |
A version footnote inside that table: on JP 1.0, the B-press-free Wall Kicks Will Work needs a precise jump from above specifically to avoid opening the cannon. The full version-by-version picture is in the version differences post.
Still unsolved here, per Ukikipedia: getting more coins than intended, reaching a Parallel Universe from either area, grabbing the second baby penguin without pressing B, and getting hurt by a penguin.
What Super Mario 64 DS changes
| N64 | Super Mario 64 DS | |
|---|---|---|
| Stars | 7 | 8 — adds Switch Star of Cool, Cool Mountain |
| Slip Slidin' Away | Star appears whichever mission is selected | Must select that mission, or the Big Penguin is present instead |
| Red coins | All eight collectable as Mario | Two are encased in Ice and need Yoshi's fire breath; some locations moved |
| Li'l Penguin Lost | Any character with pickup | Yoshi needs a cap first; the wrong baby no longer cries when picked up |
| Wall Kicks Will Work | Wall kicks | Only Mario by the intended route; Yoshi flutters, Luigi somersaults, Wario triple jumps and dives. The final bridge is widened |
| Big Penguin Race | Shortcut or 2s airtime = cheating | Luigi's Backward Somersault also counts as cheating |
| Slide shortcut 1-Up | One clips out of bounds, uncollectable | Fixed |
| Empty snowfield at the base | One red coin | Adds three Goombas wearing the characters' caps |
| Coin ceiling | 154 in the course | 255 reachable by re-entering the cabin and farming Goombas and Bricks |
| Mother Penguin's pond | Water | Frozen, with her standing beside it |
The DS red coin change is the one that reshapes a mission rather than tweaking it: on N64 Frosty Slide is a pure route problem, and on DS it becomes character-gated.
Mistakes this course punishes
- Handing over the baby penguin beside the Mother Penguin, on the cabin at the slide's exit. That is the wrong one. Tuxie is at the top of the mountain, above the slide entrance.
- Taking the hidden path during the race. The trigger inside it is permanent — it will still accuse you after the race is over.
- Jumping down the slide to save time during the race. Two seconds of airtime is the threshold, and it is checked until the Big Penguin crosses the line, not until you do.
- Trying to warp down while holding a penguin. It does not fire.
- Attempting Snowman's Lost His Head from any mission but star 5. The snowball body only exists in that version.
- Getting behind the snowball. It follows what it can see. Stay in front of it and take the coin line at the narrow section.
- Falling off the interior slide. Unlike the Princess's Secret Slide, this one costs a life.
- Expecting to clear 100 coins in one area. Both halves are 77.
Quick Action Checklist
- 3 Power Stars opens the ★ door; the centre painting of the three in that room is the course.
- Tuxie is at the summit above the slide entrance. The penguin near the mother is a decoy.
- No warp while carrying a penguin.
- Slide shortcuts: the coin trail into the fake wall, and the drop off the right ledge at the start. Neither is legal during the race.
- The race-legal skip is sliding off right on the turn before the hidden path — under two seconds of air.
- Select star 5 for Snowman's Lost His Head, and stay in front of the snowball.
- Wall Kicks Will Work: Bob-omb Buddy on the floating island, cannon at the base, aim for the tree.
- 154 coins, split 77 in the slide and 77 outside. Do both.
Frequently Asked Questions
How many stars are in Cool, Cool Mountain in Super Mario 64?
Which baby penguin is the right one in Li'l Penguin Lost?
Why does the Big Penguin say I cheated in Super Mario 64?
Is there a legal shortcut in the Big Penguin Race?
How many coins are in Cool, Cool Mountain?
How do you get the snowman's body to the head in Super Mario 64?
Do you need the cannon for Wall Kicks Will Work?
Keep Reading
- Cool, Cool Mountain — Super Mario Wiki
- Cool, Cool Mountain — Ukikipedia
- RTA Guide: Cool, Cool Mountain — Ukikipedia
- Slide (Super Mario 64) — Super Mario Wiki
- Big Penguin Race — Super Mario Wiki
- Li'l Penguin Lost — Super Mario Wiki
- Mother Penguin — Super Mario Wiki
- Baby Penguin — Super Mario Wiki
- Snowman's Lost His Head — Super Mario Wiki
- Frosty Slide for 8 Red Coins — Super Mario Wiki
- Wall Kicks Will Work / Mario's Super Wall Kick — Super Mario Wiki
- Blue Coin — Super Mario Wiki
Related Guides
Super Mario 64 Music: Every Track and Where It Plays
Super Mario 64 scores 15 courses with seven songs, and only one of them belongs to a single course. Here is which track plays in every course and secret level, the five levels whose music rearranges itself as Mario moves, what triggers the boss music and the jingles, all 36 soundtrack tracks under their 1996 and current names, and where to listen today.
Super Mario 64 Bowser Levels Guide: All 24 Red Coins
Bowser in the Dark World, the Fire Sea and the Sky each hide one Power Star behind eight red coins on the obstacle course in front of the fight. Here is the route through all three, where every red coin sits, and what else the level data holds.
Super Mario 64 120-Star Reward: Yoshi and the Castle Roof
Super Mario 64 does not announce your 120th Power Star. The reward is outside: a cannon grate that stops loading, Yoshi on the castle roof, and a gift that quietly resets the next time you load your file. Here is what 120 stars changes, checked against the wikis and the decompiled code.
Super Mario 64 Snowman's Land Guide: All 7 Stars
Snowman's Land looks like the throwaway snow level, and the wiki record on it backs that read up in one specific way: it is the only one of the game's 15 main courses with no Blue Coins at all. What it does have is two freezing ponds that hurt you in two different ways, an enemy species that appears nowhere else in the game, and a cap-stealing snowman nobody warns you about. Here is every star, the full 127-coin breakdown, and the course's last remaining gap in this vertical.
Super Mario 64 Beginner Guide: Your First 30 Power Stars
Super Mario 64 does not gate you on difficulty, it gates you on Power Stars. Here is exactly which doors need what, which stars are fastest to grab, and the route that gets a first-timer from one star to thirty without wandering the castle in circles.
Super Mario 64 Jolly Roger Bay Guide: All 7 Stars
Jolly Roger Bay is the only main course in Super Mario 64 with no Star Marker, and it hides two separate treasure chest puzzles that open in two different orders. Here is every star for both games, the eel you have to lure out twice, the version that only exists after you've earned the first star, the full 104-coin breakdown, and the mission order Super Mario 64 DS actually reshuffles rather than just extends.