Super Mario 64 Tall, Tall Mountain Guide: All 6 Stars and the Hidden Slide
The Power Star at the bottom of Tall, Tall Mountain's secret slide does not require the slide — on N64 a backward somersault from the ledge above drops you straight into the alcove. You still cannot ignore the thing, because 62 of the course's 137 coins are inside it. Here is every star, the whole climb, and the coin table.
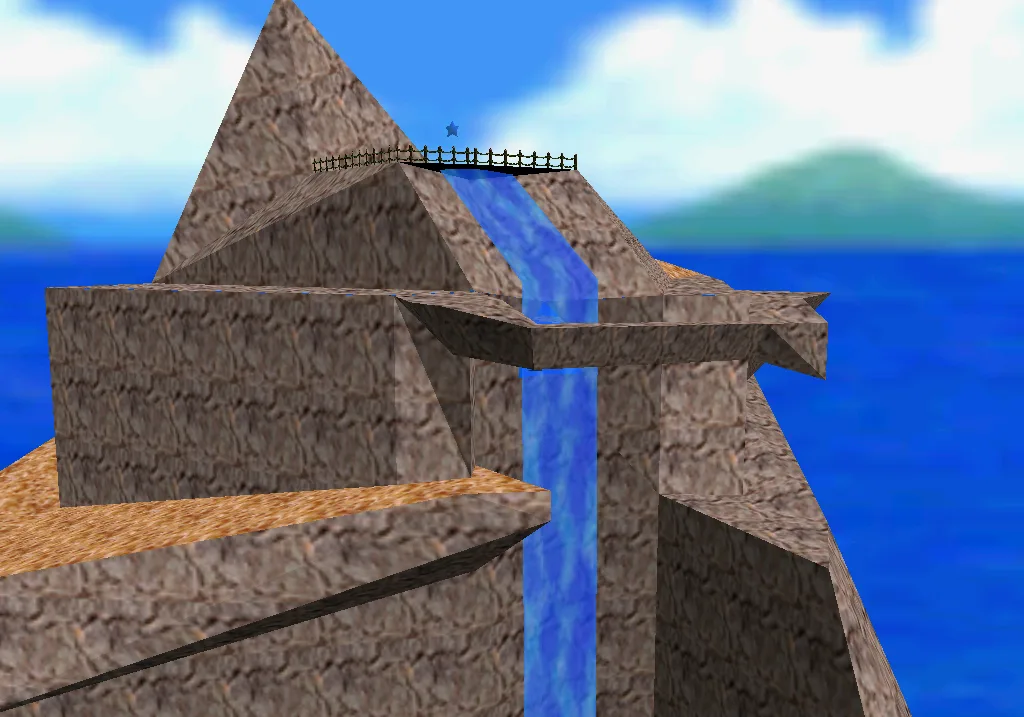
The Power Star at the bottom of Tall, Tall Mountain's secret slide does not require the slide.
In the N64 original that star sits in an alcove behind a small fence, and the ledge directly above it is close enough that a backward somersault drops you in — the twisting tunnel, the trick path and the two-minute descent, all skipped. The Super Mario Wiki flags the fence in Super Mario 64 DS as covering the entire alcove, "presumably to prevent the player from performing such actions." Somebody at Nintendo noticed.
And yet you cannot leave the slide alone, because 62 of this course's 137 coins are inside it. That is the shape of course twelve: a long vertical climb whose one big set piece is optional for one star and mandatory for another.
Getting in, and the 31-star floor
The entrance is a small painting of mushrooms on the second floor of the Mushroom Castle, directly behind the staircase — the same gallery that holds the Skeeter painting for Wet-Dry World.
The floor is the real gate. Ukikipedia puts the practical minimum at 31 Power Stars: 30 opens the basement Big Star Door, clearing "Board Bowser's Sub" in Dire, Dire Docks exposes the Bowser in the Fire Sea entrance, and that fight's key is what unlocks the second floor. The beginner guide walks that sequence in order.
While you are standing at this painting, talk to the Toad next to it. He hands over a free Power Star, one of three Toads who do — the secret stars guide has the other two.
Three course versions, not two
Ukikipedia catalogues three distinct versions of this course, and unlike Big Boo's Haunt — where the building itself rearranges — nothing here changes except what spawns at the summit.
| Version | Selected from | What is at the peak |
|---|---|---|
| Version 1 | Star 1 | The Scale the Mountain star. No Ukiki up top, no cage. |
| Version 2 | Stars 2 through 6, once Scale the Mountain is cleared and the monkey star is still uncollected | Ukiki is running around at the summit, and the cage is hanging by the waterfall. |
| Version 3 | Stars 3 through 6, once stars 1 and 2 are both collected | Neither the Scale the Mountain star nor the cage spawns. |
The practical read: the summit Ukiki does not exist during Scale the Mountain, so if you climbed all the way up on star 1 and saw no monkey, that is correct behaviour. Everything below the peak — red coins, the slide entrance, the cannon, the waterfall switch — is present on every version.
The climb, landmark by landmark
The route from the base to the peak, in order, per the Super Mario Wiki's layout notes:
- You start beside a small pond. Behind you is a narrow ledge with a 1-Up Mushroom; in front, three Goombas.
- A ramp leads to two gaps you long jump. Miss the first and you land on the ground below. Miss the second and you lose a life.
- Then the Mushroom Platforms, carrying red coins and a yellow block with a 1-Up. The smallest one in the centre is a warp.
- Past those, a stack of platforms with more red coins and Monty Moles climbing the wall. The course's Star Marker sits on a mushroom platform across the gap.
- A path with Bob-ombs and a Chuckya, then a bridge. The Bob-omb Buddy who opens the cannon is on a small platform below that bridge, off the walking route rather than on it.
- The lower Ukiki and a Fly Guy, then a rolling log across a gap.
- A slope with iron balls rolling down it. There is an alternate Bob-omb path that goes around the slope entirely.
- Both routes end at a long gap to jump, and then the Fwoosh.
- A grassy stretch with Goombas, where the grass makes jumping difficult.
- A narrow bridge over the waterfall, and the peak beyond it.
One shortcut worth knowing before you start: to the left of that first narrow ledge is an upward gust of wind that carries you straight to the Bob-omb and Chuckya path, skipping the long jumps and the Mushroom Platforms.
The six stars, mission by mission
Six missions on N64 plus the 100-coin star, no boss, and — per the boss guide — Tall, Tall Mountain is one of the courses with zero boss encounters in it.
The times below are the records listed on Ukikipedia's RTA guide for each mission: RTA first, then the single-star record.
Scale the Mountain
Reach the top. That is the whole mission, and it doubles as your tutorial for the route above. 15.93 RTA, 14.31 single-star.
Mystery of the Monkey Cage
Climb again. This time the summit holds an Ukiki instead of a star. Catch him and he asks you to let him go in exchange for showing you "something good."
Choose to free him. He leads you to a small cage hovering next to the waterfall; talk to him again and he jumps onto it, the cage falls and smashes on the land below, and the Power Star pops out. You then jump off the cliff after it.
Catching him is the annoying part. Ukikipedia's RTA guide has two mechanical tips that are not obvious: corner him against a wall and he jumps over you and pauses, which is your grab window, and for beginners, chase him to a wall, start the sideflip motion, and punch him as you turn around.
There is a reason he is hard to run down. Ukikipedia documents Ukikispeedia: when Ukiki is fleeing on the ground his speed is set to 90% of Mario's speed, with a minimum floor but no maximum ceiling. Give Mario forward hyperspeed and the monkey inherits it. The glitch is named after the wiki itself.
At 32.90 RTA, 30.79 single-star, it is the longest of the five mission times quoted in this guide — more than double Scale the Mountain, which is the same climb without a monkey at the end of it.
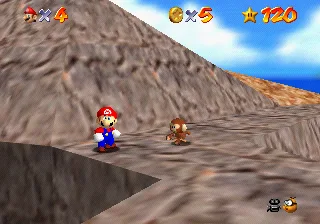
Scary 'Shrooms, Red Coins
Eight red coins, and none of them sits above the Monty Mole platforms — you never need to reach the Fwoosh, the slide or the peak.
| # | Where |
|---|---|
| 1–4 | On the Mushroom Platforms past the two long-jump gaps |
| 5–8 | On the platforms with the Monty Moles scaling the wall beyond them |
The star then appears over the Star Marker on a Mushroom Platform next to the Monty Moles. One warning from Ukikipedia's route notes: there is an invisible wall at the edge in front of that star — exposed ceiling geometry — so long jump along the right side around the corner and drift left into the star rather than approaching it head-on.
Mysterious Mountainside
The hidden slide, and it is genuinely hidden. Climb to the Fwoosh, and immediately behind it a row of five coins points at a stretch of wall that is not a wall — it behaves like a painting and you walk into it.
Inside, you drop into a rectangular room at the top of the track. Touch all four corners of that room and a 1-Up appears; another sits against the doorway. Then the slide proper: a straight ramp with three dips, a turn, a long U-shaped bend, and then a fork. Staying on the obvious path runs you off a drop that costs a life. You have to steer onto the wooden path, ride over its two gaps, take the bend, the twisted tunnel and the narrow road, and finish through two final bends and a big jump into the room with the star.
Two mercies. Die on the slide and re-enter the course and you are dropped straight back at the slide rather than climbing the mountain again, provided the death did not cause a Game Over. And on N64, as above, the star's alcove fence is short enough to somersault over from the ledge above.
At 7.30 RTA, 6.77 single-star, it is the fastest of the five times quoted here — which tells you how little of the record run is actually the slide.
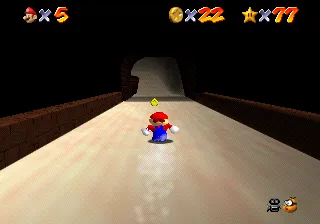
Breathtaking View from Bridge
Climb until you reach the purple ! Switch near the top. Press it and a block appears under the bridge; stand on it to reach the small cave behind the waterfall, and the star is inside.
14.26 RTA, 12.61 single-star.
Blast to the Lonely Mushroom
Two jobs, in this order.
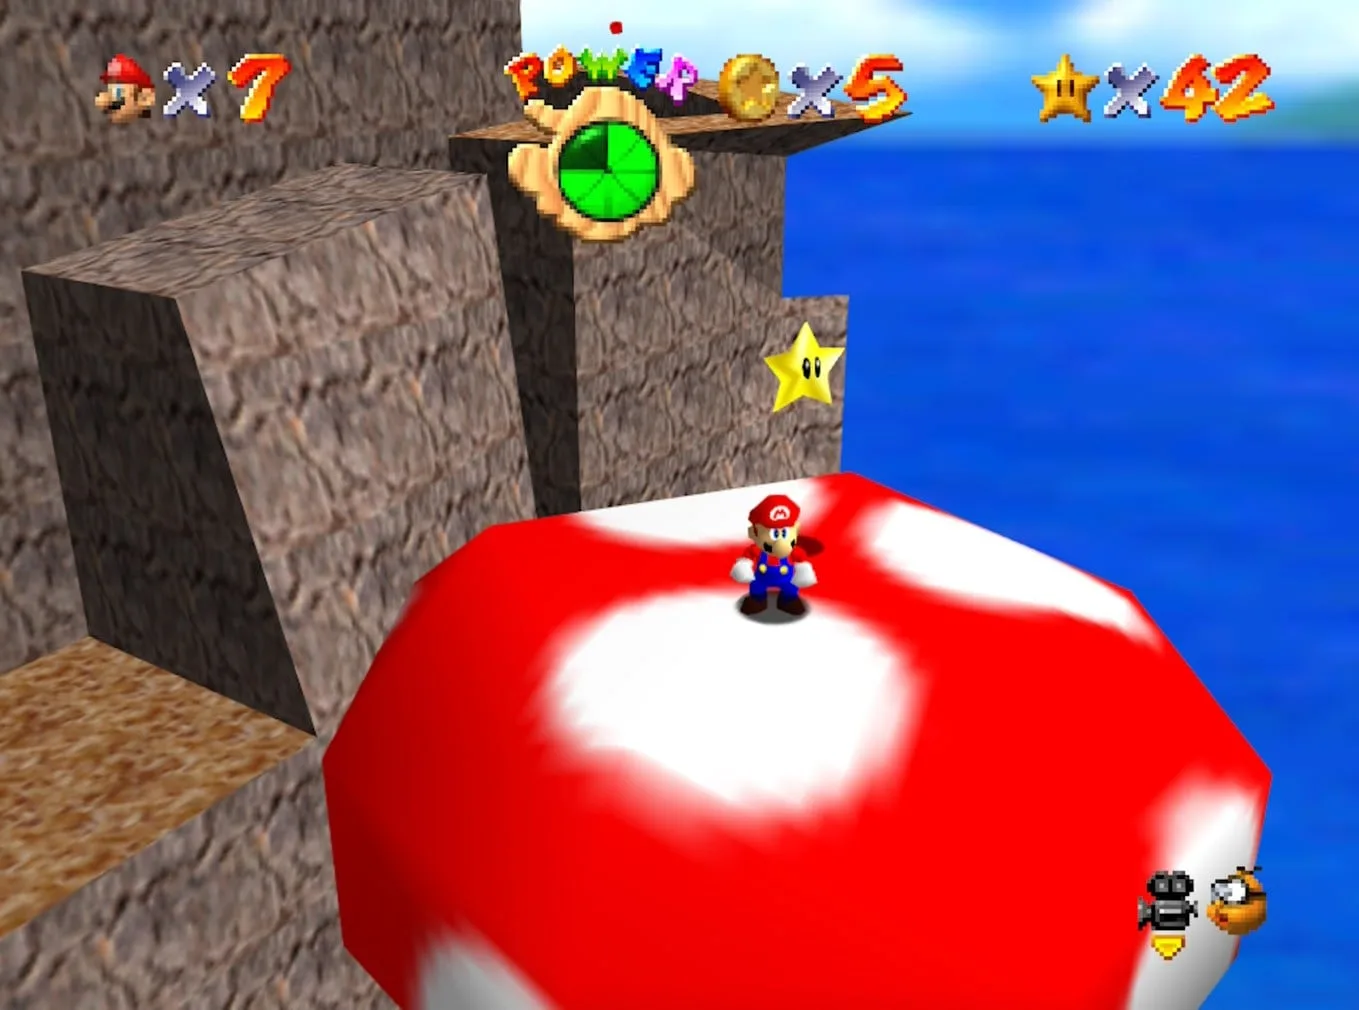
Open the cannon. The Bob-omb Buddy is on the small platform below the wooden bridge past the Chuckya. Talk to him.
Get to the cannon. Go back down to the Mushroom Platforms just before the Monty Moles and step onto the smallest mushroom in the centre. It warps you to an area under the mountain; the narrow paths there lead to the cannon. Line up on the distant mushroom with the star on it and fire.
The Super Mario Wiki lists several ways to skip the cannon entirely: the Crazy Box, or long jumping off the rolling log — you can roll the log to the right first and jump off the end. In the DS remake, Luigi's backward somersault or Mario with the Wing Cap also get there.
One piece of trivia that is very hard to unsee afterwards: the Super Mario Wiki records this as the only cannon in the game whose lid opens diagonally rather than vertically or horizontally.
10.23 RTA, 6.40 single-star. That is a wider RTA-to-single-star spread than any other mission quoted above, and Ukikipedia's page explains why: the quick versions are long-jump, jump-dive and speedkick lines, with the intermediate variant differing from the advanced one only by using a kick instead of a low single jump to kill fall damage.
The monkey, the cloud, and the 50 percent damage tax
Tall, Tall Mountain has two Ukikis, and only one of them is the one you need. Ukikipedia places the lower one near the rolling log and the Fly Guy — that is the thief. Grab it and it takes Mario's cap and wears it, then runs. Catch it again and it drops the cap.
The Fwoosh is the other way to lose your hat. The Super Mario Wiki records the gust as blowing Mario and his cap off the mountain, and the Akiki entry adds that the lower Ukiki ends up in possession of the cap when the Fwoosh blows you away.
Losing the cap is not cosmetic. Per the Super Mario Wiki, a capless Mario takes 50% more damage, and on N64 you have to return to the course where you lost it to get it back. You also get a different course-exit animation: he pats his head, looks behind him, and throws his arms up.
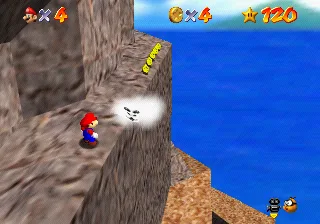
Mario cannot defeat the Fwoosh. Walk wide around it and take the hit to your route rather than your health bar. In Super Mario 64 DS the other characters have answers — Wario walks past with his metal ability, Yoshi eats it and spits fire — and the DS Fwoosh also gains the ability to turn and face you, which the original does not have.
The Chuckya on the bridge path deserves its own note, because it can end a run without touching your health. It charges, grabs Mario and throws him in a random direction, and the drop is right there. To escape a Chuckya's grasp, press A and push the control stick from inside to outside — the Super Mario Wiki puts it at 11 inputs before it throws you. To kill it, pick it up from behind and throw it; it explodes into five coins.
Where the 137 coins live, and the slide that owns 62 of them
Ukikipedia's breakdown of all 137:
| Source | Coins |
|---|---|
| Yellow coins on the slide (one hidden at the very start) | 47 |
| Ring of coins at the start, down the path by the Crazy Box | 8 |
| Line on the bridge from the Chuckya to the Bob-omb Buddy | 5 |
| Line by the Monty Moles, hanging down from the leaves | 5 |
| Line by the slide entrance | 5 |
| Vertical line by the ! switch near the top | 5 |
| Line on the rock bridge beside the waterfall | 5 |
| Nine Goombas | 9 |
| Five Bob-ombs | 5 |
| Crazy Box | 5 |
| Chuckya | 5 |
| Fly Guy | 2 |
| Eight red coins | 16 |
| Three blue coins on the slide | 15 |
Two numbers change how you route this. 62 of the 137 are inside the slide, leaving only 75 on the mountain, which is why Nintendo's 1996 Player's Guide named the 100-coin star "Challenge the Slide!" On N64 you are going down that track whether you like it or not.
And only 15 of the 137 are blue coins — three of them, all on the slide, and per the Super Mario Wiki they move away from Mario as he approaches, unlike every stationary yellow coin around them. Cool, Cool Mountain's slide has one that does the same. That is the mirror image of Big Boo's Haunt, where 105 of 151 coins are blue; the full margin table for every course is in the 100-coin stars guide.
There is a trap in that arrangement: the slide is a separate loading area. The Super Mario Wiki is explicit that if the 100-coin star appears while you are on the slide, you must take it immediately, because it disappears at the loading point between the slide and the mountain.
One curiosity from the same corner of the game. Ukikipedia notes you can clone coins here with a Bob-omb, and every clone permanently occupies an object slot — except that entering and exiting the slide clears the clones, which is what makes a 999-coin counter reachable here.
What the course does not give you
The Super Mario Wiki's statistics block for Tall, Tall Mountain is mostly a list of absences:
- Caps: none. No Wing Cap, no Metal Cap, no Vanish Cap block anywhere in the course. See the cap guide for where they actually live.
- Spinning Heart: none. Nothing to run through to heal.
- Cannons: one.
- 1-Up Mushrooms: eleven. Behind the starting point on the narrow ledge; on a ledge by the Monty Moles; on the ledge just before the Fwoosh; hidden behind the wall between the slide's entry room and the slide itself; two more on the slide; one that appears once you have walked into all four corners of the slide's entry room; one in a block above a red-coin Mushroom Platform; one from a butterfly in the vine-covered ground near the top; and two from repeatedly jumping on the two sets of Monty Moles by the vine wall.
No heart, no caps, and eleven extra lives. The course is not trying to keep you alive — it is topping up your stock for the falls it expects.
The clip that skips half the climb
Ukikipedia documents a Mountain Clip Glitch that speedrunners use to skip a long stretch of the ascent:
- Hold up from the very start of the level and long jump past the water. You land on a steep slope on the mountainside.
- Immediately hold up-right on the analog stick and press B. You clip through the slope into an area with water — press C-Left twice if you want to see where you are.
- Swim forwards, then towards the corner of the water, and swim off it. You get teleported upwards to a higher part of the mountain.
If the input timing there means nothing to you yet, the movement guide covers the long jump and dive-recover mechanics it is built on, and the speedrun guide is the better starting point for routing.
What the A Button Challenge did up here
Ukikipedia lists all seven stars as collectable in 0 A presses, and that count includes getting into the course at all — the painting can be entered with a precise dive recover, the same trick that works on The Princess's Secret Slide.
| Star | The 0-A method |
|---|---|
| Entering the course | Precise dive recover into the painting |
| Scale the Mountain | A rollout manoeuvre on the mountainside |
| Mystery of the Monkey Cage | Frame walk up the mountain, then grab Ukiki |
| Scary 'Shrooms, Red Coins | Mostly trivial with frame walking |
| Mysterious Mountainside | A slide kick into the star's area |
| Breathtaking View from Bridge | Frame walk up, hit the ! switch for the cork box, slide kick into the star |
| Blast to the Lonely Mushroom | Grab the Crazy Box at the start and bounce directly to the star |
| 100 coins | Chuckya, coin lines, coin rings, the Crazy Box, Goombas and the slide |
What is striking is what the page does not list: no multi-hour object-raising setups of the kind Big Boo's Haunt needed. The other challenge categories go the same way — Ukikipedia records all seven stars as achievable in the Pacifist, Capless/Cannonless and No Joystick Allowed challenges, and the whole course as clearable in 0 B presses and 0 Z presses. The B-press version needs two specific workarounds: hyperspeed to knock Ukiki off the mountain and then grabbing him with the vertical wind, and long jumping to the lonely mushroom on JP 1.0 to avoid opening the cannon.
Two things here remain unsolved. Ukikipedia lists collecting Mystery of the Monkey Cage without changing the HOLP for an arbitrary HOLP, and reaching a Parallel Universe in any area of the level — nobody has managed either.
What Super Mario 64 DS changes
| N64 | Super Mario 64 DS | |
|---|---|---|
| Stars | 6 | 7 — adds "5 Secrets of the Mountain", flying through rings of coins at the top |
| Mission order | Breathtaking View is 5th, Blast to the Lonely Mushroom is 6th | Blast is 5th, Breathtaking View is 7th and final |
| Breathtaking View | Purple ! Switch spawns a block under the bridge | Switch removed, a wooden bridge added below the cave, and Wario must break a Black Brick inside |
| Slide star | Small fence — a backward somersault from the ledge above skips the slide | Fence covers the alcove; Luigi's Power Flower still gets through |
| Blue coins | Three on the slide, and they run from you | Removed entirely |
| 100-coin star | Requires the slide | Does not — there are enough coins outside it |
| Fwoosh | Fixed facing | Turns to face the character |
Two structural notes. The Super Mario Wiki records Tall, Tall Mountain as the only main course in the DS version with neither a Switch Star nor a Silver Star mission — the two mission types the remake introduced. And the DS course painting carries a visible bug: the warp to the slide appears as a blank white texture instead of artwork.
Everything above the DS table describes the N64 original, which is also what runs in Super Mario 3D All-Stars and the Nintendo Switch Online N64 app — the version differences post has the full comparison.
Mistakes that cost you a life up here
- Coming up short on the second long jump. The first gap drops you to the ground below; the second one costs a life.
- Choosing to hold on to Ukiki instead of freeing him. Freeing him is what starts the cage sequence.
- Trying to fight the Fwoosh. Mario cannot beat it, and a successful gust takes your cap off the mountain along with you.
- Getting grabbed by the Chuckya next to a drop. Mash A and work the stick — it takes 11 inputs to break free before it throws you.
- Riding the slide's obvious path past the fork. Steer onto the wooden path or you go straight off a drop.
- Leaving the slide with the 100-coin star still sitting on it. It disappears at the loading point.
- Walking out of the course capless. That is 50% more damage everywhere until you come back for it.
- Trying to jump in the grass field past the Fwoosh. The grass makes jumping difficult; walk it.
Quick Action Checklist
- Reach the second floor (31 stars in practice), then take the small mushroom painting behind the staircase — and talk to the Toad beside it for a free star.
- Star 1 has no monkey at the summit; the Ukiki and cage only spawn on stars 2 through 6 after Scale the Mountain is done.
- Use the updraft left of the starting ledge to skip the long jumps and Mushroom Platforms when you do not need them.
- All eight red coins are on the Mushroom Platforms and the Monty Mole platforms — you never climb past them for that star.
- Talk to the Bob-omb Buddy under the bridge past the Chuckya, then warp from the smallest centre Mushroom Platform to reach the cannon.
- The slide entrance is the fake wall behind the Fwoosh, marked by five coins.
- On the slide, take the wooden path at the fork, and touch all four corners of the entry room for a free 1-Up.
- On a 100-coin lap, plan on the slide: 62 of the 137 coins are in there and the three blue ones run from you.
- If the Ukiki or the Fwoosh takes your cap, get it back before you leave — capless Mario takes 50% more damage.
Frequently Asked Questions
How do you unlock Tall, Tall Mountain in Super Mario 64?
Where is the secret slide in Tall, Tall Mountain?
Do you have to do the slide to get the Mysterious Mountainside star?
Why is there no monkey at the top of Tall, Tall Mountain?
How do you get Mystery of the Monkey Cage?
Where are the 8 red coins in Tall, Tall Mountain?
How many coins are in Tall, Tall Mountain?
What happens if the Ukiki steals your cap in Super Mario 64?
Keep Reading
- Mythras blog
- Super Mario 64 coverage hub
- Super Mario 64 beginner guide
- Super Mario 64 secret stars guide
- Super Mario 64 cap guide
- Super Mario 64 boss guide
- Super Mario 64 movement guide
- Super Mario 64 100-coin stars guide
- Super Mario 64 speedrun guide
- Super Mario 64 version differences
- Super Mario 64 Big Boo's Haunt guide
- Super Mario 64 Wet-Dry World guide
- Tall, Tall Mountain — Super Mario Wiki
- Tall, Tall Mountain — Ukikipedia
- RTA Guide: Tall, Tall Mountain — Ukikipedia
- Ukiki — Ukikipedia
- Mysterious Mountainside — Super Mario Wiki
- Slide (Super Mario 64) — Super Mario Wiki
- Blast to the Lonely Mushroom — Super Mario Wiki
- Akiki (the cap-stealing Ukkiki) — Super Mario Wiki
- Mario Cap — Super Mario Wiki
- Blue Coin — Super Mario Wiki
- Chuckya — Super Mario Wiki
Related Guides

Super Mario 64 Swimming Guide: Tap A, Don't Hold It
Holding A is the slow way to swim in Super Mario 64. Here is the stroke rhythm the code rewards, how the stick steers, how to jump out of the water, what each current does, and the eight seconds of free speed hiding in two clams.

Super Mario 64 Lives and Game Over: What You Actually Lose
A Game Over in Super Mario 64 is a file reload: you keep everything you saved and lose everything you did not. Here is when the game actually writes your file, exactly what a Game Over rolls back, the five courses where a fall is free, and every way to earn a life, from the coin tally to the Monty Mole streak that never runs dry.
Super Mario 64 Music: Every Track and Where It Plays
Super Mario 64 scores 15 courses with seven songs, and only one of them belongs to a single course. Here is which track plays in every course and secret level, the five levels whose music rearranges itself as Mario moves, what triggers the boss music and the jingles, all 36 soundtrack tracks under their 1996 and current names, and where to listen today.
Super Mario 64 Bowser Levels Guide: All 24 Red Coins
Bowser in the Dark World, the Fire Sea and the Sky each hide one Power Star behind eight red coins on the obstacle course in front of the fight. Here is the route through all three, where every red coin sits, and what else the level data holds.
Super Mario 64 Beginner Guide: Your First 30 Power Stars
Super Mario 64 does not gate you on difficulty, it gates you on Power Stars. Here is exactly which doors need what, which stars are fastest to grab, and the route that gets a first-timer from one star to thirty without wandering the castle in circles.
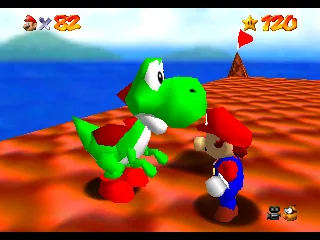
Super Mario 64 120-Star Reward: Yoshi and the Castle Roof
Super Mario 64 does not announce your 120th Power Star. The reward is outside: a cannon grate that stops loading, Yoshi on the castle roof, and a gift that quietly resets the next time you load your file. Here is what 120 stars changes, checked against the wikis and the decompiled code.