Super Mario 64 Jolly Roger Bay Guide: All 7 Stars
Jolly Roger Bay is the only main course in Super Mario 64 with no Star Marker, and it hides two separate treasure chest puzzles that open in two different orders. Here is every star for both games, the eel you have to lure out twice, the version that only exists after you've earned the first star, the full 104-coin breakdown, and the mission order Super Mario 64 DS actually reshuffles rather than just extends.
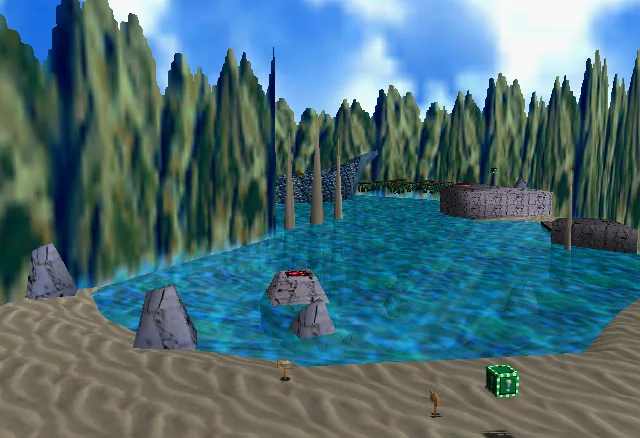
Jolly Roger Bay is the third course in Super Mario 64, and per the Super Mario Wiki's course statistics, it is the only main course in the game with no Star Marker — the pole with the spinning star that tells you where to start most missions. There is nothing to walk up to. You dive in, and the course tells you where to go by what has changed since the last time you were there.
That is the real shape of this course: not one lake, but three versions of the same lake, unlocked by which star you select. A ship that is sunken in one version is floating in another. An eel that hides in one version swims freely in another. Two separate rooms hide two separate treasure-chest puzzles with two different solutions. And the DS remake does something to the mission order here that it does not do in Whomp's Fortress or Bob-omb Battlefield — it does not just add an eighth star, it swaps two of the existing seven.
The bay with no Star Marker
The entrance is the ★ door to the far right of the first floor of Peach's Castle, and per the Super Mario Wiki it takes three Power Stars to open — the beginner guide has the rest of the castle's gating. The course itself is a large lake the Wiki compares to a real-world cenote: a yellow ! Block sits to the left of the starting shore, a green Metal Cap block (recolored red in the DS remake) sits to the right, and a Bob-omb Buddy waits on a platform further out who opens the level's one cannon once you talk to him.
Jolly Roger Bay shares its music with Dire, Dire Docks — the Wiki notes synths layer in while swimming, and a drum beat while you're on land in the cavern area. There is no boss here; the boss guide already lists it among the eight courses with no fight at all, and Unagi the eel guards two stars without ever being a boss encounter itself.
Every star, in order, N64 and DS
The N64 original has six named missions plus the 100-coin star, which the Super Mario 64 Player's Guide names "Pirates' Plunder." Super Mario 64 DS has eight — and unlike Whomp's Fortress, which keeps its original six missions in their original slots and simply appends a seventh and eighth, Jolly Roger Bay's DS remake reorders two of them.
| # (N64) | Mission | # (DS) |
|---|---|---|
| 1 | Plunder in the Sunken Ship | 1 |
| 2 | Can the Eel Come Out to Play? | 2 |
| 3 | Treasure of the Ocean Cave (N64) / Treasure in the Ocean Cave (DS) | 3 |
| 5 | Blast to the Stone Pillar | 4 |
| 4 | Red Coins on the Ship Afloat | 5 |
| — | Switch Star of the Bay (DS-exclusive) | 6 |
| 6 | Through the Jet Stream | 7 |
| — | 100 Coins ("Pirates' Plunder") | 8 |
Every individual mission page on the Super Mario Wiki carries its own "previous/next" chain, and all four affected pages — Red Coins on the Ship Afloat, Blast to the Stone Pillar, Switch Star of the Bay and Through the Jet Stream — agree with each other independently: in the DS version, Blast to the Stone Pillar moves up to slot 4 and Red Coins on the Ship Afloat moves back to slot 5, before the new Switch Star of the Bay fills slot 6 and Through the Jet Stream is pushed to 7. The course's own summary table lists the missions in their N64 order regardless of game version, which reads as a simple oversight next to the individually-sourced numbering — this guide follows the mission pages, since four of them independently corroborate each other and the course table does not distinguish itself from a simple copy-paste list.
"Switch Star of the Bay" is DS-exclusive and cannot be completed until Luigi has been freed: it lives behind a steel gate in the same cave as "Treasure in the Ocean Cave," and Luigi needs a Power Flower to turn partially invisible, walk through the bars, hit the Star Switch, then dash back into the cage before either the flower wears off or the Star vanishes. A second Power Flower block waits inside the cage as a backup.
Three versions of the bay, chosen by star select
Ukikipedia documents three course states here, chosen the same way as in Whomp's Fortress — by which star you highlight before diving in:
| Version | Selected by | What's different |
|---|---|---|
| 1 | Star 1 | The ship sits sunken at the bottom of the trench, Unagi hides inside it, and a thin fog covers the water with a darker sky above |
| 2 | Star 2 | The ship has risen to the surface, Unagi has relocated to a hole, the Bob-omb Buddy is present and the cannon is open, and Stars 2 and 6 are collectable |
| 3 | Stars 3–6 | Same as Version 2, except Unagi now swims freely around the trench with no Star on its tail |
Two mission pages confirm why this matters beyond flavor: "Red Coins on the Ship Afloat" cannot be completed until the first star is collected, "as a few of the Red Coins can be collected only once the sunken ship is brought to the surface," and "Through the Jet Stream" cannot be completed either, "as the sunken ship blocks the hole releasing the jet stream." The first star is not optional busywork — it is the switch that turns on four of the other five missions.
One genuinely odd wrinkle the Super Mario Wiki calls out on its own: after you collect the first star, the fog and darkened sky never return, even if you go back and replay "Plunder in the Sunken Ship." That is specifically the visual effect — nothing in either source claims the ship itself stays sunken on a mission-1 replay, only that the fog and dark sky are gone for good once you've seen the version-2 lighting.
Luring Unagi, twice, for two different stars
Unagi — officially "Unagi the eel" per the Player's Guide, and a Maw-Ray by species — is a heavy-contact enemy: the health guide lists a hit from Unagi at three wedges of damage, the same tier as a Big Boo or a Mad Piano. You never fight it. You lure it.
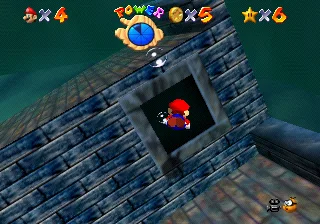
"Plunder in the Sunken Ship." Unagi hides inside the sunken ship's hatch. Swim close enough to provoke it into lunging, then swim a short distance away and back. Unagi leaves the hatch to give chase, which is your opening to slip in through the window it was guarding.
"Can the Eel Come Out to Play?" Unagi has since relocated to an underwater cave, and this time a Power Star sits on its tail. Lure it the same way — swim in front of it until it emerges — then touch the Star before Unagi decides enough time has passed and retreats back into its cave, at which point you have to lure it out again from scratch.
Water itself is your real health bar in this course. Per the health guide, the Power Meter becomes an air gauge underwater, draining one wedge every eight seconds, and surfacing refills it to full — including any damage that had nothing to do with drowning. In a course this coin-poor, floating at the surface between Unagi encounters costs you nothing and can undo an Unagi hit for free.
The course carries only two 1-Up Mushrooms total, per the Super Mario Wiki's statistics, and one of them is tied to Unagi directly: swim through the coin ring near the eel and a triggered Mushroom appears. The other is static, waiting atop one of the stalagmites near "Blast to the Stone Pillar."
Two chest puzzles, two different orders
Jolly Roger Bay hides two separate rooms full of Treasure Chests, and they are not the same puzzle wearing two names — each has its own correct order, and opening a chest wrong in the ocean cave triggers a weak electric shock rather than progress.
The ship chests ("Plunder in the Sunken Ship"). Four chests sit inside the sunken ship. The Super Mario Wiki gives the order as: the chest directly ahead of you, then — after turning around — the one on your left, then the one on your right, then — turning around again — the last chest in the center. Solve it correctly and the ship drains and rises, letting you climb its interior platforms to a yellow ! Block holding the Star. Super Mario 64 DS keeps only the first of the four chests, which the Wiki reads as a deliberate difficulty cut — opening that single chest has the same draining effect.
The cave chests ("Treasure of the Ocean Cave"). A sign warns that only a shipwrecked pirate captain knows the right sequence for this room's own four chests, hidden past a gauntlet of falling triangular columns. The order here is back, left, right, front — worded slightly differently from the ship's "center" on the last chest, but the same shape: the one behind you, then left, then right, then the one you started facing. On N64 you can grab a Metal Cap at the cave entrance to shrug off the falling columns entirely; on DS, the equivalent Power Flower gives each playable character a different way past them — Mario floats over them, Luigi turns invisible and walks through, and Wario turns to metal and ignores them.
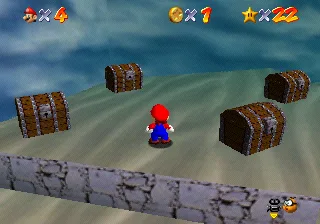
One piece of trivia worth flagging rather than routing around: per the Super Mario Wiki, the N64 version hides an invisible duplicate ship floating above the level, visible only during "Plunder in the Sunken Ship" and only through tool-assisted means — not something you will ever see in a normal playthrough, but real enough that it has its own citation on the Wiki's page.
Eight Red Coins, three of them only after the ship rises
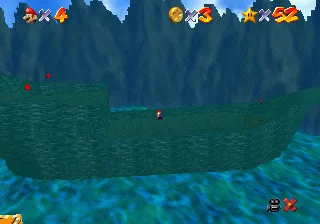
"Red Coins on the Ship Afloat" needs the first star already collected, because three of its eight Red Coins sit on the risen ship itself.
| Location | Count |
|---|---|
| Inside clam shells (near the start, just past that first clam, next to the cannon's Bob-omb Buddy crag, and at the bottom of the bay) | 4 |
| Atop the stone spire beside the cannon's Bob-omb Buddy | 1 |
| On the risen ship, reached via the platforms the Purple Switch raises | 3 |
Once all eight are in hand, a Power Star appears at the ship's stern. The ship itself is not a passive platform: the Super Mario Wiki notes a Slide Box crate rocks back and forth with the vessel and can knock you off if it catches you, so time your approach with the rocking rather than fighting it.
The cannon that puts you on a stone pillar
"Blast to the Stone Pillar" sends you to a ledge on the far side of the bay from the start, next to a cluster of climbable stalagmites — one of which holds a 1-Up Mushroom at its tip. The intended route is the cannon: fire yourself onto a stalagmite, then jump the rest of the way to the platform. Super Mario 64 DS gives Mario an alternative in his floating power and Luigi an alternative in a backward somersault off the ship, neither of which needs the cannon.
One regional quirk worth knowing if you're comparing footage: in international releases of the N64 original, the Star sits inside a yellow ! Block on that platform. In the Japanese original, in Super Mario 3D All-Stars, and in the DS remake, the same Star simply sits out in the open with no block around it. If a video shows the Star already visible with no block-punching step, that is not a different route — it is a different regional or platform release.
Metal Mario is the intended way through the jet stream
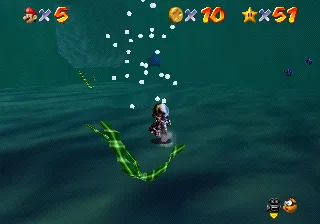
Once the first star has been collected, the sunken ship's old resting spot becomes a jet stream, sealed behind a grate that lets pressure through but blocks Mario. The Super Mario Wiki is direct about the intended solution here: on N64, only Metal Mario can collect this Star, because the added weight lets him sink to the bottom unaffected by the current. Jolly Roger Bay carries exactly three Metal Cap blocks toward that end — one on the starting shore, one on a platform near the ship, and one inside the ocean cave from "Treasure in the Ocean Cave" — so you are never far from one.
It is not strictly mandatory. A cited community video demonstrates swimming through the current without the cap, entering at precisely the right angle and full speed to avoid being pushed back out — difficult enough that the Wiki still calls the Metal Cap the generally suggested route. On Super Mario 64 DS, there is no swimming workaround documented: the Star is obtainable only by Wario, the single DS character with a metal transformation, which makes this one of the missions where your character select at the start of the level actually locks you out of a Star if you picked wrong.
Where the 104 coins are
Ukikipedia's course template puts the N64 total at 104 coins, one of the smallest in the game — small enough that the 100-coin stars guide already calls this the single hardest 100-coin star in Super Mario 64, with only four coins of margin for error. That post has the full cross-course ranking and routing tips; this is where those 104 actually come from.
| Source | Coins |
|---|---|
| Yellow ! Block near the start | 3 |
| Underwater coin ring near the clam shells | 8 |
| Coin ring around the tall spire | 8 |
| Vertical coin line before the Purple Switch | 5 |
| Coin ring near the jet stream | 8 |
| Coin ring near the cave's Treasure Chests | 8 |
| Coin lines leading up to the ship | 15 |
| 3 Goombas | 3 |
| 8 Red Coins (2 each) | 16 |
| Blue Coin Block | 30 |
That totals 104 exactly — 55 static yellow coins, 3 from Goombas, 16 from Red Coins, and 30 from a single Blue Coin Block worth six blue coins at five apiece. The Blue Coin Block alone is more than a quarter of the entire course's coins, which is precisely why missing it derails a 100-coin run in a way it wouldn't in a more coin-rich course.
What Super Mario 64 DS changes
| Change | Detail |
|---|---|
| Missions 4 and 5 swap | Blast to the Stone Pillar becomes mission 4 and Red Coins on the Ship Afloat becomes mission 5 — confirmed independently by all four affected mission pages' own numbering |
| An eighth star | Switch Star of the Bay slots in as mission 6, pushing Through the Jet Stream to 7 and the 100-coin star to 8; it needs Luigi already freed |
| The ship puzzle is cut down | Only the first of the ship's four chests exists in DS; opening it still drains and raises the ship |
| The cave puzzle keeps its difficulty | All four cave chests remain, but each playable character gets its own way past the falling columns via a Power Flower |
| The jet stream needs Wario specifically | Only Wario's metal transformation gets through it; there is no swimming workaround documented for DS the way there is for N64 |
| Coins jump from 104 to 128 | Per both the Super Mario Wiki and Ukikipedia — the 100-coin stars guide covers how much that eases the DS version's 100-coin star |
| The shore gets busier | Goombas and a Shiny Shell block are added near the start; the starting Metal Cap block is recolored red instead of green |
The version differences post covers the N64-versus-DS split game-wide.
Mistakes this course punishes
- Chasing the Red Coins mission before you've earned the first star. Three of the eight Red Coins are on the ship, and the ship isn't up yet.
- Confusing the two chest puzzles. The ship's order ends on the center chest; the cave's order ends on the front chest, and a wrong guess there shocks you instead.
- Letting Unagi's Star linger in "Can the Eel Come Out to Play?" Wait too long after it surfaces and it retreats, forcing a fresh lure.
- Ignoring the Blue Coin Block on a coin run. It alone is 30 of the course's 104 coins — nearly a third — in a level with only four coins of slack.
- Picking the wrong DS character before "Through the Jet Stream." Only Wario can finish it; anyone else needs to restart the mission as him.
- Fighting the ship's Slide Box crate instead of timing it. It rocks with the ship and can knock you into the water mid-Red-Coin sweep.
Quick Action Checklist
- Open the three-star door on the ground floor's far right; the Jolly Roger Bay painting is the room behind it.
- Take "Plunder in the Sunken Ship" first — it is the switch that unlocks the Red Coins and Jet Stream missions and raises the ship for good.
- Lure Unagi by swimming close, then retreating and circling back; it works the same way in both of its missions.
- Solve the ship's chests back → left → right → center, and the cave's chests back → left → right → front — they are not the same puzzle.
- Float at the surface between fights to refill the Power Meter for free, since it is both your air gauge and your health here.
- Grab a Metal Cap (shore, ship platform, or ocean cave) before "Through the Jet Stream" on N64; pick Wario for it on DS.
- Prioritize the 30-coin Blue Coin Block on any 100-coin attempt — it's over a quarter of the course's total.
- Fire the cannon at the stalagmite cluster for "Blast to the Stone Pillar," or use Mario's float / Luigi's somersault on DS instead.
Frequently Asked Questions
How many stars are in Jolly Roger Bay in Super Mario 64?
How do you get into the sunken ship in Jolly Roger Bay?
Why does Jolly Roger Bay's mission order look different on Super Mario 64 DS?
How many coins are in Jolly Roger Bay?
Do you need the Metal Cap for Through the Jet Stream in Jolly Roger Bay?
Keep Reading
- Jolly Roger Bay — Super Mario Wiki
- Jolly Roger Bay — Ukikipedia
- Plunder in the Sunken Ship — Super Mario Wiki
- Can the Eel Come Out to Play? — Super Mario Wiki
- Treasure in the Ocean Cave — Super Mario Wiki
- Red Coins on the Ship Afloat — Super Mario Wiki
- Blast to the Stone Pillar — Super Mario Wiki
- Switch Star of the Bay — Super Mario Wiki
- Through the Jet Stream (Jolly Roger Bay) — Super Mario Wiki
- Maw-Ray (Unagi) — Super Mario Wiki
Related Guides
Super Mario 64 Music: Every Track and Where It Plays
Super Mario 64 scores 15 courses with seven songs, and only one of them belongs to a single course. Here is which track plays in every course and secret level, the five levels whose music rearranges itself as Mario moves, what triggers the boss music and the jingles, all 36 soundtrack tracks under their 1996 and current names, and where to listen today.
Super Mario 64 Bowser Levels Guide: All 24 Red Coins
Bowser in the Dark World, the Fire Sea and the Sky each hide one Power Star behind eight red coins on the obstacle course in front of the fight. Here is the route through all three, where every red coin sits, and what else the level data holds.
Super Mario 64 120-Star Reward: Yoshi and the Castle Roof
Super Mario 64 does not announce your 120th Power Star. The reward is outside: a cannon grate that stops loading, Yoshi on the castle roof, and a gift that quietly resets the next time you load your file. Here is what 120 stars changes, checked against the wikis and the decompiled code.
Super Mario 64 Snowman's Land Guide: All 7 Stars
Snowman's Land looks like the throwaway snow level, and the wiki record on it backs that read up in one specific way: it is the only one of the game's 15 main courses with no Blue Coins at all. What it does have is two freezing ponds that hurt you in two different ways, an enemy species that appears nowhere else in the game, and a cap-stealing snowman nobody warns you about. Here is every star, the full 127-coin breakdown, and the course's last remaining gap in this vertical.
Super Mario 64 Beginner Guide: Your First 30 Power Stars
Super Mario 64 does not gate you on difficulty, it gates you on Power Stars. Here is exactly which doors need what, which stars are fastest to grab, and the route that gets a first-timer from one star to thirty without wandering the castle in circles.
Super Mario 64 Whomp's Fortress Guide: All 7 Stars
Whomp's Fortress is the second course in Super Mario 64, and your star selection swaps out the building itself. The Whomp King and the tower occupy the same spot at the top of the fortress, and which one is standing there depends entirely on the star you picked from the menu. Here is the mission list for both games, the three course versions and what loads in each, the full 141-coin breakdown, the ten-coin Whomp drop, and all four 1-Ups.