Ocarina of Time Forest Temple: Poes, Keys and Phantom Ganon
The Forest Temple is where Ocarina of Time stops being a fairy tale. Four ghosts steal the elevator, two hallways rotate on their own axis, and the boss is a fake Ganondorf on horseback. Here is the whole dungeon, key by key and Poe by Poe.
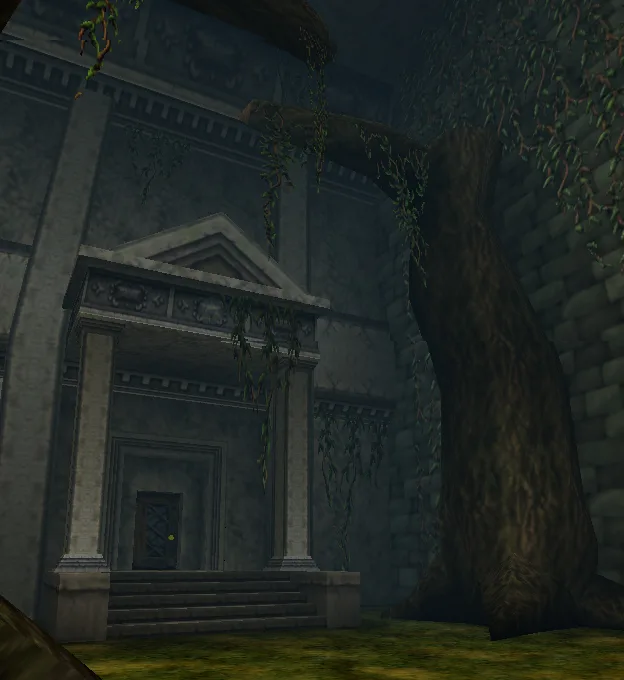
The Forest Temple is the moment Ocarina of Time changes genre. You pull the Master Sword, lose seven years, and the reward for growing up is a haunted mansion where four ghosts steal the elevator in front of you, two hallways rotate ninety degrees on their own axis, and the boss room hangs six paintings of a horseman who rides out of them.
It is also the first adult dungeon in the standard route, which means it teaches the second half of the game's vocabulary: shoot the painting, distrust the wall, follow the ghost. Here is the whole run — every Small Key, every sister, and the fight at the bottom of the elevator shaft.
Forest Temple at a glance
| Detail | What it is |
|---|---|
| Location | Sacred Forest Meadow, above the broken stairway |
| Entry requirements | Hookshot, Saria's Song for Mido |
| Entry song | Minuet of Forest |
| Dungeon item | Fairy Bow |
| Mini-fights | Two Stalfos ambushes, four Poe Sisters |
| Boss | Phantom Ganon |
| Small Keys | Five in the original, six in Master Quest |
| Gold Skulltulas | Five |
| Reward | Forest Medallion and a Heart Container |
Getting in: Hookshot, Mido, Minuet
Two locks sit between adult Link and the front door. The first is the Hookshot, dug up by winning Dampe's race in the Kakariko graveyard — the broken stairway in the Sacred Forest Meadow is impassable without it. The second is Mido, who has planted himself in the Lost Woods on Saria's request and refuses to let anyone through to the meadow. He does not recognise the adult stranger in front of him; play Saria's Song and he lets you pass, because Saria only teaches that song to her friends.
Walk into the meadow for the first time as an adult and Sheik appears with the Minuet of Forest — the warp that drops you at the temple's doorstep for the rest of the game. One N64 quirk: the confirmation prompt asks whether you want to warp to the Lost Woods, even though the song deposits you at the Sacred Forest Meadow; Ocarina of Time 3D fixed the text. Every melody, with note inputs for both versions, is in our songs guide.
Then Hookshot the branch above the broken stairs, climb, and go in.
The four Poe Sisters and their torches
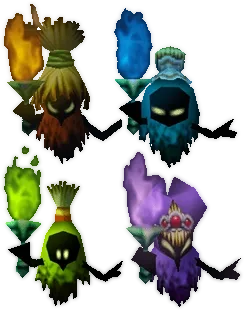
Walk into the main hall and the dungeon states its objective as a cutscene: four Poes swirl around the central torches, take the flames, and vanish, and the elevator to the basement drops out of reach. The whole temple is a ghost hunt. Each sister you put down relights one torch, and all four flames bring the elevator back.
| Sister | Flame | Where she is | What she drops |
|---|---|---|---|
| Beth | Blue | Staircase room beside the Bow room, three paintings | Compass |
| Joelle | Red | Staircase room east of the second twisted corridor, three paintings | Small Key |
| Amy | Green | Falls out of a painting as a five-block puzzle | Opens the way to Meg |
| Meg | Purple | The main hall itself, as a shell game | Raises the elevator |
Beth and Joelle cannot even be engaged until you hold the Fairy Bow — their portraits have to be burned down with arrows — which is why the first half of the dungeon ignores the ghosts entirely and goes hunting for keys instead.
The first three keys
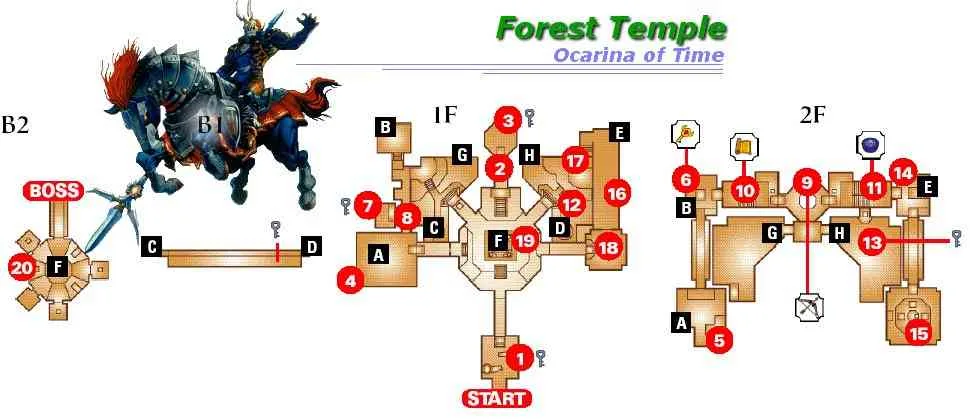
Key 1: the tree in the entrance room
The entrance courtyard greets you with two Wolfos; fight them one at a time. Before the door, Hookshot the vines beside the right-hand tree, climb to the branch, and grab the Gold Skulltula up there — the first of the temple's five, all covered in our Gold Skulltula guide. Walk to the end of the branch and Hookshot the chest sitting on the other tree: Small Key one.
Key 2: the two-Stalfos room
Cross the main hall (the second Gold Skulltula is on the wall by the stairs) and take the door up the staircase. A Blue Bubble patrols the connecting room — raise your shield and walk into it to snuff the flame, then cut it down. The room beyond locks you in with two Stalfos. Bait the jump attack, sidestep, punish. The chest that appears holds Small Key two, and one of the jars in this room hides a fairy.
Key 3: drain the well
Back in the main hall, the northwest arch hides a Song of Time block; play the song and it vanishes, opening the way to the East Courtyard. Kill the Deku Baba and the Octorok, clear the Skullwalltulas off the vine wall with the Hookshot, and climb to the ledge. Through the door up there, a Blue Bubble guards the chest holding the Dungeon Map. Back on the ledge, Hookshot the target on the opposite wall and stand on the switch — this drains the well connecting the two courtyards. Down in the emptied channel, a ladder leads to the chest with Small Key three. The third Gold Skulltula is on the wall above the raised ground across the courtyard's water; Hookshot the front of the small chest on the ledge to get up there.
The block climb and the first twisted corridor
The locked door above the main hall's western stairs spends your first key and starts the climb. Push the big block along the arrows on the floor until it drops into place, then use it as a step to shove the red block on the level above until it slides home. Two-block staircase, built by hand.
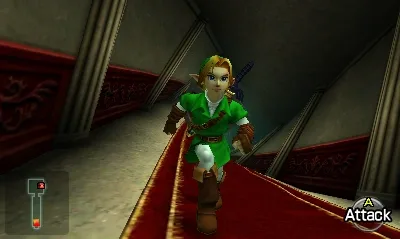
Up top, past the Blue Bubbles, a locked door opens onto the temple's signature trick: a corridor twisted ninety degrees, floor becoming wall as you walk it. The small room at its end has a Wallmaster — when the shadow grows under you, run in circles until the hand slams down, then kill it. If it grabs you, it dumps you back at the dungeon entrance, which is the real damage.
The Fairy Bow: a three-Stalfos tax
Through the next locked door is a staircase room lined with Poe paintings. Nothing here responds yet — remember it, you will be back in two minutes. Descend and enter the arena beyond.
One Stalfos drops in. Kill it and two more appear, and this pair has a rule: take too long killing the second and the first reassembles itself. There is also a hole in the floor to fall through mid-duel. Commit to one target, finish it fast, and the chest that appears holds the Fairy Bow — the item the rest of the ghost hunt is keyed to, and the tool the Big Poe hunt will demand later anyway.
Beth and Joelle: the painting hunts
Both painting sisters work the same way. Each haunts a staircase room with three portraits of herself, one per level. Shoot a portrait with an arrow while the ghost is visible in it and the canvas burns; when the third portrait goes up, the sister materialises and attacks. She fades in and out — hold your shot until she is solid, and finish her with arrows or the sword.
Step back through the blue-carpet door into the staircase room you just passed: that is Beth, and killing her lights the blue torch and produces the Compass. Then cross the Bow room to the painting room on the far side for Joelle — red torch, and a chest with Small Key four beside it.
The Boss Key and the Floormaster
From Joelle's room, head up the stairs into the temple's second twisted corridor. This one you straighten: shoot the eye switch on the wall in the Blue Bubble room and the corridor untwists, turning the drop beyond into a fall to the lower level. Another Wallmaster, same drill — circles, then steel. The chest in this northern chamber holds the Boss Key.
Drop through the hole in the floor, clear the two Bubbles, and you emerge in the West Courtyard. The fourth Gold Skulltula is high on the wall north of the arches, off the narrow walkway. The room off the courtyard belongs to a Floormaster — stun it with the Hookshot, and when it dies it splits into three small hands. Kill them quickly or they regrow into a full Floormaster; they always drop magic jars, so Din's Fire is a free answer here. Small Key five is your prize.
The burning-arrow switch and the falling ceiling
Now the route folds back on itself. Return to the Blue Bubble room and shoot the eye switch again — the corridor re-twists, opening the path along its upper ledges. Work back through Beth's room, the Bow arena, and Joelle's room, then spend your last key on the door up the stairs. Past one more Wallmaster drop and a pair of Green Bubbles, you reach the room with spinning platforms and a frozen eye switch. The switch ignores ordinary shots: stand on a platform and fire an arrow through the torch flame so it arrives burning. The corridor beyond twists, and the hole at its end drops you into the checkerboard room.
The falling ceiling here is a press, not a puzzle: safe gaps are cut into it, and the tiles with shadows hiding Skulltulas are the ones to avoid. First safe hole is to the left; a floor switch against the right wall opens the way on, and a chest of arrows sits mid-room if you want it.
Amy's block puzzle and Meg's shell game
The next room holds the third sister. Shoot Amy's portrait and it bursts into five blocks that crash down from the ceiling. Four of them recreate her picture; one does not belong. Pull the odd block out of the cluster, push the rest together, and watch the overhead camera pass — it is showing you the answer. Run out the timer and the puzzle resets — the blocks shuffle and the odd one moves — but you get a fresh window to solve it. Solve it and Amy pops out swinging; shoot her when she turns solid. Green torch lit.
Meg skips the buildup. Walk to the centre of the main hall and she splits into four copies that circle you. The real one is the one that spins after the split — Z-target her and shoot, then watch for the spin again on each new split. Purple torch, four flames, and the elevator rises back into place. Ride it down.
The rotating basement
The basement is one round room, and you rotate it yourself by pushing the wall slabs — always push the same direction unless you enjoy being lost. Stepping on the three switches hidden around the ring opens the gate; check both doors after each rotation. The fifth Gold Skulltula shares a chamber with an ordinary Skulltula along the way. When the tunnel with the blue carpet lines up, your Boss Key opens the door at the end of it.
Phantom Ganon: the two-phase fight
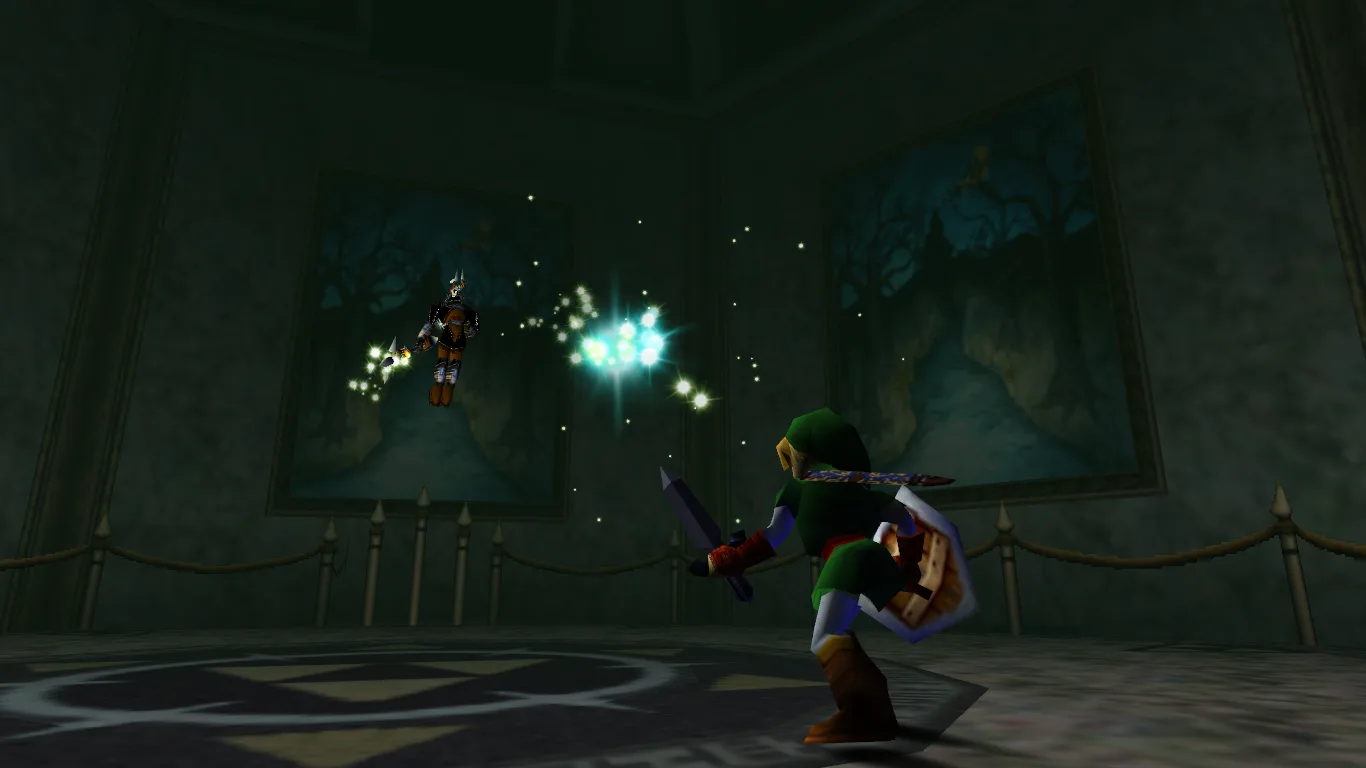
The arena is a platform ringed by six paintings of a road to a dark castle, and Phantom Ganon — 24 hit points — jumps his horse into one of them.
Phase one is a shell game. He and a duplicate ride to the front of two paintings at random. The real one is the lighter-coloured rider, and a purple vortex swirls out of his painting as he emerges while the fake simply turns around. Shoot the real one with an arrow as he leaves the frame; if you miss or hesitate, he lands an electric ball that scatters across the floor — stand on one of the Triforce symbols in the platform's corners and it cannot touch you. Three arrows end the phase and cost him the horse.
Phase two is tennis. He hovers and fires an energy ball; hit it back with the Master Sword — an empty Bottle also works, which never stops being funny — and volley until it connects. He drops paralysed, and that window is where the fight actually happens: jump attacks do roughly double, so spend the stun well. Below half health he adds a staff-twirl charge worth three hearts of damage, the one attack in the fight that punishes greed. The full damage-window breakdown for every boss lives in our boss guide.
Win, and Ganondorf's voice dismisses his own creation as worthless before banishing it to the gap between dimensions. You take the Heart Container and the Forest Medallion, Saria wakes as the Sage of Forest, and the route points at Death Mountain.
Master Quest changes worth knowing
- Six Small Keys instead of five, with locations and locked doors rearranged throughout.
- The two Wolfos move from the entrance to the old first-Stalfos room, and the lone Stalfos relocates to a small connecting room where it guards the Dungeon Map.
- The Floormaster room hosts a single ReDead instead, with the Floormaster moved elsewhere.
- Two extra blocks fall into Amy's puzzle room — they serve no purpose except to camouflage the real five.
- The Boss Key chest shifts to the northwest corner of the twisted corridor's northern chamber.
- More Skulltulas and Skullwalltulas appear throughout, and the Gold Skulltulas move to new perches.
The bones of the dungeon — the Poe hunt, the torches, the elevator, Phantom Ganon — are unchanged. It is the connective tissue that gets remixed, same as the Master Quest treatment elsewhere.
Quick Action Checklist
- Win Dampe's race for the Hookshot, play Saria's Song to Mido, and learn the Minuet of Forest from Sheik in the meadow.
- Key 1 from the chest on the entrance-room tree; key 2 from the two-Stalfos room; key 3 from the drained well.
- Song of Time block in the main hall's northwest arch opens the East Courtyard route to the map and the well switch.
- Push the arrow block, then the red block to climb to the first twisted corridor.
- In the Bow room, kill the second and third Stalfos quickly or the first one revives.
- Beth (blue, Compass) is beside the Bow room; Joelle (red, Small Key) is across it. Shoot all three paintings, then the ghost.
- Untwist the second corridor for the Boss Key, then re-twist it to move on.
- Light the frozen switch by shooting an arrow through the torch flame.
- Amy: pull the one wrong block away, assemble the other four. Meg: shoot the copy that spins after splitting.
- Phantom Ganon: the real rider is lighter with a purple vortex; three arrows, then volley the energy ball and punish the stun.
Frequently Asked Questions
What do you need before entering the Forest Temple in Ocarina of Time?
How many Small Keys are in the Forest Temple?
What order do you fight the Poe Sisters in the Forest Temple?
How do you beat Meg, the Poe that splits into four?
How do you solve the frozen eye switch in the Forest Temple?
How do you beat Phantom Ganon in Ocarina of Time?
What is different about the Forest Temple in Master Quest?
Keep Reading
- Zelda Wiki — Forest Temple, chest-by-chest treasure list, Gold Skulltulas and Master Quest changes
- Zelda Wiki — Phantom Ganon health and fight structure
- Zelda Wiki (Fandom) — Phantom Ganon, the replica rider, Triforce-symbol safe spots and the staff charge
- Zelda Wiki — Joelle, the red flame and the three-portrait fight
- Zelda Wiki — Beth, the blue flame and her painting room
- Zelda Wiki — Amy, the five-block portrait puzzle and its timer
- Zelda Wiki — Meg, the four-copy split and the spinning tell
- Zelda Wiki — Minuet of Forest, where Sheik teaches it and the Lost Woods prompt quirk
- Zelda Wiki — Mido guarding the Sacred Forest Meadow route until Saria's Song is played
- Thonky — room-by-room Forest Temple walkthrough, key order and Poe route
Related Guides
Ocarina of Time Ice Cavern Walkthrough: Every Room
Skip the Ice Cavern and the Water Temple becomes uncrossable — the Iron Boots live nowhere else in the game. It's also a genuinely strange dungeon: per Zelda Wiki, it's tied with the Gerudo Training Ground as the smallest in Ocarina of Time, and every room but the mini-boss chamber connects by open hallway instead of a door. Here's the room-by-room route: the Ice Scythe hub and its five Silver Rupees, all three Gold Skulltulas, the White Wolfos fight, and the underwater shortcut on the way out.
Ocarina of Time Jabu-Jabu's Belly Walkthrough: Every Room
Inside Jabu-Jabu's Belly is the third dungeon in Ocarina of Time and the odd one out: no map-and-compass hunt for its own sake, and an escort mission where the person you're escorting can drown. Here is how to actually get in (it takes a diving contest and a message in a bottle), the full route through the Fork in the Guts, the Big Octo fight, and every phase of the Barinade boss fight, including the scripted invulnerability window partway through.
Ocarina of Time Dodongo's Cavern Walkthrough: Every Room
Dodongo's Cavern is one enormous lock with a giant dead Dodongo for a keyhole, and the entire dungeon is you gathering the means to open its mouth. Here is the route through the Entrance, Eastern, Western and Northern Rooms, every chest, the Bomb Bag, all five Gold Skulltulas — two of which child Link cannot reach on the way through — and the King Dodongo fight.
Ocarina of Time Deku Tree Walkthrough: Every Room
Inside the Deku Tree is the first dungeon in Ocarina of Time and the game's own tutorial, teaching doors, vines and switches in about twenty minutes. It is also easy to half-explore, because several of its rewards sit behind puzzle steps the game never spells out. Here is every chest, all four Gold Skulltulas (one of which needs an item you don't have yet), and the fastest way through Gohma.
Ocarina of Time Dungeon Order: The Full Route, Explained
Ocarina of Time looks like an open adventure and plays like a corridor. Eight required dungeons, three side dungeons, and exactly one place where the game genuinely lets you pick. Here is the whole route with the reasons behind each lock.
Ocarina of Time Bottom of the Well: Lens of Truth Guide
The Lens of Truth sits at the bottom of a Kakariko well that is full of water for the entire first act. Here is how you empty it: the time loop that unlocks the well, the six-step run to the Lens chest, and the ten other things buried down there.