Tears of the Kingdom Skyview Towers: How to Unlock All 15
Ten of Tears of the Kingdom's 15 Skyview Towers have something wrong at the door when you arrive: a stolen terminal, a jammed door, a broken elevator, brambles, sludge, a trapped repairman or a snowdrift. Here is where every tower is, what is wrong with each one, the fix, and what to pack before you go.
An Aerocuda has flown off with the terminal from the Ulri Mountain Skyview Tower, and Sawson, the Hudson Construction worker sent to repair it, is standing by the tower looking up at it. That is one of the 15 Skyview Towers Purah sends you to after she hands over the Paraglider at Lookout Landing, and it is a fair sample of the set. Ten of the 15 have something wrong at the door when you arrive: a stolen part, a jammed door, a broken elevator, a platform parked on the roof, brambles, sludge, a repairman stuck in a cage, or a snowdrift. The other five work as soon as you get inside. Lookout Landing is handed to you, and the other four just sit somewhere awkward.
This guide lists all 15 with where each one is, what is wrong with it, and the fix. Tower facts and in-game dialogue come mostly from Zelda Wiki. Eleven of its 15 tower pages are still marked as stubs, so GamerGuides' per-tower walkthroughs fill the gaps, with GameWith and the Zelda Fandom wiki as cross-checks, and each is credited where it is used. Map coordinates come from the datamined object map at radar-totk.zeldamods.org.
How a tower works, in three facts
Our beginner guide covers the first launch at Lookout Landing. Three things matter for the other 14:
- The warp point is dead until you get inside. Zelda Wiki says each tower has a Travel Point outside its doors that stays inactive until the terminal inside is used. Reaching a tower you cannot open does not give you a warp point.
- One launch fills in two maps. The scan from the top of the launch updates both the Surface map and the Sky map, per Zelda Wiki.
- Look for the beams. GamerGuides points out that each tower has four spotlights at its base pointed straight up, and that the best place to spot the next tower's beams is the top of your current launch. Mark them with the Purah Pad and glide.
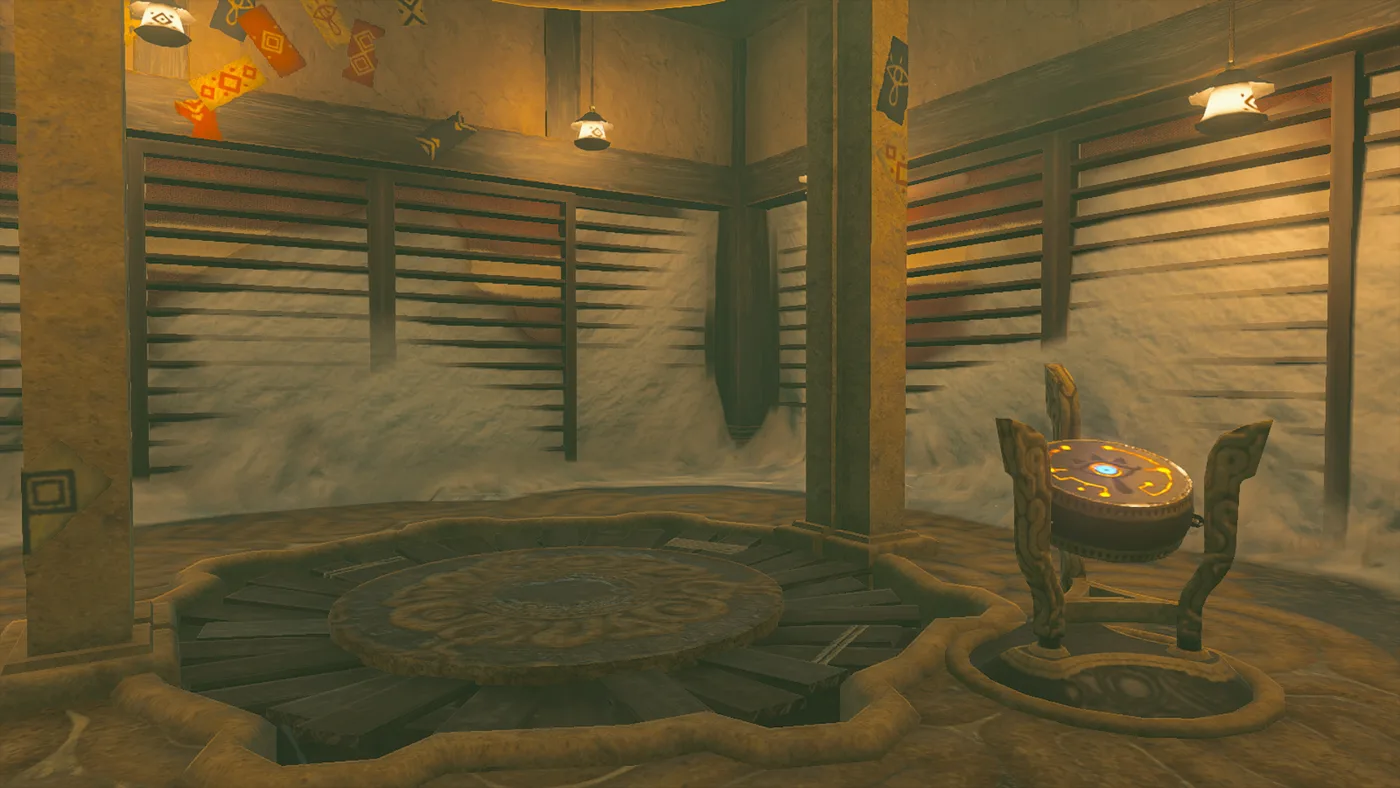
GamerGuides also says all 15 can technically be done straight after you leave the Great Sky Island. Across the 15 fixes below, the tools called for are Ultrahand, Fuse, Ascend, Recall, a bow, something that burns, Splash Fruit and the Paraglider. GamerGuides' warning is that the more persistent hazard is the climate, and cold most of all.
All 15 at a glance
Sorted alphabetically. "Where" is Zelda Wiki's location, with the region added where the location is just the tower's own name. The problem and fix are expanded in the sections below.
| Tower | Where | Map X, Y | What is wrong | The fix |
|---|---|---|---|---|
| Eldin Canyon | East of Pico Pond | 1638, 1184 | Falling ruins knocked off the roof lid and jammed the door | Recall a fallen rock, glide in through the roof, use the terminal |
| Gerudo Canyon | North-northwest of Spectacle Rock | -2432, -2179 | Broken elevator strands the repairman | Ultrahand weight onto the counterweight |
| Gerudo Highlands | Meadela's Mantle | -3960, -1313 | Snowed in | Raft down the river in Meadela's Mantle Cave, Ascend in from below |
| Hyrule Field | Northwest of Lake Kolomo | -753, -1020 | Built inside a monster stronghold | Fight or sneak in; Ascend through the east bridge |
| Lindor's Brow | Lindor's Brow, Hyrule Ridge | -1902, 1243 | On an island in a lake | Bridge out from the shore, Ascend through the west overhang |
| Lookout Landing | Lookout Landing | -293, 137 | Nothing | Purah switches it on |
| Mount Lanayru | Peak of Mount Lanayru | 3846, -1307 | Nothing at the door | Get up there with cold resistance |
| Pikida Stonegrove | Pikida Stonegrove, Hebra Mountains | -2318, 3066 | Nothing at the door | Climb in from Snowfield Stable |
| Popla Foothills | Overlooking Deya Lake | 603, -2119 | Terminal down, repairman trapped below | Free Elmerson with the floor switch in the excavation site |
| Rabella Wetlands | Rabella Wetlands, East Necluda | 2420, -2763 | Brambles at the door, and rain that puts fire out | Roof the brambles with boards, then burn them |
| Rospro Pass | Between the Flight Range and Rospro Pass | -3686, 2342 | Brambles on the path and stairs | Burn them |
| Sahasra Slope | Near the top of Sahasra Slope | 1344, -1171 | Door will not open | Ascend in from Sahasra Slope Cave, pull out two Long Sticks |
| Thyphlo Ruins | Thyphlo Ruins, north of Great Hyrule Forest | 344, 3134 | A floating platform sits on the lid | Rocket up a platform, Ultrahand the blocker off |
| Ulri Mountain | Northwest of Tarrey Town | 3494, 2020 | An Aerocuda stole the terminal | Shoot it down, put the terminal back |
| Upland Zorana | West of Zora's Domain | 2858, 582 | Sludge over the door | Splash Fruit |
Map X, Y comes from the StartPos entry the datamined object map lists for each tower: its first value, and its third with the sign flipped, both rounded. Thonky's tower list gives in-game coordinates for nine of the 15, and all nine land within 40 map units of these on both axes, so treat the column as close enough to drop a pin on, not as an exact readout. Thonky's numbers also include elevation, which these do not.
Six towers with a repairman at the door
Zelda Wiki says many of the towers are malfunctioning when Link reaches them and need a nearby Hudson Construction worker before they will run. Count them and it is six towers, split between three workers. Hudson Construction is based in Tarrey Town and built both the towers and Lookout Landing, per Zelda Wiki; one of its workers says Purah did the design work.
Sawson's three: Eldin Canyon, Ulri Mountain, Gerudo Canyon
Eldin Canyon. Sawson tells you a big chunk of ruins fell from the sky, knocked the lid off the top of the tower and jammed the door. His theory is that using the terminal inside would force the door open, if anyone could get in. The way in is the hole the debris left. Ruins Rubble keeps dropping out of the Eldin Canyon Sky around the tower, and Recall on a piece that has just landed rides it back up. GamerGuides finds the landing spot on a grey rock platform below a cliff west of the door. Jump off once you are above the tower, glide into the open top, and use the terminal. Zelda Wiki notes you can also just climb the outside. Either way, the terminal opens the door, and Sawson is surprised to find you already in.
Ulri Mountain. Sawson's complaint is the Aerocuda. Zelda Wiki says shooting it with an arrow makes it drop the terminal, which you then carry or Ultrahand back into the tower. GamerGuides finds it circling just east of the tower and warns that it climbs higher once it spots Link, so shoot from behind the tower before it notices you. If it keeps getting away, the Fuse guide has the fix: a Keese Eyeball on an arrow homes in. GamerGuides also flags a Black Bokoblin camp a short way west.
Gerudo Canyon. Sawson is stuck at the bottom of a pulley elevator whose other platform is gone, so nothing pulls him up. Attach weight to the empty end of the pulley with Ultrahand and his side rises. GamerGuides did it with three metal crates from the building supplies at the top. Once up, Sawson finds the tower's drive mechanism jammed by the canyon heat, swaps in heat-resistant parts, and pays you in Chilly Steamed Mushrooms, which GamerGuides notes grant heat resistance. The tower is the easy part here. GamerGuides warns that the road up through Gerudo Canyon Pass is unbearably hot by day and cold at night without protection.
When all three of his towers are working, Zelda Wiki says Sawson turns up at the Goron Hot Springs and shares the locations of other hot springs as thanks.
Billson's two: Sahasra Slope and Thyphlo Ruins
Billson is a Rito carpenter, per a co-worker's line on Zelda Wiki. Before the Lookout Landing tower is switched on he is camped north of the Hyrule Field tower, explaining what a Skyview Tower is. Afterwards he moves to these two.
Sahasra Slope. He came to fix the terminal, he says, but the door will not budge even though it is not locked, and he has worked up an appetite and suspects the caves below have good mushrooms. The mushroom line is the hint. Zelda Wiki says Sahasra Slope Cave runs beneath the tower, with entrances northwest and southeast of it, and that you have to enter it to Ascend into the tower. Large parts of the cave are Hard Sediment, so bring a crushing weapon. A rock fused to anything works, which the Fuse guide covers. GamerGuides' tip for the Ascend spot is to line yourself up with the tower icon on the mini-map.
You come up inside, and the door still will not open. Long Sticks are jamming it, two of them per the Fandom wiki. Pull them out, let Billson in, and he clears the terminal with a little oil. Two things worth taking on the way: a stone chest on a ledge in the cave's northeast chamber holds the Shield of the Mind's Eye, at 1388, -1142, 0136 per Zelda Wiki, and the cave has a Bubbulfrog, which GamerGuides found behind a boulder you move with Ultrahand. Our shields guide has the shield's numbers, and the cave guide has what the gem buys.
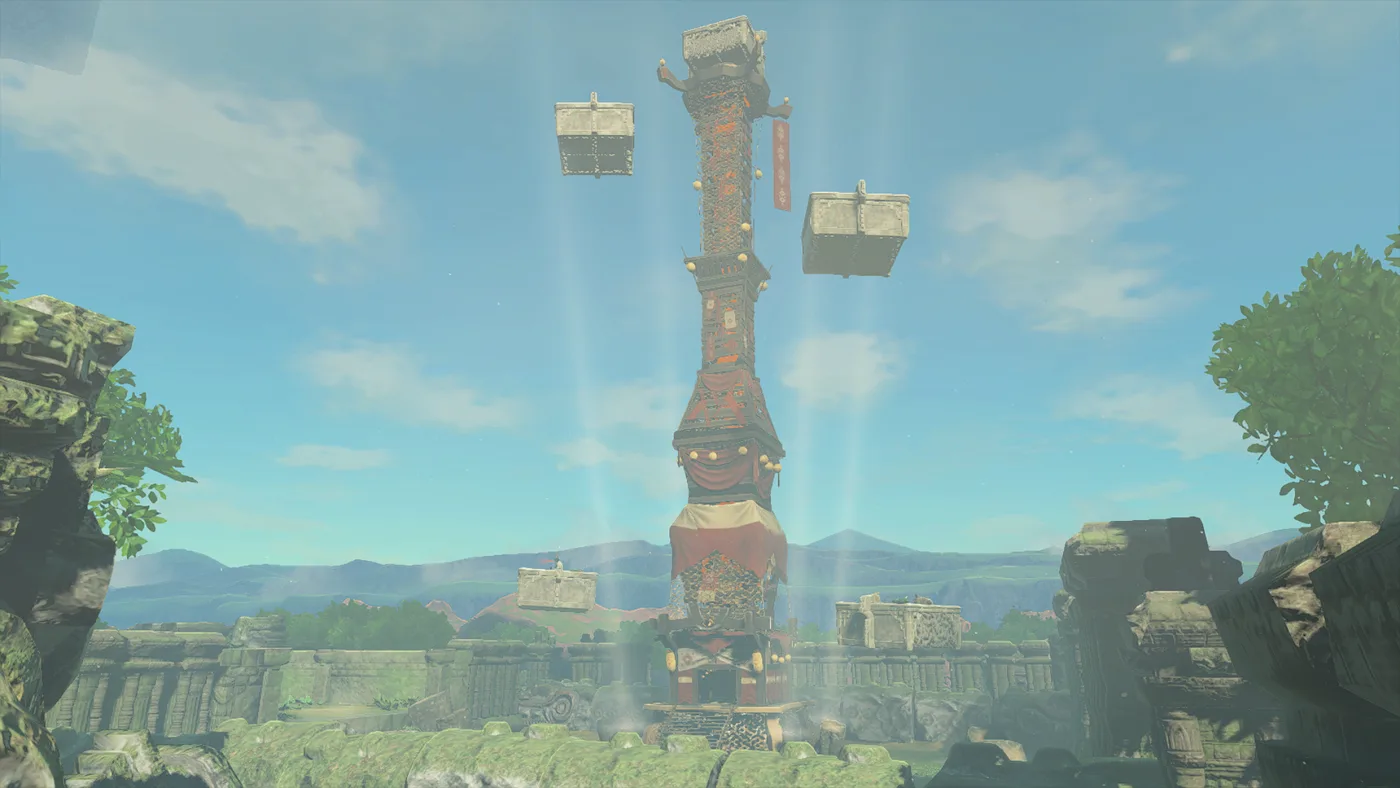
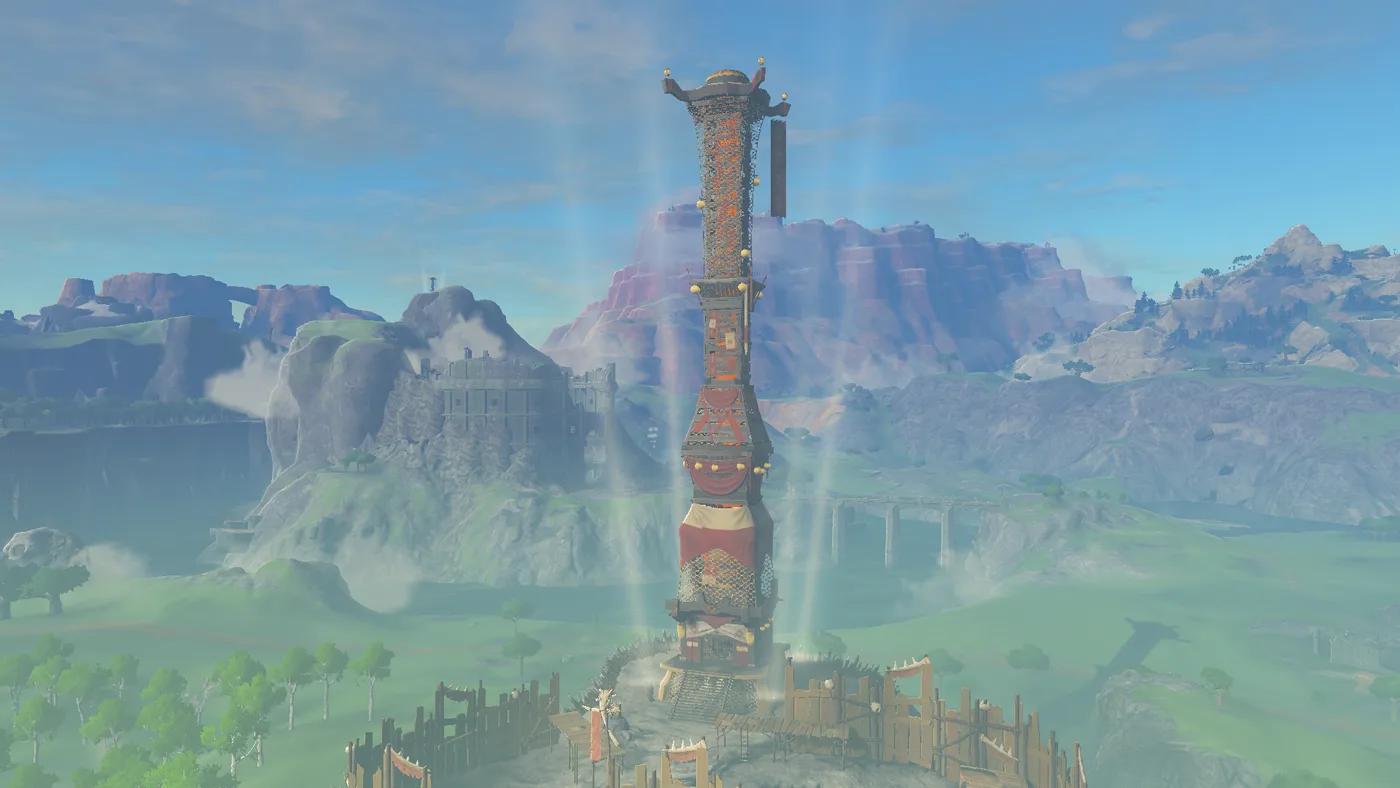
Thyphlo Ruins. The hero image at the top of this page is the whole puzzle. Billson cannot work out why the tower will not run. Zonai floating platforms hang around it, and GamerGuides notes you will not see them around any other tower. The answer is on top: one platform sits right over the tower's lid. GamerGuides' method is to Ascend to the lowest platform, Ultrahand one of its Rockets onto the side pointing up, hit it, and ride the platform skyward. Drop onto the blocking platform, glide down onto the tower roof under it, and Ultrahand it out of the way. Zelda Wiki says a Rocket burns out after a few seconds, so be standing on the platform before you hit it. GamerGuides also warns of archer Constructs on some of the lower platforms.
Once both of Billson's towers work and Lurelin Village has been restored, Zelda Wiki says he heads to Lurelin to eat fish.
Elmerson in the well: Popla Foothills
After the Lookout Landing tower is switched on, a voice calls for help from inside the Popla Foothills North Well, right next to the tower, per Zelda Wiki. GamerGuides' advice is to climb down rather than jump. Past a Cracked Wall at the bottom is a Zonai ruin, and Elmerson is in it, trapped between two portcullises after setting off a trap. The floor switch that frees him is on the far side.
The far side is the Popla Foothills Excavation Site, the cave below the tower. GamerGuides' route: Ascend back out of the well, head south from the tower to a cliff above some ruins, glide down, and find the cave mouth in the cliff face to the north. Inside, drag a rock onto the switch with Ultrahand. Elmerson gives you the Purple Rupee he found in the chest that trapped him, worth 50 rupees, and runs off to fix the tower. In a line Zelda Wiki quotes, he says humidity had stopped the terminal working. Sawson later mentions that Elmerson was heading for the Bedrock Bistro.
Three doors you burn or wash
Rospro Pass. GamerGuides puts it directly north of Rito Village, reached from the Hebra Mountain Climbing Path at Hebra Trailhead Lodge. Thorny brambles start on a branch to the left of the path and thicken until they block the stairs to the tower. Burn your way through. GameWith's suggestion is Fire Fruit on an arrow. GamerGuides says to pack cold resistance as well as the fire before you set out.
Rabella Wetlands. The same brambles, but the Fandom wiki says it is always raining here, and GamerGuides found the rain puts out the fire. A note in a shelter east of the tower complains about the cost of keeping things dry, which is the hint. Hudson building materials sit on foundations around the tower. Ultrahand long boards together into a roof over the brambles at the door, then light them. The Fandom wiki lists a Ruby, Red Chuchu Jelly or Fire Fruit as fire sources. GamerGuides hung a three-board panel between the two structures on either side of the door.
Upland Zorana. Sludge covers the door. Zelda Wiki lists Splash Fruit, Chuchu Jelly or a Hydrant as things that wash Sludge away, and GamerGuides says Splash Fruit grows behind the tower if you arrive without any. Getting up is the longer job: GamerGuides notes that the Zora Armor from "Restoring the Zora Armor" lets you swim up a waterfall outside Zora's Domain straight to the plateau. Without it, climb from the south and follow the sludge.
Gerudo Highlands: snowed in, so you go under it
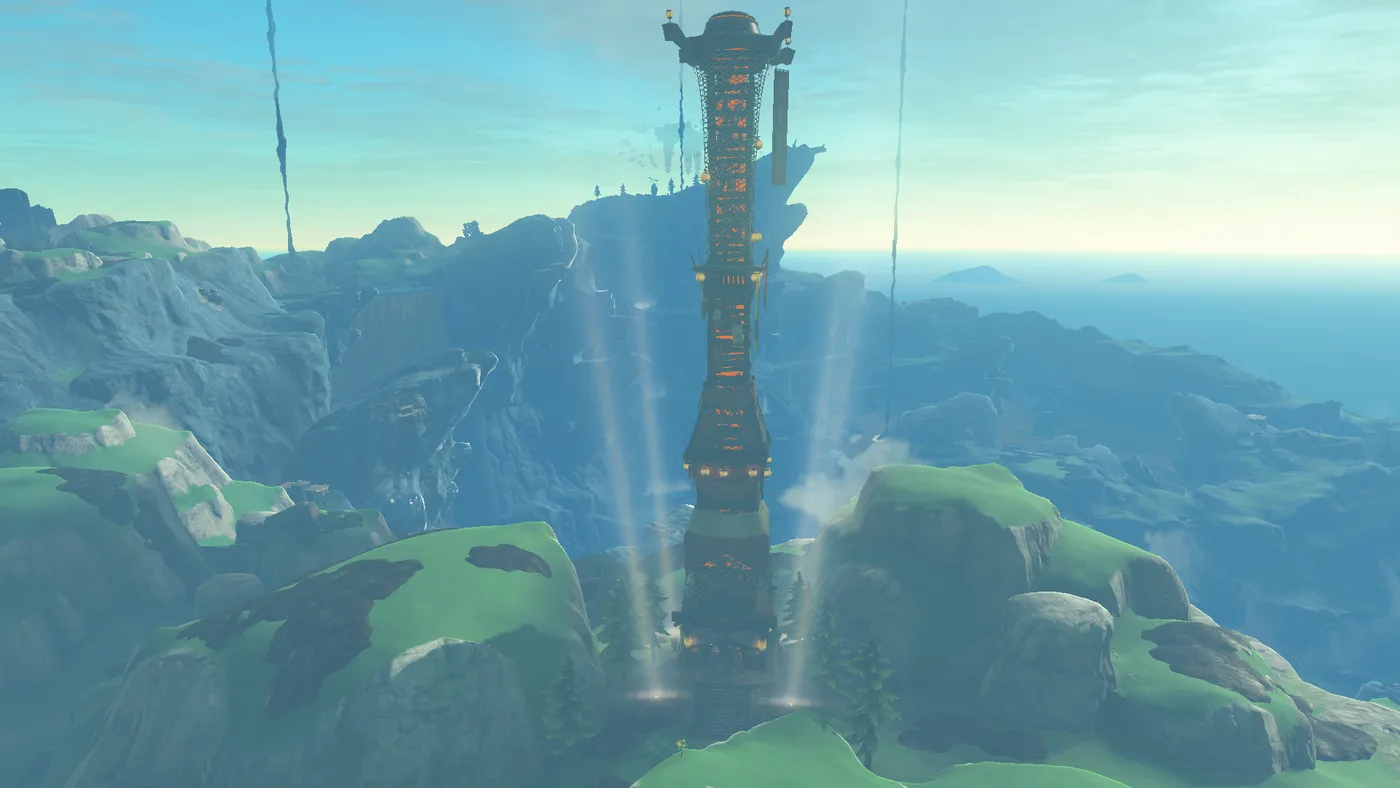
GamerGuides calls this tower inaccessible from outside because of heavy snowfall, and says the clue is a note in a tent northeast of the tower about a cave where supplies were stored. That is Meadela's Mantle Cave, on the northern side of Meadela's Mantle. Zelda Wiki says it has an underground river that ends at the tower's supports.
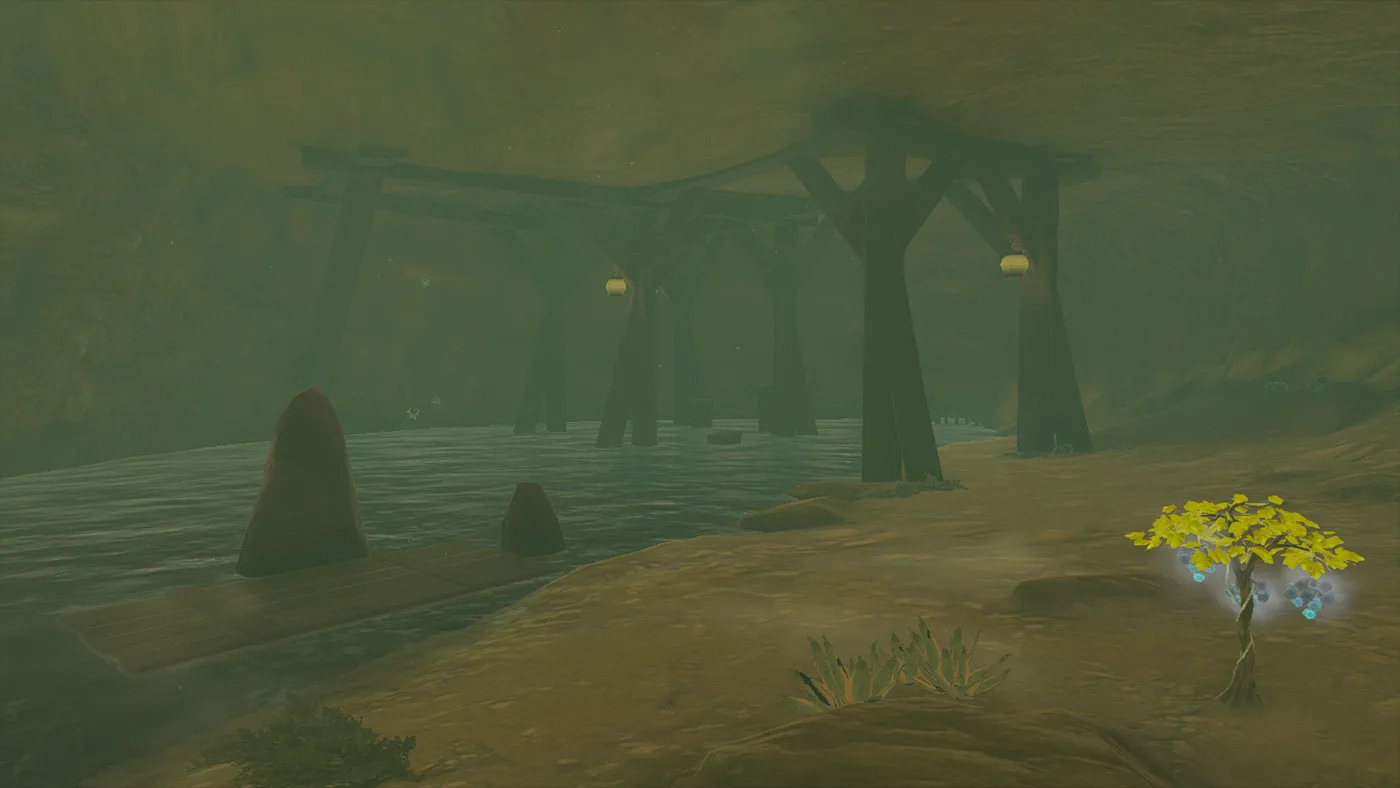
The cave also explains itself. Billson's Records, a book Zelda Wiki transcribes from inside it, is his build diary. A snowstorm hit on day one, so the crew sheltered in the cave and made it their base. They followed the river downstream, found it ran all the way under the tower, and planned a reinforcement in the cave so the tower would not sink. Zelda Wiki files the screenshot above as that reinforcement. The tower was done on day ten, and they left materials behind in case they needed the site again.
Those leftover materials are your raft. GamerGuides' route: lash the wooden platforms together, ride the river down until it drops over a waterfall, glide to dry ground on the right, and look south for the support beams. Most of the ceiling they hold up is stone, but one section is wood. Get a platform under the wooden section and Ascend through it into the tower. The cave has a Bubbulfrog too, per Zelda Wiki.
Pack for the cold. GamerGuides says surviving the Gerudo Highlands takes two levels of cold resistance, and GameWith says the same.
Five that only ask you to get there
Lookout Landing. Purah switches the tower network on and launches you with the Paraglider. The beginner guide covers it.
Hyrule Field. Zelda Wiki describes it as built on a rock formation north of the Great Plateau that monsters have turned into a stronghold. Spiked barricades ring the top, Bokoblins guard the entrance with a Spiked Iron Ball trap, and Bomb Barrels lie around. Its enemy list includes Blue Bokoblins, a Blue Boss Bokoblin and a Blue Moblin.
You do not have to clear it. GamerGuides sneaks under the bridge on the east side, climbs the cliff beneath it and Ascends straight up through the bridge. One Bokoblin there smashes a gate to roll the spiked ball down at you, so hop the palisade to the left and wait between the spikes and a wooden wall until the camp loses interest. GamerGuides adds that the enemies here sleep at night. GameWith's alternative is a fire arrow into the Bomb Barrels near the Moblins.
Lindor's Brow. GamerGuides describes a funnel-shaped island in the middle of a lake northwest of Lookout Landing, with walls GamerGuides doubts an early stamina wheel can climb. Hudson building materials sit on the lake's southwest shore. Build a bridge to the overhang on the island's west side, stand on a dry platform beneath it, and Ascend up through the rock to the tower.
Pikida Stonegrove. GameWith says there is no gimmick at the door, and GamerGuides' walkthrough describes none. GamerGuides starts from Snowfield Stable, where Orochium Shrine gives you a warp, and heads northwest up a snowbank to rock formations shaped like mushrooms. Ascend through the pillar under one of them, then climb and glide across to the tower. It warns of a Gleeok nearby and advises cold protection.
Mount Lanayru. GamerGuides says the whole challenge is reaching it. It stages from Hateno Village, with Zanmik Shrine above the village as a warp point, and follows slopes that spiral up the mountain. GameWith says cold resistance level 1 is not enough at the peak, so bring level 2.
What to pack
| Bring | Towers it opens | Per |
|---|---|---|
| A fire source: Fire Fruit arrows, Red Chuchu Jelly or a Ruby | Rospro Pass, Rabella Wetlands | GameWith, Fandom wiki |
| A crushing weapon (a fused rock will do) | Sahasra Slope, through the cave's Hard Sediment; Popla Foothills, for the Cracked Wall in the well | Zelda Wiki, GamerGuides |
| A bow, with Keese Eyeballs if you have them | Ulri Mountain's Aerocuda; Hyrule Field's Bomb Barrels | Zelda Wiki, GamerGuides, GameWith |
| Splash Fruit | Upland Zorana | Zelda Wiki, GamerGuides |
| Cold resistance at level 2 | Gerudo Highlands, Mount Lanayru | GamerGuides, GameWith |
| Some cold resistance | Rospro Pass, Pikida Stonegrove | GamerGuides |
| Heat protection by day, warmth by night | The Gerudo Canyon road | GamerGuides |
Zelda Wiki caps Cold Resistance at level 2, so the two coldest towers ask for the maximum. Our cooking guide has the food math, and the armor guide has the Snowquill set and the other climate gear.
An order that works
GameWith publishes a recommended order for the 14 after Lookout Landing: Lindor's Brow, Rospro Pass, Pikida Stonegrove, Thyphlo Ruins, Eldin Canyon, Upland Zorana, Ulri Mountain, Sahasra Slope, Mount Lanayru, Popla Foothills, Rabella Wetlands, Hyrule Field, Gerudo Canyon, Gerudo Highlands. GameWith says the order follows its recommended main-quest order, with Lindor's Brow first, the two Hebra towers next and the rest clockwise, and its own Hyrule Field note says the guards there are hard to deal with early in the game.
That is a sound route if you are heading for Rito Village anyway. Two adjustments, and they are my opinion, not GameWith's. Pull Sahasra Slope and Eldin Canyon forward. Neither needs more than Ascend, Recall and a rock-fused weapon, and neither GamerGuides nor GameWith flags a climate problem on the way to either. And do not start the Rospro Pass or Pikida Stonegrove climbs without cold protection just because they are second and third on a list. GamerGuides says both need it. Gerudo Highlands, which wants level 2 cold resistance and a raft, is last on GameWith's list, which is where it belongs.
What all 15 buy you
A third Travel Medallion. Robbie's Travel Medallion quest unlocks a second medallion once 10 regions are mapped and a third at 15, per the Adventure Log text on Zelda Wiki, and GamerGuides reads "regions mapped" as Skyview Towers activated. Our Purah Pad upgrades guide covers the rest of that quest.
A full sky and surface map. The Depths are a different job. Zelda Wiki says each Lightroot reveals the area around it on the map, and our Depths guide covers that layer.
Fifteen launch pads. Once a tower is activated you can launch from it again any time, per Zelda Wiki.
Breath of the Wild also had 15 towers, per Zelda Wiki's Sheikah Tower page, and our Breath of the Wild tower guide covers what stood between Link and the top of those. Those you climbed. These you have to get inside.
More Hyrule lives on the Tears of the Kingdom hub, and everything else we are playing is on the Mythras blog.
Quick Action Checklist
- 15 Skyview Towers. Ten have a problem at the door; Lookout Landing, Hyrule Field, Lindor's Brow, Pikida Stonegrove and Mount Lanayru only make you get there.
- Use the terminal inside before you count a tower as done. The Travel Point outside stays dead until you do.
- Eldin Canyon: Recall a fallen rock up past the tower and glide in through the roof.
- Ulri Mountain: shoot down the Aerocuda and put the terminal back.
- Gerudo Canyon: Ultrahand weight onto the counterweight to lift Sawson, then take his Chilly Steamed Mushrooms.
- Sahasra Slope: Ascend in from Sahasra Slope Cave and pull the two Long Sticks off the door. Grab the Shield of the Mind's Eye in the cave.
- Thyphlo Ruins: Rocket a floating platform up and Ultrahand the one sitting on the tower's lid.
- Popla Foothills: hear Elmerson in the well, then free him from the excavation site's floor switch for a Purple Rupee.
- Rospro Pass and Rabella Wetlands: burn the brambles. At Rabella, build a board roof over them first.
- Upland Zorana: Splash Fruit on the sludge.
- Gerudo Highlands: raft down the river in Meadela's Mantle Cave and Ascend through the wooden ceiling. Bring level 2 cold resistance, and the same for Mount Lanayru.
- All 15 activated unlocks the third Travel Medallion.
Frequently Asked Questions
How many Skyview Towers are in Tears of the Kingdom?
How do you get into the Eldin Canyon Skyview Tower?
How do you activate the Gerudo Highlands Skyview Tower?
Why won't the Sahasra Slope Skyview Tower door open?
How do you fix the Thyphlo Ruins Skyview Tower?
How do you free Elmerson at the Popla Foothills Skyview Tower?
What do you get for activating every Skyview Tower in Tears of the Kingdom?
Keep Reading
- Zelda Wiki — Skyview Tower: 15 towers and their locations, Travel Points inactive until the terminal is used, Surface and Sky maps updated by each scan, and towers needing repair by a nearby Hudson Construction worker
- Zelda Wiki — Eldin Canyon Skyview Tower: Sawson, the fallen debris, the open roof, Recall on Ruins Rubble, and the terminal opening the door
- Zelda Wiki — Ulri Mountain Skyview Tower: Sawson and the Aerocuda that stole the terminal
- Zelda Wiki — Gerudo Canyon Skyview Tower: the broken elevator, the heat-resistant parts, and the Chilly Steamed Mushrooms reward
- Zelda Wiki — Hyrule Field Skyview Tower: the Monster Stronghold, its Spiked Iron Ball trap, Bomb Barrels and enemy list
- Zelda Wiki — Sawson: the Ulri Mountain, Gerudo Canyon and Eldin Canyon towers, then hot-spring tips at the Goron Hot Springs
- Zelda Wiki — Billson: a Rito carpenter, first camped north of the Hyrule Field tower, then at Sahasra Slope and Thyphlo Ruins, later in Lurelin Village
- Zelda Wiki — Hudson Construction: based in Tarrey Town, builders of the Skyview Towers and Lookout Landing, and Elmerson's humidity line
- Zelda Wiki — Sahasra Slope Cave: entrances northwest and southeast of the tower, Hard Sediment, the Long Sticks on the door, and the Shield of the Mind's Eye chest
- Zelda Wiki — Popla Foothills North Well: Elmerson trapped between portcullises, the floor switch in the excavation site, and his Purple Rupee
- Zelda Wiki — Popla Foothills Excavation Site: the cave below the Popla Foothills Skyview Tower, connected to the North Well
- Zelda Wiki — Meadela's Mantle Cave: the underground river ending at the Gerudo Highlands Skyview Tower's supports
- Zelda Wiki — Billson's Records: the Gerudo Highlands tower build diary, the reinforcements under the tower, and the materials left in the cave
- Zelda Wiki — Sludge: washed away by Splash Fruit, Chuchu Jelly or a Hydrant
- Zelda Wiki — Rocket: powerful thrust in the direction it faces, burning out after a few seconds
- Zelda Wiki — Lightroot: activating one reveals the surrounding Depths on the map and adds a Travel Point
- Zelda Wiki — Cold Resistance: some environments need a higher level, and the effect caps at level two
- Zelda Wiki — Presenting: The Travel Medallion!: second medallion at 10 mapped regions, third at 15
- Zelda Wiki — Sheikah Tower: 15 towers in Breath of the Wild
- Object Map (radar-totk.zeldamods.org) — datamined StartPos entries for all 15 Skyview Towers
- Thonky — List of Skyview Towers: regions for all 15 and in-game coordinates for nine
- GamerGuides — Where to Find All Towers: the four base spotlights, spotting towers from launches, and all 15 being possible straight after the Great Sky Island
- GamerGuides — Thyphlo Ruins Skyview Tower: Billson, the Rocket platforms, the archer Constructs and the platform on the lid
- GamerGuides — Eldin Canyon Skyview Tower: the grey rock platform below the cliff west of the door, Recall on a falling rock, and gliding in through the open roof
- GamerGuides — Gerudo Highlands Skyview Tower: the snowfall, the tent note, the raft down the river, the wooden ceiling, and two levels of cold resistance
- GamerGuides — Gerudo Canyon Skyview Tower: three metal crates on the counterweight and the hot-day, cold-night road through Gerudo Canyon Pass
- GamerGuides — Popla Foothills Skyview Tower: the well, the cliff route to the excavation site, and the rock on the pressure plate
- GamerGuides — Rabella Wetlands Skyview Tower: the rain, the note about keeping things dry, and the board roof over the brambles
- GamerGuides — Rospro Pass Skyview Tower: north of Rito Village via Hebra Trailhead Lodge, with brambles up to the stairs, and cold resistance plus a fire source to pack
- GamerGuides — Sahasra Slope Skyview Tower: Billson's mushroom hint, the cave, the Bubbulfrog behind the boulder and the Ascend spot under the tower icon
- GamerGuides — Ulri Mountain Skyview Tower: the Aerocuda east of the tower, climbing when it spots Link, and the Black Bokoblins to the west
- GamerGuides — Upland Zorana Skyview Tower: the Zora Armor waterfall route and Splash Fruit behind the tower
- GamerGuides — Hyrule Field Skyview Tower: Ascend through the east bridge, the spiked-ball Bokoblin, and sleeping enemies at night
- GamerGuides — Lindor's Brow Skyview Tower: the lake island, the building materials on the southwest shore, and the west overhang
- GamerGuides — Pikida Stonegrove Skyview Tower: the Snowfield Stable route, the Ascend pillar, and cold protection
- GamerGuides — Mount Lanayru Skyview Tower: staging from Hateno Village and Zanmik Shrine, and no puzzle at the top
- GamerGuides — Presenting: The Travel Medallion: the second charge at 10 Skyview Towers and the third for all of them
- GameWith — Skyview Tower Locations and How to Unlock: the recommended activation order, Fire Fruit arrows for the Rospro Pass brambles, Bomb Barrels at Hyrule Field, and level 2 cold resistance for Mount Lanayru and Gerudo Highlands
- Zelda Fandom wiki — Rabella Wetlands Skyview Tower: constant rain, thorn bushes, and a Ruby, Red Chuchu Jelly or Fire Fruit to burn them
- Zelda Fandom wiki — Sahasra Slope Skyview Tower: the two Long Sticks jamming the door and Billson's oil fix
Related Guides
Tears of the Kingdom Purah Pad Upgrades and the Compendium
The Purah Pad you take off a Steward Construct is missing half its features. The Camera and Hyrule Compendium wait on a Main Quest in the Depths, and the Sensor, Sensor +, Hero's Path Mode and three Travel Medallions come one Side Adventure at a time from Robbie. Here is what unlocks each one, what Robbie charges for Compendium pictures, and which boss entries have no rematch, so they are best photographed mid-fight.
Tears of the Kingdom Shrines: 51 of 152 Have No Puzzle
Tears of the Kingdom has 152 Shrines of Light, and a third of them contain nothing to solve. Here is the full census — every shrine sorted by trial type and by region, what the 51 blessing chests actually hold, and why the puzzle moved outside the door.
Tears of the Kingdom Cave Guide: 147 Bubbulfrogs, Koltin, and 58 Wells
Skyview Towers map the surface. Lightroots map the Depths. Nothing maps the 147 caves — you find those by walking into them. Here is what each one is hiding, what the frog inside is worth, and why the merchant who buys the gems only opens after 9 PM.
Tears of the Kingdom Master Kohga: All Four Mine Fights
The two researchers who watch you get Autobuild are Yiga, and their boss wants it back. That fight at the Great Abandoned Central Mine is only the first of four. Here is how to reach each Abandoned Mine Master Kohga runs to, how to knock him off each of his four vehicles, and what the whole chase pays.
Tears of the Kingdom Beginner Guide: Great Sky Island and Your First 10 Hours
Tears of the Kingdom hands you four abilities in two hours and then refuses to explain how they interact. Here is what the Great Sky Island is actually teaching, what it skips, and the systems that decide whether hour ten feels powerful or exhausting.
Tears of the Kingdom Paraglider Fabrics: All 57 Sources
Mineru's Construct amiibo went on sale September 17, 2026, and its one exclusive drop is a paraglider skin. That makes 29 fabrics you can only get from a figure, against 28 you earn by playing. Here is where every one comes from, which figure drops which, and the per-scan odds from Zelda Wiki's datamined tables.