Fortnite Fishing Guide: Rods, Fish, and Free Heals
Fishing looks like the thing you do when you're bored and the storm is far away. It's actually one of the fastest heal sources in the game — a Shield Fish hands you 40 shield in about a second while a Shield Potion is still gurgling. Here's how the whole system works and when it's worth your time.
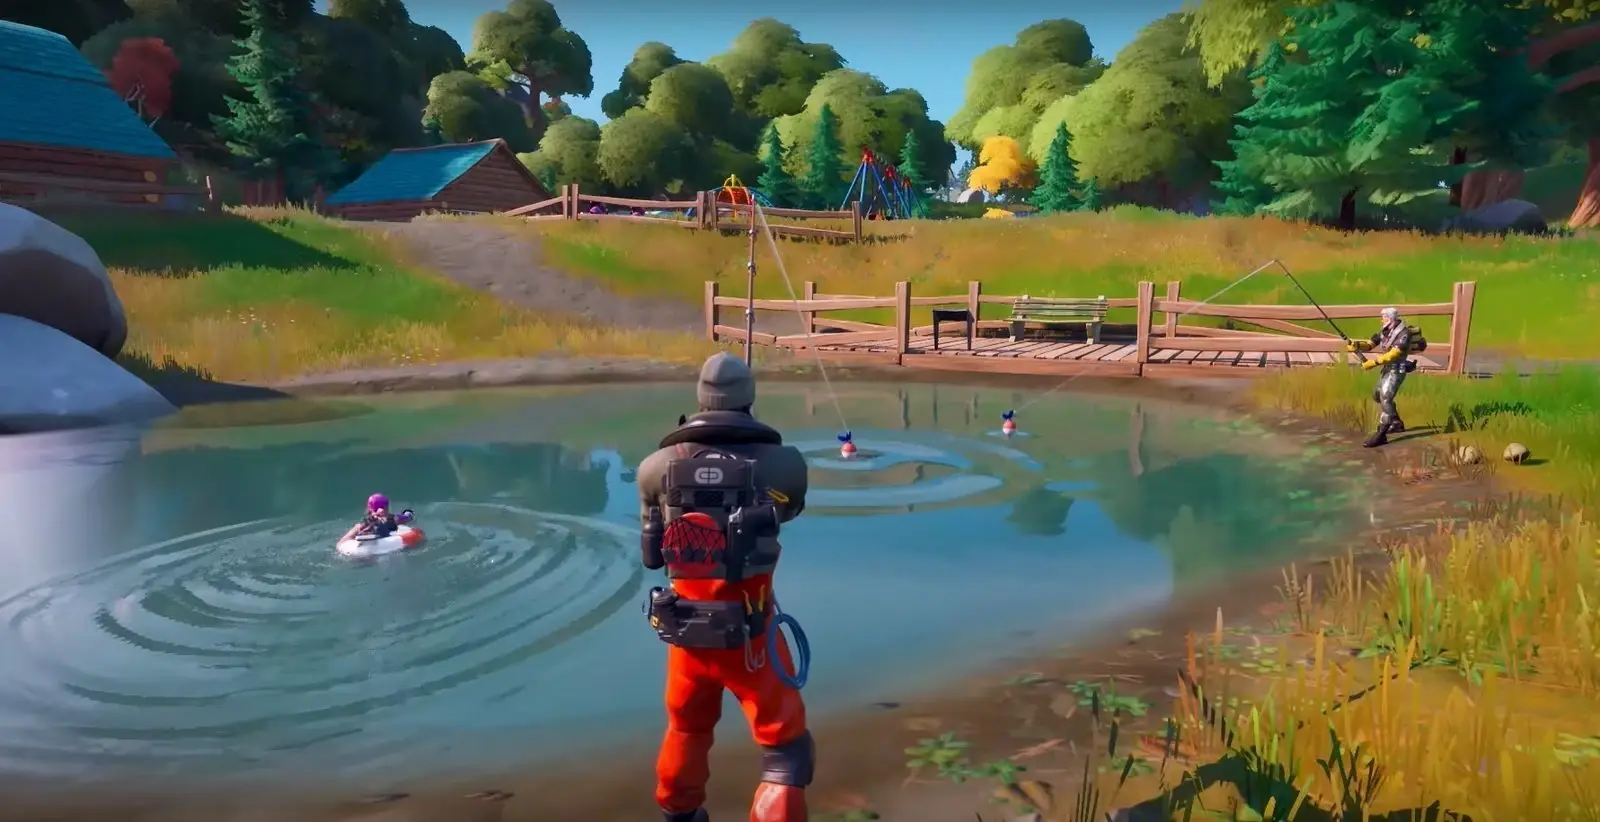
Nobody respects fishing. It's the thing you do at 4 minutes into a match when you have no shield, no mats, and a vague sense of shame. Streamers only touch a rod for the Midas Flopper meme. And yet: a Shield Fish gives you 40 shield in about one second of use, while a Shield Potion needs a one-second delay plus four more seconds of drinking to deliver 50. In a box fight, that gap is the entire fight. Fishing isn't a hobby you do instead of playing Fortnite. It's a loot source that happens to be sitting in every pond on the map, ignored, while everyone else fights over the same three chests.
The catch — sorry — is that fishing is genuinely dangerous. You're standing still, in the open, next to water, making noise, holding an item that cannot shoot back. So the skill isn't casting. The skill is knowing what the water is worth, how fast you can extract it, and when to leave the rod on the ground and walk away.
Fishing is a heal source, not a hobby
Fishing arrived in Chapter 2 Season 1 and has rotated in and out of the loot pool since — the Fishing Rod lasted 16 straight seasons before its first vaulting in Chapter 4, then returned in Chapter 5. That matters for one reason: the exact fish menu shifts by season. The mechanics underneath have barely moved in years, and those are what this guide is built on.
The pitch is simple: water is everywhere, water is free, and water is uncontested. Everyone else fights over a POI's chest spawns while a pond forty meters away quietly holds shield, health, ammo, and sometimes a better gun than the one they're dying for. If you land off-spawn — see our best Fortnite landing spots breakdown — fishing is a legitimate first-ninety-seconds plan, not a consolation prize.
How fishing actually works
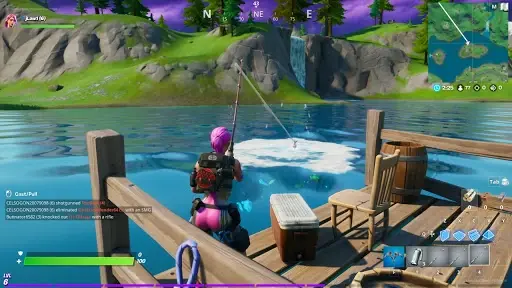
The cast, the bob, the reel
You need a Fishing Rod (or a Pro Fishing Rod) equipped, and you need to be looking at water. Cast the line, and after a short random delay the bobber sinks. That sink is your cue: hit the attack input at that moment and you reel in an item. Miss the window and the line comes back empty and you start over, which is a real cost when you're exposed.
Two details people get wrong. First, you can move while fishing — you're not rooted in place like a digital statue — but you have to stay near the bobber or the line breaks. That's enough freedom to shuffle behind a rock while you wait, which is more useful than it sounds. Second, the delay before the bob is random, so "the bite is taking forever" isn't a bug, it's variance. Don't stand in the open re-casting out of frustration.
You can fish essentially any water on the map: ponds, rivers, coastline, and weird water too — players have fished the stacks at Steamy Stacks and the fountains at The Authority.
Calm water vs fishing holes
This is the most important distinction in the system, and it separates fishing-as-a-plan from fishing-as-a-waste-of-time.
Calm water — any plain patch of blue — gives low-tier loot. Small Fries, basic ammo, junk. Rarely worth standing still for.
Fishing holes (or fishing spots) are the rippling circles with floppers visible near the surface. Substantially better table: rarer fish and a real chance at weapons. If you fish at all, fish these. Casting into flat water while a hole sits nearby is the fishing equivalent of skipping the vault to open a Common chest.
A third variant matters: Golden Fishing Spots. Fishable twice, and each pull guarantees an Epic-or-better weapon (up to Mythic/Exotic) plus a Rare-to-Legendary fish, with a chance at a Chest instead. That's a top-tier loot node sitting in a puddle. See one with no immediate threat, take the detour.
Faster ways to crack a hole
A rod is not the only way to fish a hole, and this is where fishing gets tactical:
- Harpoon Gun. Fires at a fishing hole and pulls the loot instantly. No bob, no timing window, no standing around. If you find a Harpoon Gun, it's a fishing rod that respects your time — and it doubles as a pull tool and can damage players and builds.
- Explosives. Grenades, rockets, and similar tools will pop a fishing hole. But — and this is the trade — explosions give regular loot, not the good stuff. Fishing a hole with a rod or harpoon gives the best table. Blowing it up gives you the discount version. Explosions also permanently lock you out of the game's most absurd prize: the Mythic Goldfish (a roughly one-in-a-million drop that instantly eliminates whoever it hits) can come from any form of fishing except explosions.
So: harpoon > rod > explosives, in that order, for both speed and quality.
The rods: standard vs Pro
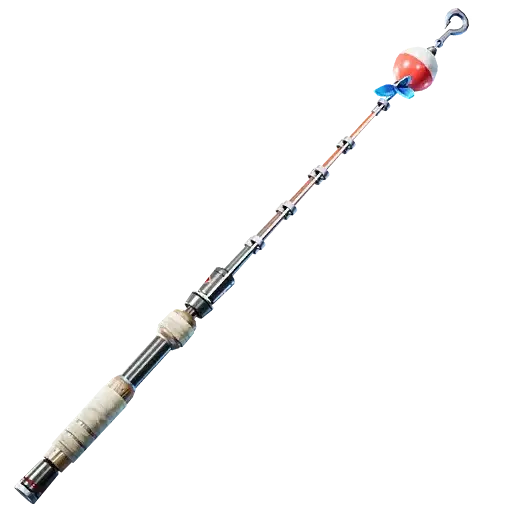
The Fishing Rod is Common rarity, takes a full inventory slot, and does not stack. That last part is the real cost — you're trading a fifth of your loadout for a tool that can't shoot. Read our loadout priority guide if you want the longer argument about slot economics, but the short version is a rod belongs in your inventory early and almost never late.
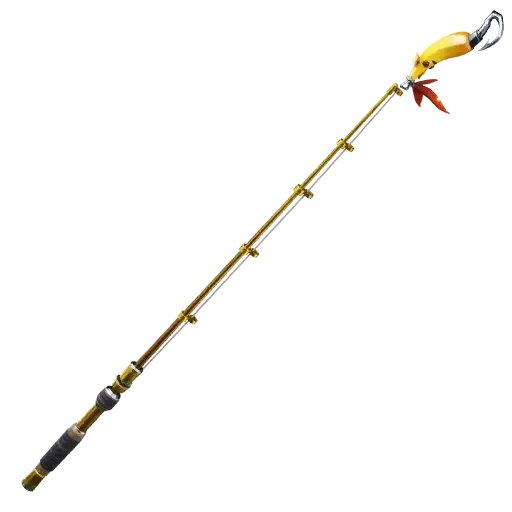
The Pro Fishing Rod is the Rare version, and it's narrower than the name implies: it fishes identically, and its real edge is that some variants can only be caught with it — the Pink Shield Fish and the White Slurpfish, for example. Chasing the Fishing Collection Book (44 fish models across 9 categories, tracked on your in-match map)? You need one. Chasing a Victory Royale? Both rods heal you at the same rate. It also uses a tiny Peely as the bobber, which is not gameplay-relevant but is correct behavior from Epic.
Rods come from Fishing Barrels — containers near water that spawn 3-4 items, mostly standard rods, sometimes swapping one for a Pro Rod or a Harpoon Gun. They also hand out a little XP for opening, which stacks with the objectives in our XP and leveling guide. One barrel kits out a whole squad.
The fish that actually matter
There are dozens of fish. Most you'll never think about. Here's the honest split.
The healing core
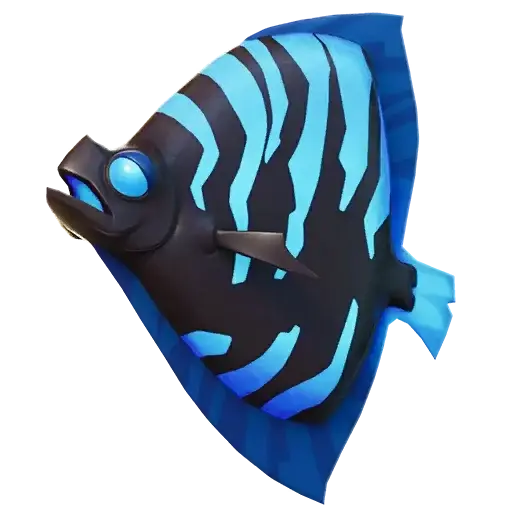
These four do 95% of the work:
- Small Fry — Common. 25 health, caps you at 75, stacks to 6. A bandage that came out of a lake. Eat one above 75 and the game tells you you've hit your "Small Fry Limit."
- Flopper — Uncommon. 40 health, one-second consume, stacks to 4. Only usable below full health. The best raw health-per-second item most players will ever hold.
- Shield Fish — Rare. 40 shield, one-second consume, stacks to 3. The headline item.
- Slurpfish — Epic. 40 effective health — fills health, shield, or both, whichever you're missing. The most flexible heal in the pool.
Honorable mention: Jellyfish, 20 effective health, stacks to 3. Filler, but fine filler.
All of these throw — hold aim, use the arc, and the landing spot pings for your squad. Underrated in duos and trios; our duos and trios strategy guide covers building a healing economy around it.
The utility fish
The gimmicky, occasionally match-winning stuff. Availability rotates by season, so treat this as a menu, not a promise:
- Midas Flopper (Legendary) — 40 health and upgrades every weapon in your inventory to Legendary. Yes, that is as good as it sounds.
- Vendetta Flopper (Legendary) — 40 health and marks a nearby enemy.
- Thermal Fish (Legendary) — 15 health and brief thermal vision.
- Rift Fish (Epic) — 40 health and spawns a Rift. A rotation tool that heals; pairs with the ideas in our rotation guide.
- Hop Flopper (Epic) — 15 health and low gravity.
- Zero Point Fish (Rare) — 15 health and a brief Zero Point dash.
- Spicy Fish (Rare) — 15 health and a speed boost.
- Cuddle Fish (Rare) — heals nothing; deals 35 damage to players who walk near it once placed. A trap in a box.
- Stink Fish (Uncommon) — 20 health, throwable as a stink cloud.
- Snowy Flopper (Uncommon) — 40 health and icy feet.
- Shadow Flopper (Rare) — 40 health and turns you into a Shadow.
Note the pattern: the fish with big effects heal 15, the fish with no effects heal 40. Epic priced these deliberately. A Midas Flopper is the exception and that's why people lose their minds over it.
Fish vs potions: the real math
Here's the comparison that should change how you play.
A Shield Potion gives 50 shield, but it needs a one-second delay plus four seconds of healing — five seconds where you cannot shoot, build, or react. A Shield Fish gives 40 shield in a one-second consume. You give up 10 shield and get four seconds of your life back.
Mid-rotation with nobody nearby, the potion wins: more shield, and the time is free. Inside a box with someone editing on you, it isn't close — the potion is a five-second window in which you lose. Same logic on health: a Flopper's 40 in one second beats sitting through a Medkit while someone tunnels toward you.
The rule: potions for the calm, fish for the fight. Slugging a Slurpfish mid-box-fight is the closest thing Fortnite has to a free reset. Our healing items tier list ranks the rest of that trade, and it matters even more in Zero Build, where you can't wall off to buy drinking time.
When to fish and when to walk away
Fish when:
- You landed quiet, it's early, and you have no shield. Ninety seconds at a hole solves your whole heal problem.
- You spot a Golden Fishing Spot with no immediate threat.
- You have a Harpoon Gun. The time cost basically disappears.
- A hole is already on your rotation path. Free value costs nothing.
Don't fish when:
- The storm is closing and the detour is real. Heals you die holding are worth zero.
- You're in a contested POI. Standing at a pond in a hot drop is charity.
- It's mid or late game and your heal slots are full. Slot economy beats hoarding.
- You have zero mats and no cover. See the mats management guide — no mats plus standing still equals a free kill for someone.
The through-line: fishing costs time and stillness, the two things Fortnite kills you for. Pay that cost only when it's cheap.
The rod as a weapon, sort of
Both rods pull items and players toward you, and both deal exactly zero damage doing it. Two legitimate uses:
- Yanking someone off a build. You don't damage them, but gravity might. A meme that occasionally becomes a highlight. Don't build a strategy on it.
- Pulling a knocked opponent to you. Actually practical. Drag a knock out of a bad spot instead of walking into open crossfire, or reel their loot in without exposing yourself to the third party that's certainly coming.
The Harpoon Gun does all of that, plus damage, plus instant fishing. Not a debate.
Mistakes that get you killed at the water
- Fishing calm water when a hole is visible. Worst table on the map, same risk.
- Blowing up holes for speed. You downgrade the loot and forfeit the Goldfish. Rod or harpoon.
- Carrying a rod into the endgame. That slot needs to be a heal, a mobility item, or a gun.
- Fishing with your back to open ground. You're audible and stationary; at least see it coming.
- Eating a Small Fry at 74 health. One point of healing, and you're capped at 75 anyway. It's a floor-filler, not a top-up.
- Tapping the key to eat a Flopper at full health. It won't let you. Rotate.
Quick Action Checklist
- Open a Fishing Barrel near water for 3-4 rods, a possible Pro Rod or Harpoon Gun, and a little XP.
- Always fish the rippling holes, never plain calm water. If you find a Golden Fishing Spot, fish it twice.
- Harpoon > rod > explosives. Explosives downgrade the loot table and cut you off from the Mythic Goldfish.
- Watch for the bobber to sink, then hit attack. You can move while waiting, just stay close or the line snaps.
- Prioritize Shield Fish, Slurpfish, and Floppers. Small Fry is filler and caps you at 75.
- Fish for fights, potions for the calm — 40 shield in one second beats 50 shield in five when someone is editing on you.
- Only grab a Pro Fishing Rod for exclusive fish variants and the Collection Book; it heals no faster.
- Drop the rod by mid-game. Slots are worth more than the option to fish.
- Never fish with your back to open ground, and never fish through a closing storm.
Frequently Asked Questions
How do you fish in Fortnite?
What is the difference between the Fishing Rod and the Pro Fishing Rod?
Are fish better than Shield Potions in Fortnite?
Should you blow up fishing holes in Fortnite?
Which fish should you keep in Fortnite?
Keep Reading
Related Guides
Fortnite Bots Explained: How to Spot One in Three Seconds
You just cracked someone for 150 and they walked into your build like it owed them money. Was that a bad player or a bot? Fortnite bots follow a fixed username list and a hard-coded list of things they will never do — once you know the tells, you can call it before the fight starts.
Fortnite Reload Nitemare Island: Map, Loot and Rewards
Nitemare Island came back to Reload on October 8 with something the 2025 version never had: a match modifier that hands you a rival and pays out a Kado Thorne Exotic when you drop them. Here is the map, the three-map rotation it sits in, the loot you can only find there, and what the new Ranked and Map Mastery tracks pay.

Fortnite Blitz Royale Guide: How the 5-Minute Mode Works
Blitz Royale was meant to close on July 15, 2025. Fifteen months later it has its own dev team, a $1,000,000 mobile tournament and a victory emote you can only earn inside it. Here is how a match actually runs: the kit everyone lands with, what Blitz Levels pay out, where the gold loot is, how fast the storm kills, and what Epic has and has not changed this season.

Fortnite Kingdom Hearts Skins: Price, Keyblade and More
Our Chapter 7 Season 4 weapons post named the Kingdom Key and Rebecca's Guns as arrivals Epic had announced but not shipped — 'neither is in the pool yet,' it said, three weeks ago. Update v42.20 shipped both, plus a four-skin Kingdom Hearts bundle tied for the most expensive in the game's history, four new Sprites, and six new Match Overrides. Here's what actually landed, what it costs, and what Epic still hasn't published.
Fortnite Weapon Tier List: How to Rank Any Loot Pool
Any Fortnite tier list is stale the second a patch drops. So instead of memorizing this season's gun names, learn how to rank weapons by class and role — the framework that's S-tier in every season.

Best Fortnite Settings for PC & Console
Half your settings menu is noise; a handful of options decide whether you can see, aim, and build. Here's what to change on PC and console, why, and the one number nobody else can pick for you.