Roblox Input Action System Guide: Bind Once, Ship Every Platform
Roblox quietly shipped the thing input code has needed for a decade: actions and bindings you configure in the Explorer instead of a LocalScript full of if-statements. One InputAction called CharacterSprint, three InputBindings — LeftShift, ButtonY, an on-screen button — and your script connects to Pressed and Released without ever asking what device the player is holding. Here's the full setup, the five action types, the threshold and Scale numbers that matter, and where UserInputService still earns its keep.
For about a decade, every Roblox input tutorial taught the same ritual: open a LocalScript, call UserInputService.InputBegan, check input.KeyCode == Enum.KeyCode.LeftShift, then bolt on a TouchEnabled branch for mobile, then a gamepad branch, then a special case because your touch button is a GuiButton and doesn't go through InputBegan at all. Three input paths, one feature. Multiply by every action in your game and you get the file nobody wants to touch.
Roblox's answer is the Input Action System, and it moves the entire problem out of code and into the Explorer. You define an action once — CharacterSprint — as an actual instance, parent one binding per input device under it, and your script connects to the action's events. The script never asks what hardware fired. That's the whole pitch, and having rebuilt a sprint-and-camera setup with it against the official docs, I can report the pitch holds up — with a few numbers and traps worth knowing before you migrate anything.
The input spaghetti problem
The old way fails for a structural reason, not a skill reason: the thing you care about (sprint) never exists anywhere. It's implied by scattered checks across scripts. Want to rebind sprint from LeftShift to another key? Find every check. Want to add gamepad support later? Reopen every input script you own. Want an on-screen mobile button? That's a separate GuiButton code path that has nothing in common with the keyboard one.
The Input Action System makes the action a first-class object in your place file, the same way CollectionService tags make "killbrick" a first-class label instead of forty copied scripts. Per the official docs, the system "lets you connect actions and arrange bindings across various hardware inputs at edit time" — edit time being the operative phrase. Bindings are data you configure in the Properties window, not logic you maintain in Luau.
Three instances replace your input layer
The system is three classes that nest, in this order:
- InputContext — a collection of related actions, like
PlayContextfor gameplay controls andNavContextfor menu navigation. Contexts are what you enable and disable wholesale. - InputAction — one gameplay verb: "Jump," "Sprint," "Shoot." Actions fire the events your scripts connect to. An action registers to its nearest ancestor InputContext (or a default context if it has none).
- InputBinding — one hardware route into the parent action: a KeyCode, a GuiButton, or a set of composite directional keys.
The documented recommended layout is a Folder named Inputs inside ReplicatedStorage, contexts inside that folder, actions inside contexts, bindings inside actions:
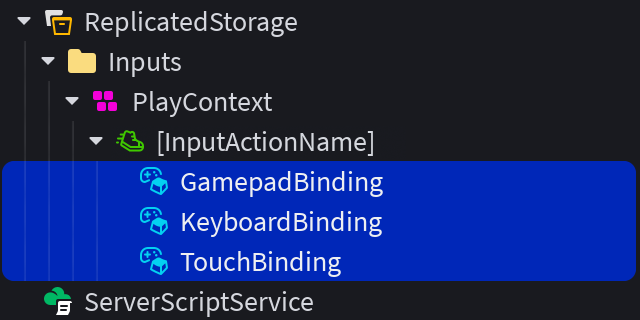
One setup step people miss: select the top-level Workspace object and set its PlayerScriptsUseInputActionSystem property to Enabled. That flips Roblox's default player scripts over to the new system — the docs mark it as the recommended first move before you test anything.
Contexts: Priority, Sink, and the inventory trick
An InputContext has three properties doing the heavy lifting: Enabled, Priority, and Sink.
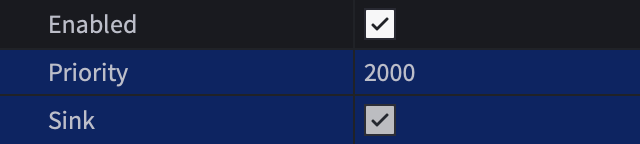
Priority decides which contexts see input first — higher numbers go earlier. Sink is the interesting one: a context with Sink enabled consumes input events for its bound KeyCodes at its priority level, so those inputs never reach lower-priority contexts. Contexts sitting at the same priority still receive the input.
The docs' worked example sets PlayContext to Priority 2000 with Sink on — high enough to swallow its bound inputs before the default PlayerScripts contexts process them. The obvious real-world use is an inventory screen: give your MenuContext a higher priority than PlayContext, sink it, and the E key that picks up items in gameplay can't also trigger pickups while the player is rummaging through a menu. That's a bug class you currently solve with boolean flags sprinkled across scripts, solved by two properties.
Disabling a context is also cleaner than it sounds: descendant actions stop receiving signals, but per the class reference, held inputs still get a final release signal — so a player holding sprint when you disable PlayContext doesn't get stuck sprinting forever.
Actions and the five InputActionTypes
Every InputAction has a Type property (Enum.InputActionType) that defines what shape of value it produces. The default is Bool. All five, with the use cases the docs assign them:
| Type | What it's for | What your handler receives |
|---|---|---|
Bool | Jump, shoot, sprint — pressed or not | true / false |
Direction1D | Accelerator pedal, scope zoom | A number from 0 to 1 (or 0 to -1 via a Down binding) |
Direction2D | Camera rotation, character movement | A Vector2 between (-1, -1) and (1, 1) |
Direction3D | An airborne vehicle that levitates, accelerates, drifts | A Vector3; Forward maps to negative Z, Roblox convention intact |
ViewportPosition | Custom cursors, tap-to-select raycasting | A Vector2 in absolute viewport pixels, from (0, 0) up to the viewport size |
Actions expose exactly three events. Pressed and Released fire only for Bool-type actions, on the false-to-true and true-to-false transitions respectively. StateChanged fires for every type whenever the state actually changes — it stays silent if an update tries to set the state to the value it already holds. For everything analog, StateChanged plus GetState() is your toolkit.
A nice touch for debugging: during a Studio playtest, actions surface read-only state properties (like BoolState for Bool actions) right in the Properties window, so you can watch an action flip in real time without a single print statement. The docs flag these as Studio-only debug properties — don't build gameplay on them.
Bindings: one per platform, no exceptions
An InputBinding routes one input source into its parent action. The docs are blunt about the target: for cross-platform compatibility, each action should carry a binding for gamepad, keyboard/mouse, and touch. The sprint example uses three:
KeyboardBinding—KeyCodeset toLeftShiftGamepadBinding—KeyCodeset toButtonYTouchBinding— no KeyCode at all; itsUIButtonproperty points at a GuiButton you've placed in a ScreenGui
That last one deserves a pause, because it fixes the oldest annoyance in Roblox mobile development: on-screen buttons finally live in the same system as physical keys. The binding references the button you built with your normal UI workflow, and pressing it fires the same Pressed event as LeftShift. No separate Activated wiring, no duplicated handler.
Bindings for analog inputs carry two threshold properties that make Bool actions feel right on triggers: PressedThreshold (default 0.5) is the point where a gamepad trigger counts as pressed, and ReleasedThreshold (default 0.2) is where it counts as released. Those two numbers being different is deliberate — it's hysteresis. A trigger hovering at exactly one threshold can't machine-gun press/release events at you, because it has to travel from 0.5 down to 0.2 before a release registers.
Composite bindings and the Scale trick
For Direction2D and Direction3D actions, a binding can skip KeyCode entirely and instead fill in composite directional properties — Up, Down, Left, Right, plus Forward and Backward for 3D. The camera-rotation example binds the four arrow keys this way:
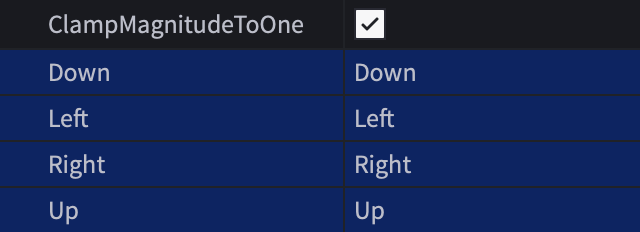
Each direction contributes its axis: Up produces (0, 1), Left produces (-1, 0), and holding both merges them. The ClampMagnitudeToOne property — on by default — keeps that diagonal from exceeding length 1, which quietly kills the "diagonal movement is 41% faster" bug that has shipped in more games than anyone will admit.
Two more bindings finish the camera action for other devices, and they carry the numbers worth copying. The gamepad binding is just KeyCode = Thumbstick2 (the right stick reports as a native 2D input, no composites needed). The mouse binding is KeyCode = MouseDelta with Scale = 0.01 — because MouseDelta reports pixels, and without the scale-down your camera whips around at pixel magnitudes instead of a sane rotation range. Touch gets the same treatment with TouchDelta at Scale = 0.01. There's also a ResponseCurve property (default 1, meaning input passes through exactly as received) if a thumbstick needs finer control near center.
The sprint build, start to finish
Here's the complete working action, matching the official walkthrough. Structure: ReplicatedStorage/Inputs/PlayContext/CharacterSprint with the three bindings above, plus a Script (not LocalScript) inside the action with its RunContext set to Client — that's what lets it run from ReplicatedStorage:
local Players = game:GetService("Players")

local player = Players.LocalPlayer
local character = player.Character
if not character or character.Parent == nil then
	character = player.CharacterAdded:Wait()
end
local humanoid = character:WaitForChild("Humanoid")
local defaultWalkSpeed = humanoid.WalkSpeed

local inputAction = script.Parent

inputAction.Pressed:Connect(function()
	humanoid.WalkSpeed = defaultWalkSpeed * 2
end)
inputAction.Released:Connect(function()
	humanoid.WalkSpeed = defaultWalkSpeed
end)
Read what isn't there. No KeyCode checks. No device detection. No gameProcessedEvent guard. Shift, the Y button, and the on-screen sprint button all arrive through the same two events, and adding a fourth input method later means inserting one more InputBinding instance — the script doesn't change. You can test the gamepad path without hardware using Studio's Controller Emulator.
One scripting note: InputAction:Fire() exists but is deprecated. If you need to drive an action from code — an accessibility toggle, an auto-sprint, a tutorial forcing an input — create an InputBinding with its Type set to Scriptable and call Fire() on the binding. Calling it on a default Automatic binding throws an error.
When StateChanged goes quiet
The one behavior guaranteed to bite migrating developers: StateChanged is edge-triggered, not continuous. The docs spell it out — a thumbstick held at a fixed angle fires the event once when it reaches that angle, then goes silent until the value changes again. If you rotate your camera inside a StateChanged handler, rotation stalls the moment the player holds the stick steady.
The documented fix is to poll. Connect to RunService, read GetState() every frame, and scale by delta time so the result is frame-rate independent:
local RunService = game:GetService("RunService")

local CAMERA_SENSITIVITY = 1.5 -- Radians per second at action state 1

local inputAction = script.Parent
local camera = workspace.CurrentCamera
camera.CameraType = Enum.CameraType.Scriptable

RunService:BindToRenderStep("CameraRotation", Enum.RenderPriority.Camera.Value, function(dt)
	local state = inputAction:GetState()
	if state.Magnitude > 0 then
		camera.CFrame = camera.CFrame
			* CFrame.Angles(0, -state.X * CAMERA_SENSITIVITY * dt, 0)
			* CFrame.Angles(-state.Y * CAMERA_SENSITIVITY * dt, 0, 0)
	end
end)
The rule of thumb falls straight out of the event semantics: discrete verbs connect to events, continuous verbs poll GetState() in a render step. Sprint is an event. Camera rotation is a poll. If you're doing serious camera work, this slots directly into the patterns from the camera manipulation guide.
Switching contexts mid-game
Because contexts are instances, swapping control schemes is a property write: context.Enabled = false. The docs' pattern routes it through a BindableEvent in the Inputs folder so any script can request a switch without holding references:
local ReplicatedStorage = game:GetService("ReplicatedStorage")

local inputsFolder = ReplicatedStorage:WaitForChild("Inputs")
local contextEvent = inputsFolder:WaitForChild("ContextEvent")

contextEvent.Event:Connect(function(targetContext, enabled)
	local context = inputsFolder:FindFirstChild(targetContext)
	if context then
		context.Enabled = enabled
	else
		warn("InputContext not found!")
	end
end)
Open the inventory: disable PlayContext, enable NavContext. Close it: reverse. Every action under each context follows automatically. This is the piece the old ContextActionService promised with its bind/unbind stack, except now the "context" is a visible object in your Explorer instead of an invisible stack you reconstruct in your head. Note the bindable is client-side messaging only — anything the server must trust still goes through RemoteEvents with server-side validation.
The Input Action Manager beta
Managing input across instances beats managing it across scripts, but a big game still ends up with dozens of actions. The Input Action Manager — in beta as of this writing, enabled through Studio's beta features and opened via Window → Input → Input Action Manager — puts the whole architecture in one matrix: contexts and actions as rows, keyboard/touch/gamepad as columns.

It scans your DataModel for existing contexts, actions, and bindings and pulls them into the grid; anything new you create in the grid materializes as instances in ReplicatedStorage/Inputs. The killer feature is the audit layer: a yellow warning icon means an action is missing a binding for one of the three platforms, and a red one means a duplicate binding — two actions in the same context claiming the same key. Those are exactly the two mistakes that slip through code review in a script-based input layer, surfaced as icons in a grid.
PreferredInput and the device question
Bindings answer "what fires the action," but UI still needs to answer "what device is this player primarily using" — to decide whether to show touch buttons, or whether your hint text should say "Press Shift" or show a Y-button glyph. The modern answer is a single read-only property: UserInputService.PreferredInput. It returns Touch, KeyboardAndMouse, or Gamepad, based on the device's built-in inputs and whichever connected hardware the player most recently used.
The docs are unusually candid about why this property exists — the old detection methods are landmines:
TouchEnabledistrueon touchscreen laptops, so it was never a real "is mobile" check.GetLastInputType()returns multiple values for one physical device —MouseWheel,MouseMovement, andMouseButton1are all just "a mouse" — forcing compound or-chains.- It also thrashes between
MouseMovementandKeyboardduring normal play, which can make naive UI-switching code flicker between layouts.
Connect GetPropertyChangedSignal("PreferredInput") and rebuild your prompts when it changes — a player pairing a Bluetooth gamepad to their tablet mid-session flips cleanly from touch UI to gamepad UI. Pair it with the action's PreferredBinding property, which hands you the specific InputBinding matching the player's current device, so a prompt can pull the right binding's DisplayName or DisplayImage without you re-deriving the device yourself. If you're building for the phone crowd — and given how much of the mobile player base lives there, you are — this pairing is the difference between UI that adapts and UI that guesses.
Where the old services still win
An honest scorecard, because the new system doesn't cover everything:
- Raw input events. UserInputService remains the API for
InputBegan/InputChanged/InputEndedwith per-input detail and thegameProcessedEventflag telling you whether the engine already consumed the input for UI. A combo system reading exact key sequences, or anything caring about which physical key fired, still lives here. It's all client-side only — LocalScripts, or Scripts with client RunContext. - Specific last-input workflows. The docs explicitly bless continuing with
GetLastInputType()andLastInputTypeChangedfor advanced control schemes that need the precise most-recent UserInputType rather than the coarse PreferredInput bucket. - Existing ContextActionService code. CAS still works, and its bind-with-priority model maps roughly onto contexts. But for new work, the instance-based system does what CAS did with less ceremony and better tooling — and the default player scripts themselves move onto it once you flip
PlayerScriptsUseInputActionSystem.
If you're still on the fundamentals, the Lua scripting basics and Studio basics guides cover the ground this one builds on.
Quick Action Checklist
- Set
Workspace.PlayerScriptsUseInputActionSystemtoEnabledbefore testing — it moves the default player scripts onto the new system. - Build the recommended tree:
ReplicatedStorage/Inputsfolder → InputContext → InputAction → InputBindings. - Give every action three bindings — keyboard/mouse, gamepad, touch. The Input Action Manager flags missing ones in yellow, duplicates in red.
- Touch controls: point the binding's
UIButtonproperty at a GuiButton — no separate Activated wiring. - Bool actions on triggers:
PressedThresholddefaults to0.5,ReleasedThresholdto0.2; the gap is deliberate hysteresis. MouseDeltaandTouchDeltareport pixels — setScaleto about0.01for rotation-style actions.- Leave
ClampMagnitudeToOneon for composite movement bindings, or diagonals run hot. - Discrete verbs (jump, sprint): connect
Pressed/Released. Continuous verbs (camera, steering): pollGetState()inBindToRenderStepand multiply by delta time —StateChangedfires once per change, not per frame. - Drive actions from code with a
ScriptableInputBinding'sFire(), not the deprecatedInputAction:Fire(). - Use higher
PriorityplusSinkon menu contexts so gameplay keys go dead while menus are open. - Read
UserInputService.PreferredInput(notTouchEnabled) to pick UI layouts, andPreferredBindingto show the right button glyph.
The real win isn't any single feature — it's that your input scheme becomes something you can see. Open the Explorer, and every action, every binding, every context is sitting there as data. The forty-if-statement input script was never a badge of honor. Now it's optional.
Frequently Asked Questions
What is the Roblox Input Action System?
What are the five InputActionType values?
How do I make one button work on keyboard, gamepad, and mobile in Roblox?
Why does my thumbstick action only fire StateChanged once?
What do InputContext Priority and Sink do?
Should I use PreferredInput or TouchEnabled to detect mobile players?
Is ContextActionService deprecated now?
Keep Reading
- Roblox Creator Documentation — Input Action System (official)
- Roblox Creator Documentation — Input overview and PreferredInput detection (official)
- Roblox Creator Documentation — InputAction API reference (official)
- Roblox Creator Documentation — InputBinding API reference (official)
- Roblox Creator Documentation — InputContext API reference (official)
- Roblox Creator Documentation — UserInputService API reference (official)
Related Guides
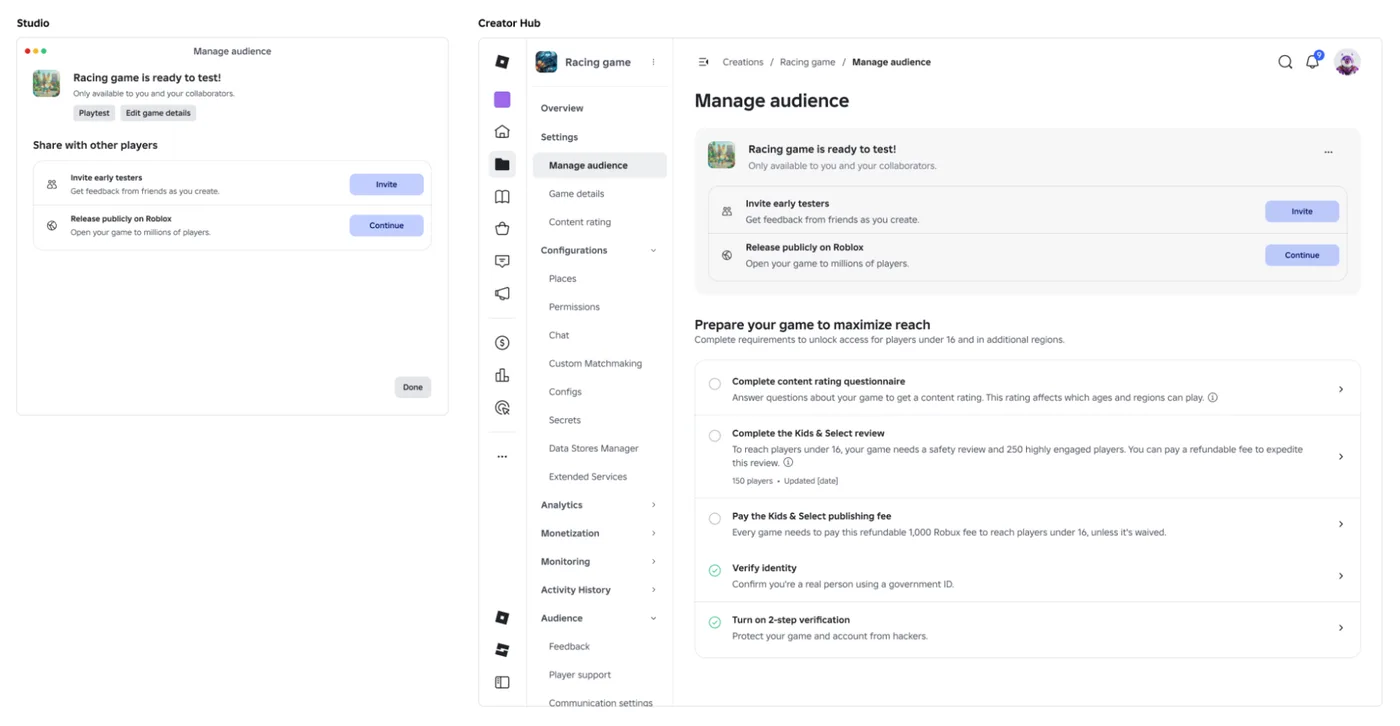
Roblox Early Testers and the New Publish Flow: What Changed
Since October 12, 2026, you can let up to 10 friends play your unreleased, unrated Roblox game, and Roblox is rolling out a path that lets a game with no age-restricted content reach age-checked players 16 and older by answering one question instead of the full questionnaire. Here is who can be an early tester, what replaced the Private and Limited audience settings, what the one question actually covers, and what still takes the long road to players under 16.
Roblox BadgeService Guide: Award, Check, Debug
Call AwardBadgeAsync on a player who isn't currently in your server and it fails one of five documented requirements — silently, the same way it fails for a disabled badge or a place outside the badge's own experience. Here is every BadgeService method, which four are dead, the rate limit two of them share despite a 10x difference in batch size, and the deprecated check that Roblox says will now always return true.
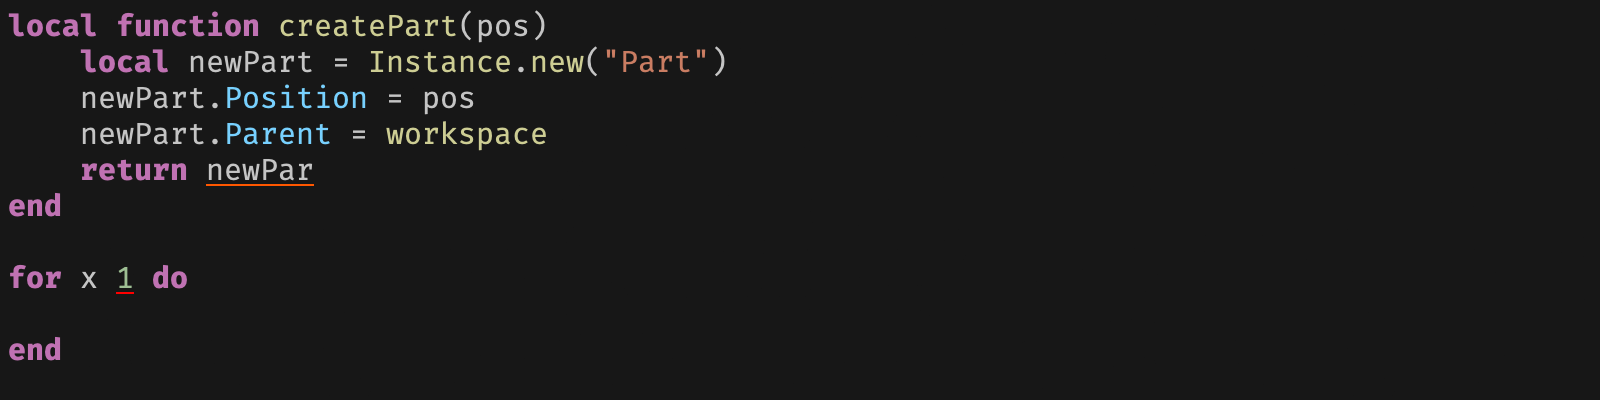
Roblox Luau Type Checking: nocheck, nonstrict, strict
Roblox says every script used to default to no typechecking. That is no longer how it works: a Workspace property now sets the default mode, projects using only nocheck and nonstrict were moved to the New Type Solver automatically, and strict mode projects were not. Here is what each mode reports, what the new solver changed, and the annotation syntax that covers most code.
Roblox Text Filtering: FilterStringAsync Done Right
Chat is filtered for you. Pet names, sign text, shop names and anything you pull off an external API are not — and Roblox documents that it takes games down until filtering is added. Here is the actual API, the getter that is now dead, and the pattern that ships.
Best Roblox Games to Play in 2026
Roblox's front page is engagement bait. This is the filtered version: the games with real, sustained player counts and actual staying power, sorted by what you're in the mood for.
How to Get Robux Safely (Legit Ways + Scams to Avoid)
There is no free Robux generator. There never was. Here are the actual legit ways to get Robux without overpaying, the earning methods that really work, and the scams that exist purely to steal your account.