Cookie Run: Braverse Control Deck Guide (Build & Pilot Blue/Purple Control)
Control is the deck that says "go ahead, swing" and then makes you regret it. Here's how to build a reactive Blue/Purple control shell in Cookie Run: Braverse, a real 60-card list of cards you can actually buy, and how to pilot it without drowning in your own clever answers.
Aggro decks want the game to end on turn five. Control wants the game to still be going on turn fifteen, because by then you've drawn twice as many cards as your opponent and every threat they played is sitting in their break area instead of yours. If you're the kind of player who'd rather answer the board than race it, this is your lane in Cookie Run: Braverse - and unlike a lot of TCGs, the game's reactive tools are deep enough to make it real.
Here's the honest version up front: this is an informed build, not a tournament-proven netdeck. The English meta is young, so treat the list as a strong, fact-checked starting point and confirm the current card pool against the official database before an event. If you want the format-wide map first, our deck archetypes guide frames where control sits next to aggro and combo, and our aggro deck guide shows you exactly what you'll be answering.
What control actually wants to do
Control isn't "play removal until I feel safe." It's a deliberate three-phase plan:
- Survive the early turns. Aggro's edge is front-loaded. Your job in the first few turns is to not die - trade efficiently, soak hits with bigger bodies, and answer the scariest attacker rather than every attacker.
- Win the card-advantage war. Every clean two-for-one - one of your cards killing one of theirs while drawing you a card - widens the gap. By the midgame you should simply have more resources than the opponent.
- Close with inevitability, not speed. Braverse's main win condition is pushing your opponent's break area to a combined Cookie Level of 10. Control gets there slowly with big, durable LV.3 Cookies that the opponent can't profitably trade with, while your removal keeps their board too thin to fight back.
The control truth: you don't need to be ahead on board every turn. You need to be ahead on cards. Tempo is rented; card advantage is owned.
Why Blue and Purple are the control colors
Braverse's five colors each have a job (the full rundown is in colors explained), and the two that hand you a control deck are Blue and Purple. They divide the labor cleanly:
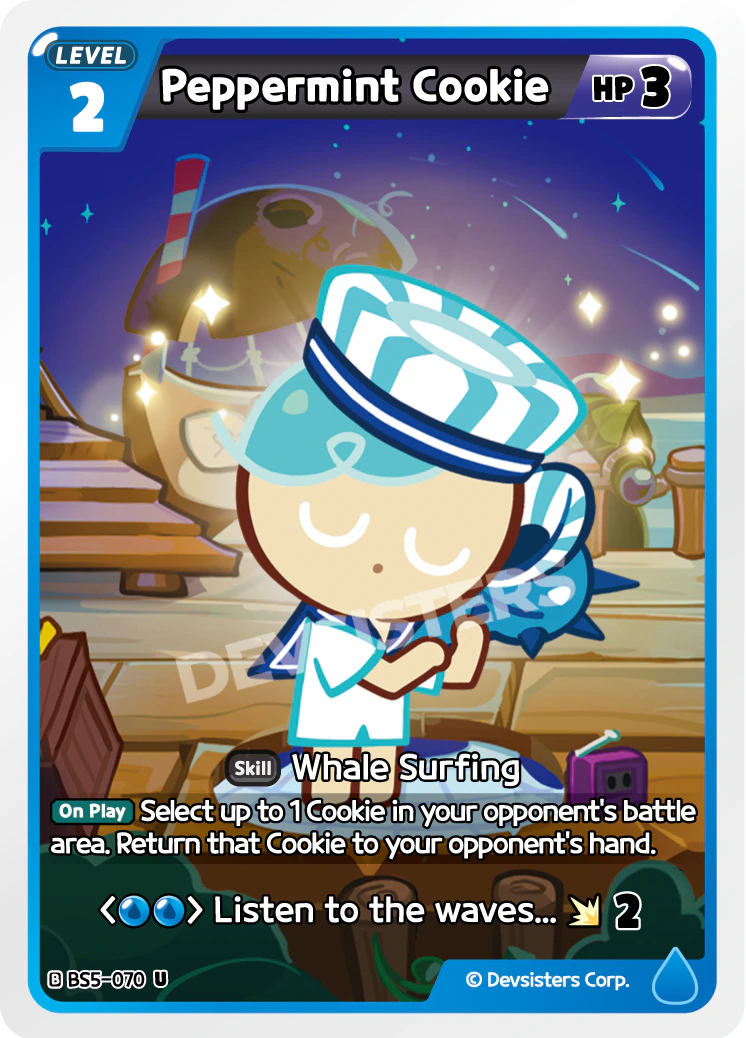
- Blue is the card-advantage and tempo color. It owns the deck's draw engine and its bounce - returning an opponent's Cookie to their hand to undo a turn of their development. Cards like Chocolate Bonbon Cookie (BS6-072) read "draw up to 3 cards" on play, and Peppermint Cookie (BS5-070) and Adventurer Cookie (BS6-080) both bounce a Cookie back to hand.
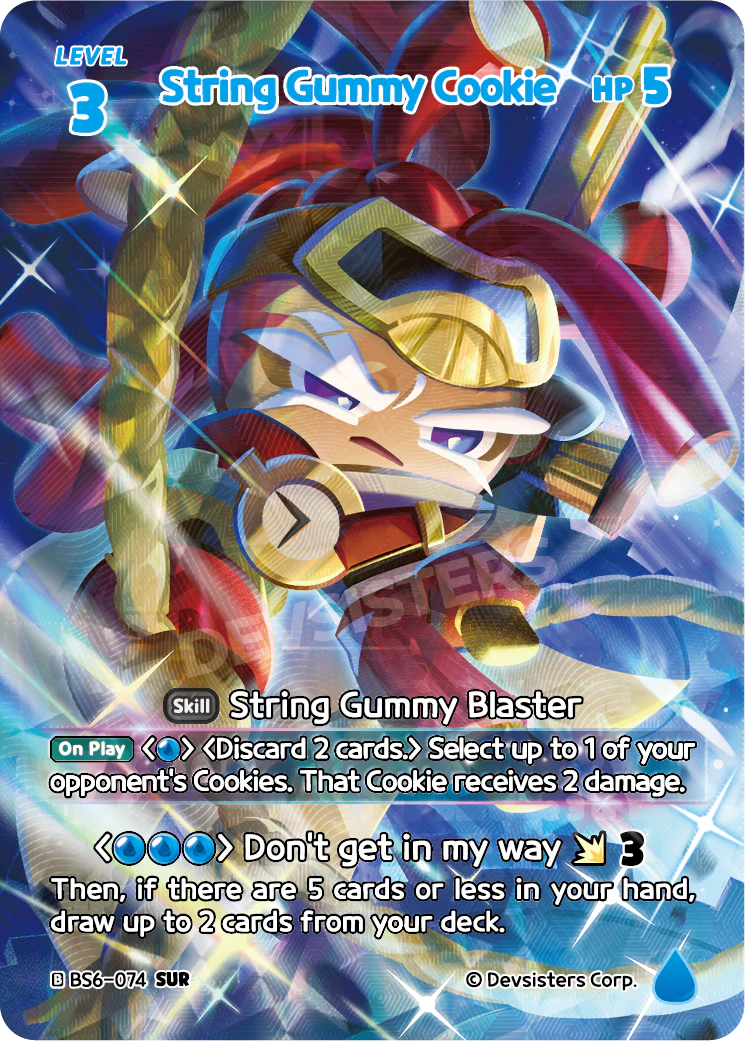
- Purple is the removal color. Its identity is killing things and grinding the opponent out - dealing direct damage to Cookies, placing cards from a Cookie's HP into the trash, and even milling the opponent's deck. String Gummy Cookie (BS6-074) deals 2 damage on play; Kumiho Cookie (BS3-098) and Lychee Dragon Cookie (BS5-093) both have repeatable ping skills.
Put them together and you get the full reactive toolkit: Blue keeps your hand full and resets their tempo, Purple makes their board disappear. That two-color pairing is also why this list runs no third color - splashing would wreck a manabase you need to be rock-solid so your answers come up on time. For the wider Blue and Purple toolboxes, our best Blue cards and best Purple cards guides go deeper; this one stays locked on the control shell.
The three engines that make control work
A control deck is really three engines bolted together. Get the ratios right and the deck plays itself; get them wrong and you flood on answers with nothing to answer, or run dry and die.
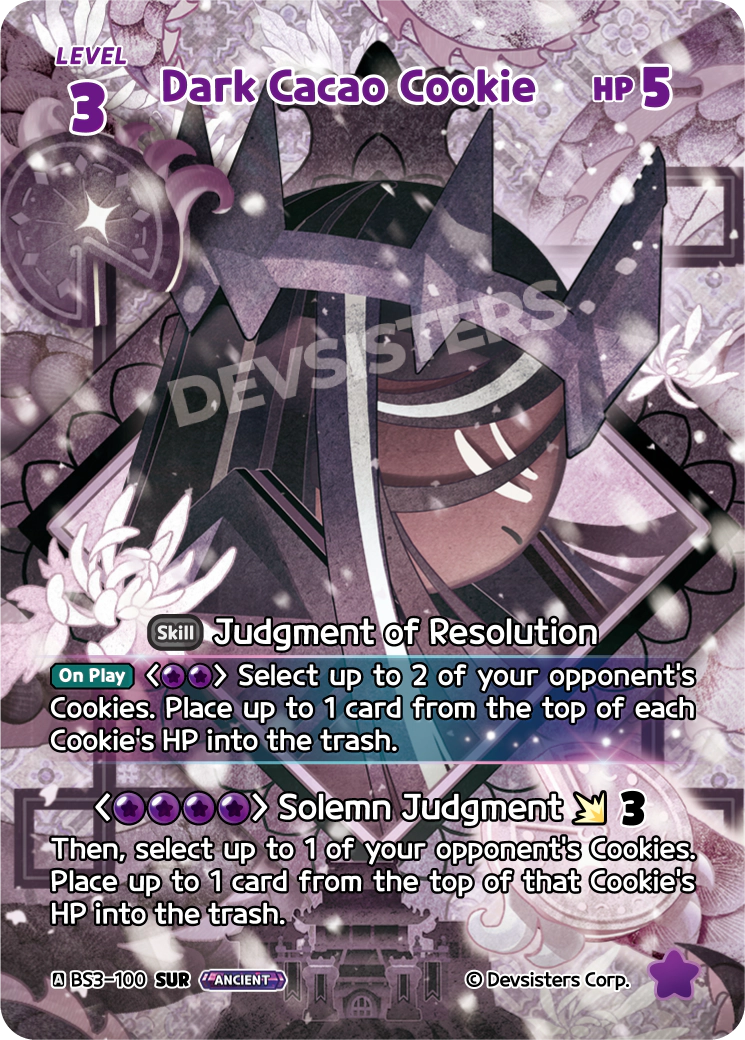
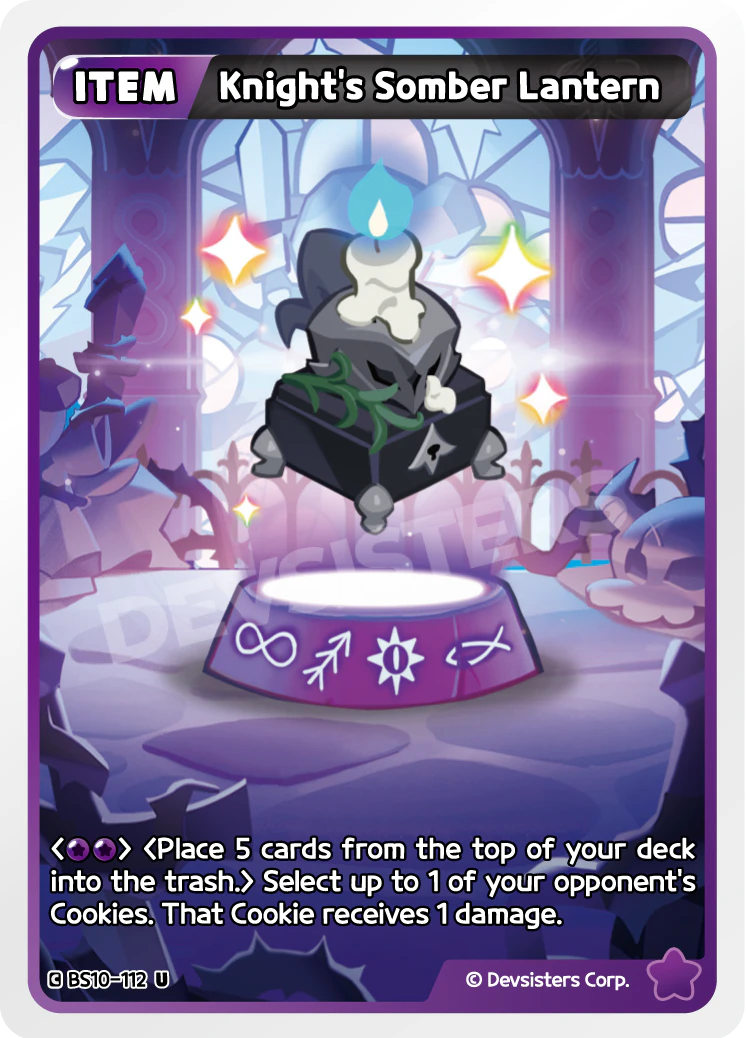
1. The removal suite. This is your interaction. Direct-damage Cookies (String Gummy BS6-074, Schneeball BS6-073, Kumiho BS3-098), trash-the-HP effects (Dark Cacao Cookie BS3-100, an Ancient), bounce (Peppermint BS5-070), and cheap removal Items (Knight's Somber Lantern BS10-112) cover every kind of threat. The trick is matching the answer to the threat - don't spend a 3-damage swing on a LV.1 a bounce would handle.
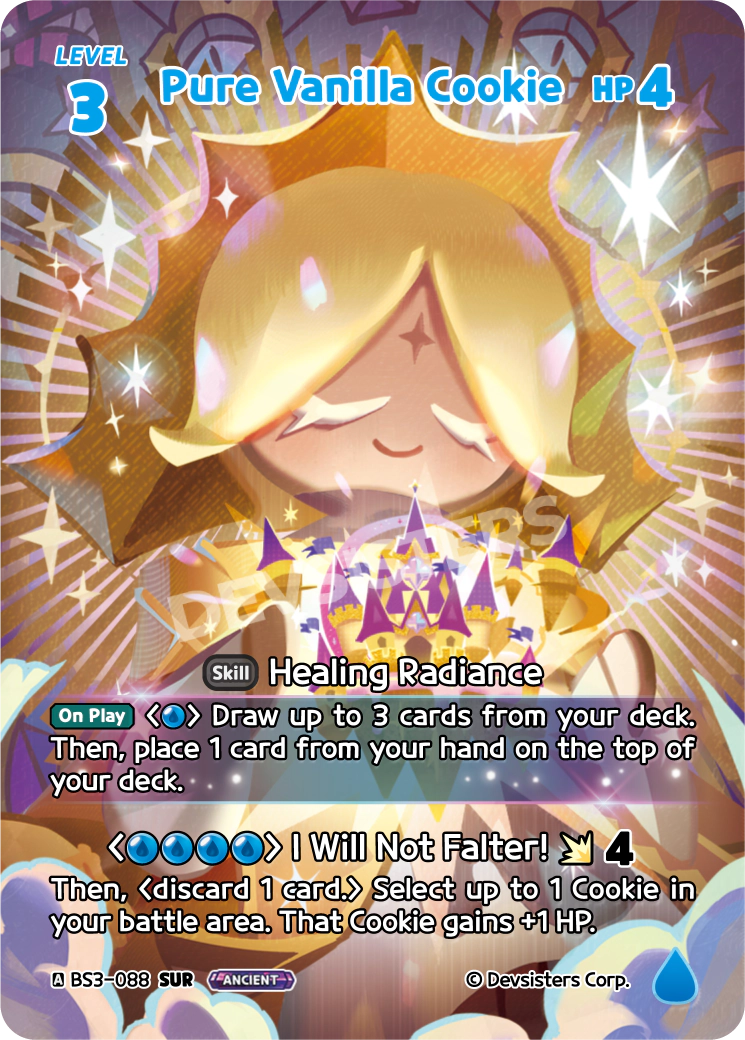
2. The draw engine. Control wins by drawing more than the opponent, and Blue is overflowing with it. Sorbet Shark Cookie (BS5-074) draws 2 on play, Chocolate Bonbon Cookie (BS6-072) draws 3, and the Blue Ancient Pure Vanilla Cookie (BS3-088) draws 3 as a skill. This is what refuels you after you've spent answers, and it's what turns a stable board into an avalanche of resources.
3. The reactive layer (Traps). Traps are control's "no" button. Reversed Prophecy (BS9-093) shrinks an attacker by 2 and refills your hand; Truth Stained With Lies (BS9-117) does the same in Purple; Dino Greetings (BS5-087) is a cheap speed bump. These let you punish the opponent's combat math without spending a turn, which is exactly how control buys the time it needs.
The engine-balance rule: if you ever draw a hand that's all answers and no draw, you'll win the early game and lose the long one. Build so your removal replaces itself - that's why so many of these cards draw a card while they interact.
A sample Blue/Purple control decklist
Here's a complete 60-card Blue/Purple control shell built entirely from real, verified cards. It respects the construction rules: exactly 60 cards, at least one Cookie, and up to 4 copies of any card number. Card numbers are cited so you can find each one in the official database.
Cookies - LV.1 (early survival & disruption):
- 4x Adventurer Cookie (BS6-080) - one-cost Blue body that bounces an opposing Cookie when your hand is low.
- 4x Licorice Cookie (BS3-097) - Purple LV.1 that pings a Cookie for 1 and mills the opponent's deck.
Cookies - LV.2 (the removal & draw core):
- 4x Schneeball Cookie (BS6-073) - deals 1 damage to a Cookie on play; clean, repeatable interaction.
- 4x Clotted Cream Cookie (BS2-069) - discard a card to place an opposing LV.1 straight into the trash - hard removal.
- 3x Peppermint Cookie (BS5-070) - bounce an opposing Cookie to hand; a tempo answer that dodges "can't be destroyed" effects.
- 3x Sorbet Shark Cookie (BS5-074) - draw 2 on play, with a FLIP that draws another; your main refuel.
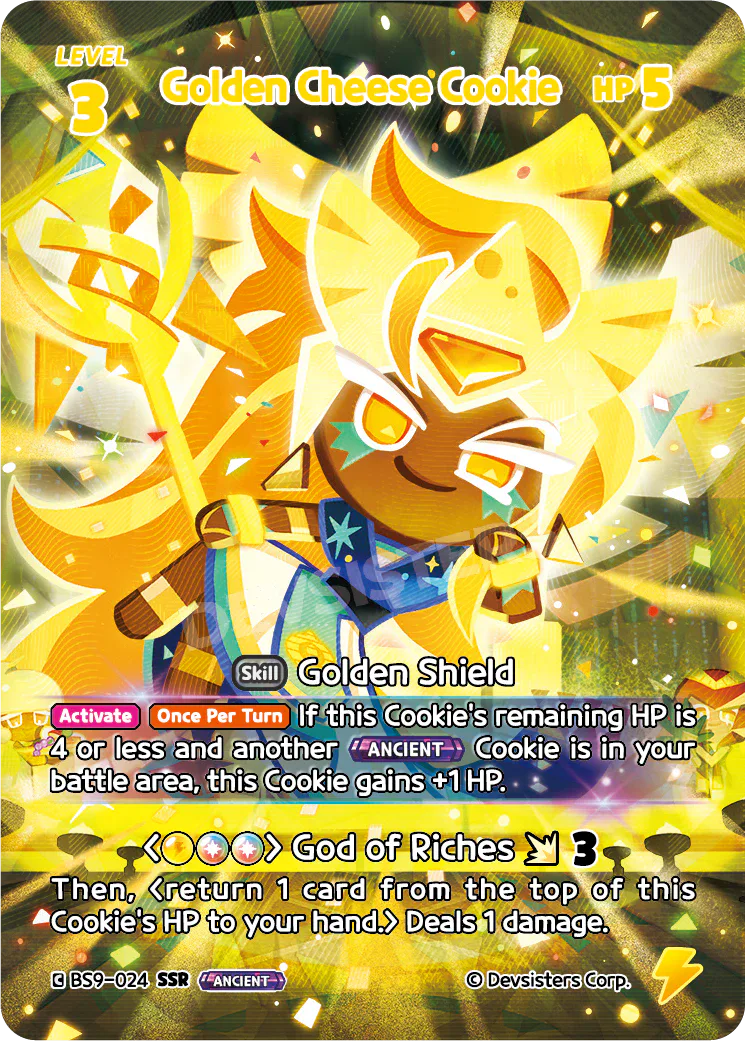
- 2x Dark Cacao Cookie (BS9-097) - the LV.2 Ancient; repeatable trash-the-HP removal that scales with another Ancient out.
Cookies - LV.3 (the inevitable top end):
- 4x String Gummy Cookie (BS6-074) - deals 2 damage on play, then draws you back up; the removal-plus-card-advantage all-star.
- 3x Kumiho Cookie (BS3-098) - durable body with a repeatable 1-damage ping.
- 3x Chocolate Bonbon Cookie (BS6-072) - draw 3 on play, swing for 3, draw 2 more on attack; the late-game card-advantage haymaker.
- 2x Croissant Cookie (BS6-079) - draws 2 and rests the opponent's support, denying them resources on the swing.
- 2x Dark Cacao Cookie (BS3-100) - the Purple Ancient finisher; trashes HP off two Cookies at once.
- 2x Pure Vanilla Cookie (BS3-088) - the Blue Ancient; a draw-3 skill plus a 4-damage attack that heals your board.
- 2x Lychee Dragon Cookie (BS5-093) - a Dragon with a repeatable 1-damage ping to grind small boards down.
Items (cheap removal):
- 4x Knight's Somber Lantern (BS10-112) - "Select up to 1 of your opponent's Cookies. That Cookie receives 1 damage." Flexible, instant interaction.
- 3x Plasma Crystal Ball (BS4-108) - returns a Purple card from your trash and pings a Cookie; removal that recurs your best answers.
Traps (the reactive layer):
- 4x Reversed Prophecy (BS9-093) - shrink an attacker by 2 and draw up to 2; the perfect control Trap.
- 4x Truth Stained With Lies (BS9-117) - Purple's version; -2 attack and a bigger effect when the opponent's trash is stocked.
- 3x Dino Greetings (BS5-087) - cheap -1 attack speed bump for the early turns.
That's 4+4 + 4+4+3+3+2 + 4+3+3+2+2+2+2 + 4+3 + 4+4+3 = 60 cards. It's a coherent two-color list: a wall of cheap interaction up front, a deep draw engine in the middle, and Ancient-fueled LV.3 bodies that simply outlast the opponent. Counts are a matter of taste - which staples sit at common or uncommon shifts with the card pool, so confirm current printings against the official database. For the build philosophy behind these ratios, pair this with deck-building basics.
How to pilot the deck
Building the deck is the easy half. Piloting control is harder than aggro, because every turn is a decision instead of an attack. The principles:
- Triage the early game. You will take damage. That's fine. Spend answers only on the threats that actually matter - the buffed attacker, the engine Cookie - and let the small chip damage through. New control pilots burn removal on turn-one one-drops and then have nothing for the real threat on turn four.
- Match the answer to the threat. Bounce (Peppermint, Adventurer) is best against expensive Cookies you want to set back a whole turn. Hard removal (Clotted Cream trashing a LV.1, Dark Cacao trashing HP) is for things you need gone permanently. Cheap pings (Knight's Somber Lantern, Schneeball) finish wounded Cookies. Spending the wrong answer is how you run out.
- Draw before you have to. When you're stable, dump a draw spell to widen the gap before you're under pressure. A turn you spend on Chocolate Bonbon Cookie's draw-3 while you're safe is a turn you'll never regret; drawing for cards while you're being beaten down is reactive and worse.
- Hold Traps for the swing that matters. Reversed Prophecy and Truth Stained With Lies are best deployed against the attack that would otherwise kill your key Cookie or push lethal. Bait out small swings, then say no to the big one - and pocket the cards they draw you.
- Mind the break-area math going both ways. The game ends at a combined Level of 10 in someone's break area. Your big LV.3 Cookies are worth a lot when they die, so don't throw them into bad trades that feed your break total. Make the opponent spend two cards to remove one of yours, never the reverse. The win conditions guide breaks down the Level math in full.
The pilot's mantra: I'm not trying to win this turn. I'm trying to make sure I'm the one with cards in hand on the turn that matters - and that turn is always later than my opponent wants.
Mulligan and opening hands
Control hands are harder to evaluate than aggro hands because "good" depends on what you expect to face. The general rule: you want a hand that can interact early and a way to refuel.
- Keep hands with cheap interaction. A couple of one- or two-cost answers (Knight's Somber Lantern, Dino Greetings, Schneeball, Licorice) means you won't get run over before your engine comes online.
- Keep at least one draw or value piece. Sorbet Shark Cookie or a String Gummy Cookie down the line means you won't run out of gas. A hand of pure removal with no card draw will win the early game and lose the long one.
- Ship hands that are all top-end. Three LV.3 finishers and no early plays is a mulligan - you'll be dead before you can cast them.
Against an unknown opponent, lean toward the flexible hand: a little interaction, a little draw, a top-end card to land on. Our full mulligan and opening hand guide covers the framework; for control, the short version is "keep the hand that survives and refuels, ship the one that only does one."
Control mistakes to avoid
The classic ways control pilots lose games they should win:
- Over-answering early. Spending three pieces of removal in the first three turns to "feel safe" leaves you defenseless when the real threat lands. Let chip damage through; save answers for what matters.
- Hoarding cards forever. Card advantage you never spend is just a bigger hand when you deck out. Convert your resources into board control and break-area damage at some point - control still has to actually win.
- Running too few win conditions. A deck that's all answers and no closers durdles to a draw or decks itself. The LV.3 Ancients and big bodies are there for a reason; respect their count.
- Splashing a third color. A "powerful" off-color card you can never reliably cast is worse than a fine on-color one you always can. Two colors, rock-solid manabase.
- Forgetting your own break-area math. Trading your durable LV.3 into a bad fight can advance your break total and hand the opponent the alternate win. Always know whose break total a trade feeds.
The cheapest mistake to avoid is panic. Aggro punishes hesitation; control punishes overreaction. When in doubt, take the small hit and hold the answer.
How to tune it as you learn
Once the core is humming, tune the ratios rather than chasing every new card:
- Read your local meta. A field full of aggro means more cheap Traps and early pings; a field full of other slow decks means more draw and more LV.3 inevitability. The reactive package is the part you flex hardest.
- Track which answers feel dead. If a removal type consistently sits uncast - say bounce against a board you'd rather kill permanently - swap a copy for hard removal or a draw spell.
- Watch new sets, but wait. New Blue draw and Purple removal print regularly, and they can quietly upgrade the deck, but let the card pool's verdict settle for a week or two after a set drops. Track releases via the set release timeline and upgrade one slot at a time so you can feel the change.
Control is the most demanding archetype to pilot, but it teaches you the game's decision points faster than anything else: every turn is a real choice about what to answer, what to let through, and when to draw. Build it, lose a few while you learn the triage, and it'll quietly become the deck nothing in the format can race.
Quick Action Checklist
- Build two-color Blue/Purple - Blue for draw and bounce, Purple for hard removal; no third-color splash.
- Balance the three engines - removal, a deep draw package, and a reactive Trap layer; build so answers replace themselves.
- Triage the early game - take chip damage, spend answers only on threats that matter.
- Match the answer to the threat - bounce big Cookies, hard-remove the permanent problems, ping the wounded ones.
- Draw while you're safe - widen the card gap before you're under pressure, not after.
- Hold Traps for the swing that matters - bait small attacks, say no to the lethal one.
- Close with Ancient-fueled LV.3 bodies - win on inevitability, not speed, and mind both break-area totals.
- Verify current printings against the official database - the English card pool is young and shifts set to set.
Frequently Asked Questions
Keep Reading
Related Guides
Cookie Run: Braverse Tempo Deck Guide (Build & Pilot Blue Tempo)
Tempo is aggro that learned to play defense. Here's how to build a Blue-Red tempo shell in Cookie Run: Braverse, a real decklist of cards you can buy, and how to keep the clock running while the other deck flails a turn behind.
Cookie Run: Braverse Combo Deck Guide (Build & Pilot Purple Recursion)
Combo in Braverse isn't a one-card instant-kill - it's a Purple value engine that replays Cookies out of your trash until the opponent runs out of answers. Here's the real decklist, the loop, and how to pilot it without bricking.

Cookie Run: Braverse Mill Deck Guide (Build & Pilot Purple Deck-Out)
Mill in Braverse won't deck someone to zero for an instant win - the game doesn't work that way. But a Purple deck-out shell weaponizes the opponent's trash, fuels its own payoffs, and starves their Cookie supply. Here's the real list.

Cookie Run: Braverse Midrange Deck Guide (Build & Pilot Green/Yellow Midrange)
Midrange is the deck that beats aggro because it's bigger and beats control because it's faster - and asks you to actually read the game to know which one you're being. Here's how to build a value-driven Green/Yellow midrange deck in Cookie Run: Braverse, a real 60-card list you can buy, and how to pilot it.

How to Play Cookie Run: Braverse - A Complete Beginner Guide
Cookie Run: Braverse is the rare TCG you can teach in a single match. This guide covers everything a first-time player needs: card types, setup, turn structure, how you pay for cards, the FLIP mechanic, and how to win.
Cookie Run: Braverse Meta Tier List — Best Decks & Archetypes Ranked
Which Cookie Run: Braverse decks are actually carrying right now? Here's a meta tier list of the strongest archetypes - the real cards that anchor each one, why they rank where they do, and what's overrated.